It was 5:15 PM on a Tuesday in October, and I was staring into the abyss of my pantry. You know the look. The fridge has half a jar of pickles and some sad spinach. The cupboards have flour, sugar, and a box of baking soda that expired in 2019. I had zero energy to cook a “real” dinner, but I knew my family was going to be home in ten minutes with hangry faces waiting.
Usually, this is the moment I cave and order takeout. But then I saw a can of pumpkin puree. Just sitting there. Looking innocent.
I didn’t want pie. I didn’t want soup. I wanted something sweet, warm, and smelling like autumn to fill the house. So I threw together what I thought would be a mediocre quick-bake treat. Thirty minutes later, the smell of cinnamon and brown sugar had my kids running to the table before the bars even cooled. My husband took one bite and asked if I was secretly a pastry chef. (I am not. I’m just a tired parent who figured out that pumpkin makes cookies softer than butter ever could.)
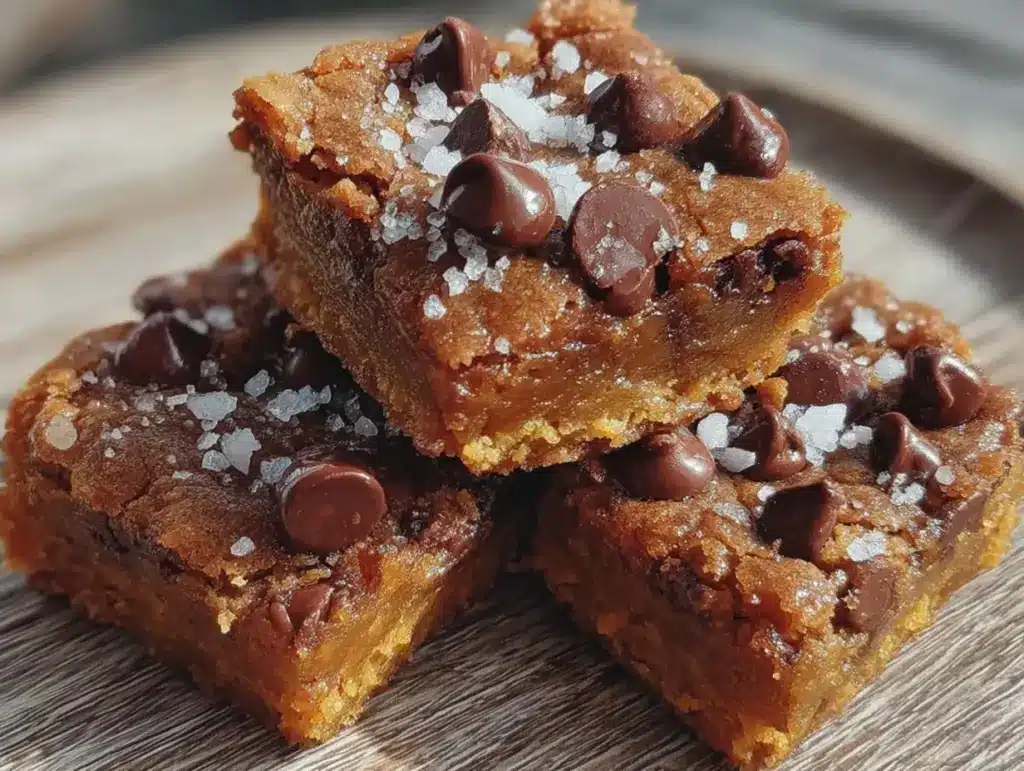
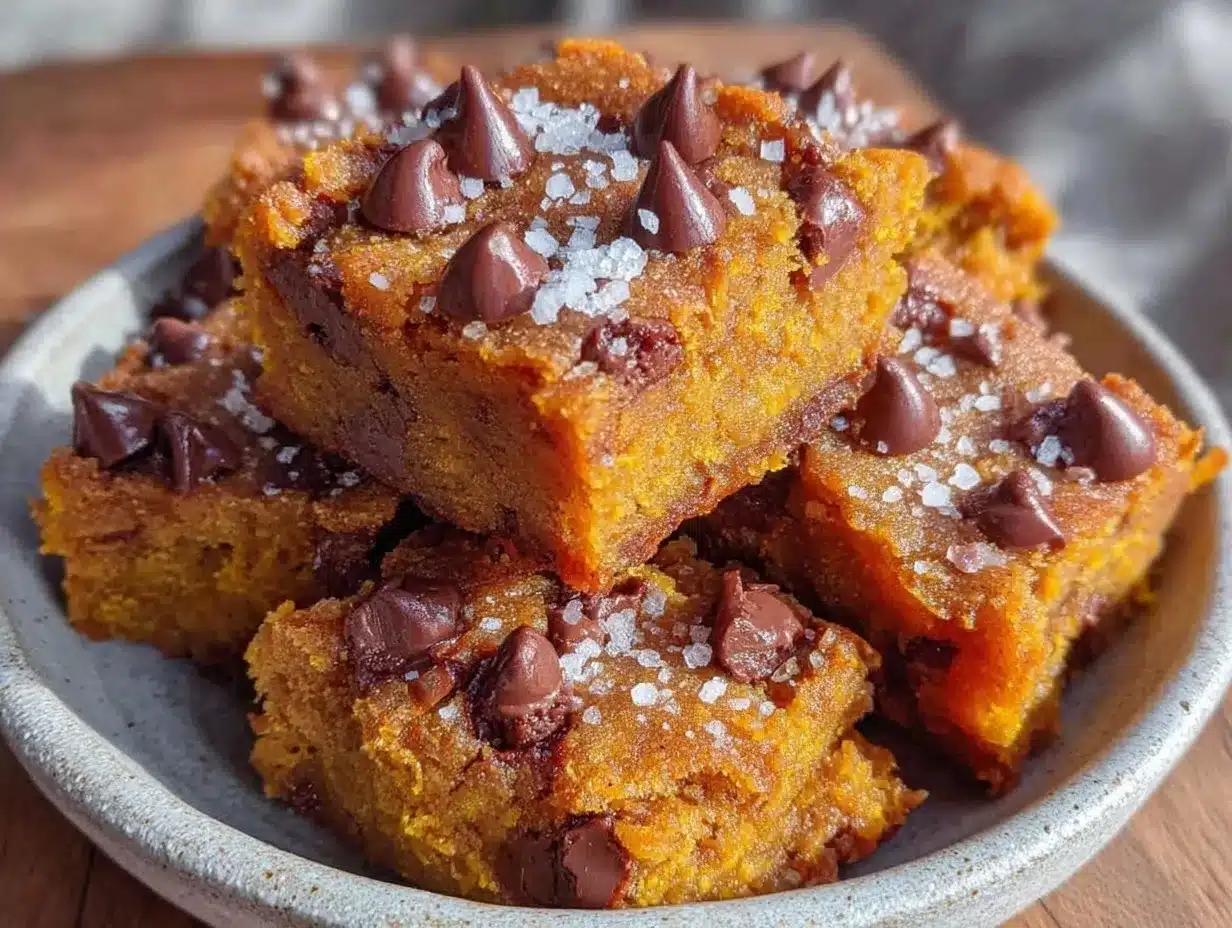
That was three weeks ago. Since then, I’ve made these fall spiced pumpkin chocolate chip cookie bars at least five times. They’ve replaced my usual weeknight panic routine. They’re my answer to “5pm and nothing planned.” They’re soft, chewy, spiced perfectly, and they require almost zero cleanup. If you’re looking for a dessert that tastes like fall but takes less time than a pizza delivery, you need to make these. Immediately.
Why You’ll Love This Recipe
There are about ten reasons I keep coming back to these bars, but let’s be real—you care about the ones that actually matter to your chaotic schedule. Here’s why this recipe has earned a permanent spot in my weekly rotation:
One-Bowl Magic — Seriously. I mix the wet ingredients, dump in the dry, stir until it looks like cookie dough, and press it into the pan. No creaming butter. No separate bowls. If you can stir, you can make this. I’ve even walked my teenager through it over FaceTime while I was folding laundry.
Ready in 30 Minutes — From preheating the oven to pulling the pan out, it’s 30 minutes flat. Ten minutes of prep, twenty minutes of baking. That’s less time than it takes to scroll through meal delivery apps. I make these on nights when I get home at 6pm and still want something homemade.
Soft and Chewy, Not Crispy — I hate dry cookies. They’re like eating cardboard. These bars are dense, moist, and tender because of the pumpkin. They stay soft for days. In fact, I deliberately make extra because they taste even better the next day as the spices settle in.
Uses What You Have — You probably have pumpkin puree, chocolate chips, and spices already. This isn’t a recipe that requires a special trip to the store. I keep a can of pumpkin in the back of my pantry just so I can make these on a whim.
Kid-Approved — My picky eater who usually only eats chicken nuggets and bread asked for seconds. That’s the highest praise I can give. If it passes the “5pm hangry kid test,” it’s a winner.
This is my go-to when I need dinner to just work. No complicated techniques, no weird ingredients, just reliable, delicious food that makes everyone happy and fills the house with the smell of cinnamon.
Ingredients You’ll Need
Here’s the best part: this looks like a long list, but most of it is pantry basics. I’m particular about three ingredients here, and I’ll tell you exactly why they matter for getting that perfect texture.
For the Base
All-purpose flour (2 ¼ cups / 280g) — Standard stuff. Don’t try to substitute with almond flour unless you want a completely different texture. I use Gold Medal because it’s consistent. Measure it by spooning it into the cup, not scooping, or you’ll end up with dry bars.
Pumpkin puree (1 cup / 245g) — Not pumpkin pie filling! Just plain puree. I use Libby’s because it’s reliable. This is the secret to the moisture. If you skip this, you’re just making regular cookie bars, and we don’t want that.
Brown sugar (1 cup / 200g, packed) — This gives them that caramel, chewy texture. Light brown is fine, but dark brown has more molasses and makes them taste richer. Don’t skimp here. White sugar makes them crispier; brown sugar keeps them soft.
Granulated sugar (½ cup / 100g) — Just a little bit to balance the sweetness. I find that too much sugar makes them cakey, so I keep this ratio low.
Butter (½ cup / 115g, softened) — Use real butter, not margarine. Softened means you can press a finger into it easily. If it’s melted, the dough will be too greasy. If it’s cold, it won’t mix well.
Large egg (1) — Room temperature is best, but cold works if you’re in a rush. Just don’t skip it; it binds everything together.
Pure vanilla extract (2 teaspoons) — I always use real vanilla. The fake stuff tastes chemical and ruins the warm spice flavor.
For the Flavor
Allspice (1 teaspoon) — This is the star. It tastes like a mix of cinnamon, nutmeg, and clove. It’s what makes it taste “fall” instead of just “pumpkin.”
Cinnamon (1 teaspoon) — Ground cinnamon. Not the sticks. I use ground cinnamon because it distributes evenly.
Nutmeg (½ teaspoon) — Freshly grated is amazing, but pre-ground works fine. Don’t use more than ½ teaspoon; nutmeg is strong.
Ginger (½ teaspoon) — Ground ginger. Adds a little zing. If you’re sensitive to spice, you can skip it, but I recommend keeping it.
Baking soda (1 teaspoon) — This helps them rise slightly. Make sure it’s not expired.
Salt (½ teaspoon) — Essential to balance the sweet. Don’t skip it.
For the Topping
Chocolate chips (1 cup / 170g) — Semi-sweet or milk chocolate. I use Nestlé Toll House because they melt perfectly. You can also use chopped chocolate bars if you want fancy.
White chocolate chips (½ cup / 85g, optional) — I add these for color and extra sweetness. It looks pretty with the orange bars. Skip if you want less sweet.
Crushed pretzels (½ cup, optional) — This is my secret weapon. Salty crunch against sweet and soft? Game changer. I learned this trick from a friend, and now I never make these without pretzels.
Equipment Needed
You don’t need fancy equipment for this. Here’s what I actually use:
9×13 inch baking pan — I use a glass Pyrex pan because it browns the bottom nicely. Metal works too, but glass gives me more control. Grease it well with butter or cooking spray.
Large mixing bowl — Any big bowl works. I use a ceramic one because it’s heavy and doesn’t slip.
Electric mixer or wooden spoon — I use a hand mixer because it’s faster, but a wooden spoon works if you’re strong. You’re mixing soft butter and sugar, so it’s not too hard.
Rubber spatula — For scraping the bowl. Don’t waste that good dough by leaving it stuck to the sides.
Pastry brush or paper towel — For greasing the pan. I like a pastry brush because it’s even.
Cooling rack — Optional, but helps them cool faster. I usually just leave them in the pan on the counter.
How to Make It: Step-by-Step
Alright, let’s make this! I’m walking you through exactly how I do it, including the little tricks I’ve picked up.
Step 1: Prep Your Pan and Oven (2 minutes)
Preheat your oven to 350°F (175°C). Grease your 9×13 inch pan. I use butter because it prevents sticking better than spray. If you’re in a rush, cooking spray works, but butter is safer.
Step 2: Mix the Wet Ingredients (3 minutes)
In your large bowl, beat the softened butter, brown sugar, and granulated sugar until smooth. This doesn’t need to be fluffy; just mixed well. Add the pumpkin puree, egg, and vanilla. Mix until combined. The batter will look a bit wet and orange. That’s normal.
Step 3: Add the Dry Ingredients (2 minutes)
Add the flour, baking soda, salt, allspice, cinnamon, and ginger. Mix on low speed or stir with a spoon until just combined. Do not overmix! Once the flour disappears, stop. Overmixing makes them tough.
Step 4: Fold in the Chocolate (1 minute)
Stir in the chocolate chips (and white chips/pretzels if using). Save a handful to sprinkle on top later. This ensures every bite has chocolate.
Step 5: Press into Pan (2 minutes)
Transfer the dough to your prepared pan. Use your hands or a spatula to press it into an even layer. It doesn’t need to be perfect, but try to keep it even so they bake uniformly. Sprinkle the reserved chocolate chips on top.
Step 6: Bake (20-25 minutes)
Bake at 350°F for 20-25 minutes. The edges should be golden, and the center should be set but still slightly soft. It will look a bit underdone when you take it out, but it firms up as it cools. Don’t overbake, or they’ll be dry.
Step 7: Cool and Cut (15 minutes)
Let them cool in the pan for at least 15 minutes. This is the hardest part, I know. If you cut them hot, they’ll fall apart. Once cool, cut into squares. I make 12 squares for dinner parties or 24 for smaller portions.
Expert Tips & Tricks
Here’s everything I’ve learned from making this dozens of times. These tips will save you from my mistakes.
Don’t Overbake — This is the #1 mistake. Pumpkin bars stay moist because of the pumpkin. If you bake them until they’re firm in the center, they’ll be cakey and dry. Take them out when the center is still slightly jiggly. They’ll set as they cool.
Softened Butter is Key — If your butter is too cold, it won’t mix well. If it’s melted, the bars will be greasy. Aim for “softened.” If you forgot to take it out, microwave it for 5 seconds. It should yield to gentle pressure.
Measure Flour Correctly — Scooping flour packs it down, leading to dry bars. Spoon flour into your measuring cup and level it off with a knife. It makes a huge difference in texture.
Room Temperature Egg — A cold egg can cause the butter to seize up slightly. If you’re rushing, just drop the egg in the warm water for a minute. It helps everything emulsify better.
Storage is Easy — These keep well at room temperature for 3 days in an airtight container. They also freeze beautifully. Wrap individual squares in plastic wrap and freeze for up to 3 months. I make a batch and freeze half for later.
Variations & Substitutions
Once you’ve nailed the basic version, here’s how you can mix it up. I’ve tried all of these.
Gluten-Free — Use a 1-to-1 gluten-free flour blend. I’ve used Bob’s Red Mill and it works great. The texture might be slightly crumblier, but still good.
Vegan — Use vegan butter and egg replacer (or flax egg). Use dairy-free chocolate chips. The pumpkin puree helps keep them moist even without eggs.
Spice It Up — Add a pinch of cardamom or cloves for extra warmth. I like a tiny bit of cayenne pepper for a kick. It sounds weird, but it’s delicious.
Less Sweet — Reduce the granulated sugar to ¼ cup. Use dark chocolate chips (70% cocoa) instead of semi-sweet. It’s still sweet from the pumpkin, but less sugary.
No Pumpkin? — You can use applesauce, but the texture will be different. It won’t be as dense. I recommend sticking with pumpkin for this specific recipe.
Serving & Storage
How to serve these bars is easy. I usually serve them straight from the pan at the dinner table—it looks rustic and stays warm. But here are other ways I’ve enjoyed them:
Side Dishes — They’re a dessert, so they don’t really need sides. But if you want a balanced meal, pair them with a glass of cold milk or a cup of hot tea. I also serve them with a slice of sharp cheddar cheese for a sweet-salty combo.
Toppings — A dollop of whipped cream or a scoop of vanilla ice cream makes them feel like a dessert restaurant treat. Caramel drizzle is also amazing if you’re feeling fancy.
Storage — Store in an airtight container at room temperature for up to 4 days. They actually get softer over time, which is nice. If you live in a humid area, keep them in the fridge to prevent mold, but let them come to room temp before eating.
Freezing — These freeze well. Wrap individual squares in plastic wrap, then put them in a freezer bag. They last for 3 months. Thaw at room temp for 30 minutes. Perfect for lunchboxes or snacks.
Nutrition Information
I’m not a nutritionist, but here’s the breakdown if you’re tracking. Keep in mind that these are bars, so the sugar content is higher than a veggie dish, but they’re made with real ingredients.
Per serving (based on 12 squares):
- Calories: 220
- Protein: 3g
- Carbs: 32g
- Fiber: 1g
- Sugar: 20g
- Fat: 10g
- Saturated Fat: 6g
- Cholesterol: 25mg
- Sodium: 120mg
What’s Good: They have some fiber from the flour and pumpkin. They’re a decent treat compared to store-bought brownies. You know exactly what’s in them.
What to Know: Higher in sugar and carbs. Use this as an occasional treat or share with friends. If you’re watching sugar, reduce the chocolate chips and use dark chocolate.
Final Thoughts
So that’s my go-to fall spiced pumpkin chocolate chip cookie bars! I’ve probably talked your ear off at this point, but when you make a recipe this often, you have a lot to say about it.
This has saved weeknight dinners more times than I can count. It’s my answer to “what’s for dessert” when I’m tired, don’t want to bake a cake, and still want something that tastes really good. My kids are happy, my husband’s happy, and I’m happy because I’m not stressed about cooking.
Make it yours! Try different add-ins, swap in your favorite spices, adjust the chocolate. The best recipes are the ones you adapt to your family’s tastes.
If you make this, drop a comment and let me know what you think! I love hearing how recipes turn out in your kitchen. And if something doesn’t work, tell me that too—I’m here to help troubleshoot.
Happy cooking! And I hope your kitchen smells half as good as mine does right now.
Frequently Asked Questions
Can I use pumpkin pie filling instead of puree?
No, don’t do it. Pumpkin pie filling has sugar and spices already added, which will throw off the balance of the recipe. You want plain 100% pumpkin puree. Check the label to make sure it doesn’t say “pie filling.”
My bars came out dry—what happened?
You probably overbaked them. Pumpkin bars continue to cook in the pan after you take them out. Take them out when the center is still slightly soft. Also, make sure you’re measuring your flour correctly. Scooping flour packs it down and leads to dry bars.
Can I make these ahead for a party?
Absolutely. Make them 2 days ahead and store in an airtight container. They actually taste better the next day as the flavors meld. I do this all the time for gatherings.
Why did my bars crumble?
Too much flour or not enough fat. Make sure you’re not packing the flour into the cup. Also, ensure your butter is softened and fully mixed. If the dough is too dry, add a tablespoon of milk or more pumpkin puree.
Can I freeze the dough?
You can, but it’s tricky because of the pumpkin. The texture might change. I recommend baking them first, then freezing the finished bars. They freeze much better that way.
Can I use maple syrup instead of sugar?
You can try, but it will change the texture significantly. The bars might be denser and wetter. I haven’t tested this substitution, so I’d stick to sugar for best results.
Are these good for lunchboxes?
Yes! They’re sturdy and don’t crumble easily. I pack them in my kids’ lunches sometimes as a treat. They stay fresh for 2-3 days in the lunchbox. Just like my no-bake peanut butter oat bars, they’re a great portable snack.
Can I add nuts?
Walnuts or pecans are classic with pumpkin. Add ½ cup of chopped nuts with the chocolate chips. I love the crunch they add. Just like my oatmeal raisin lunchbox cookies, adding nuts gives them a nice texture contrast.
Pin This Recipe!
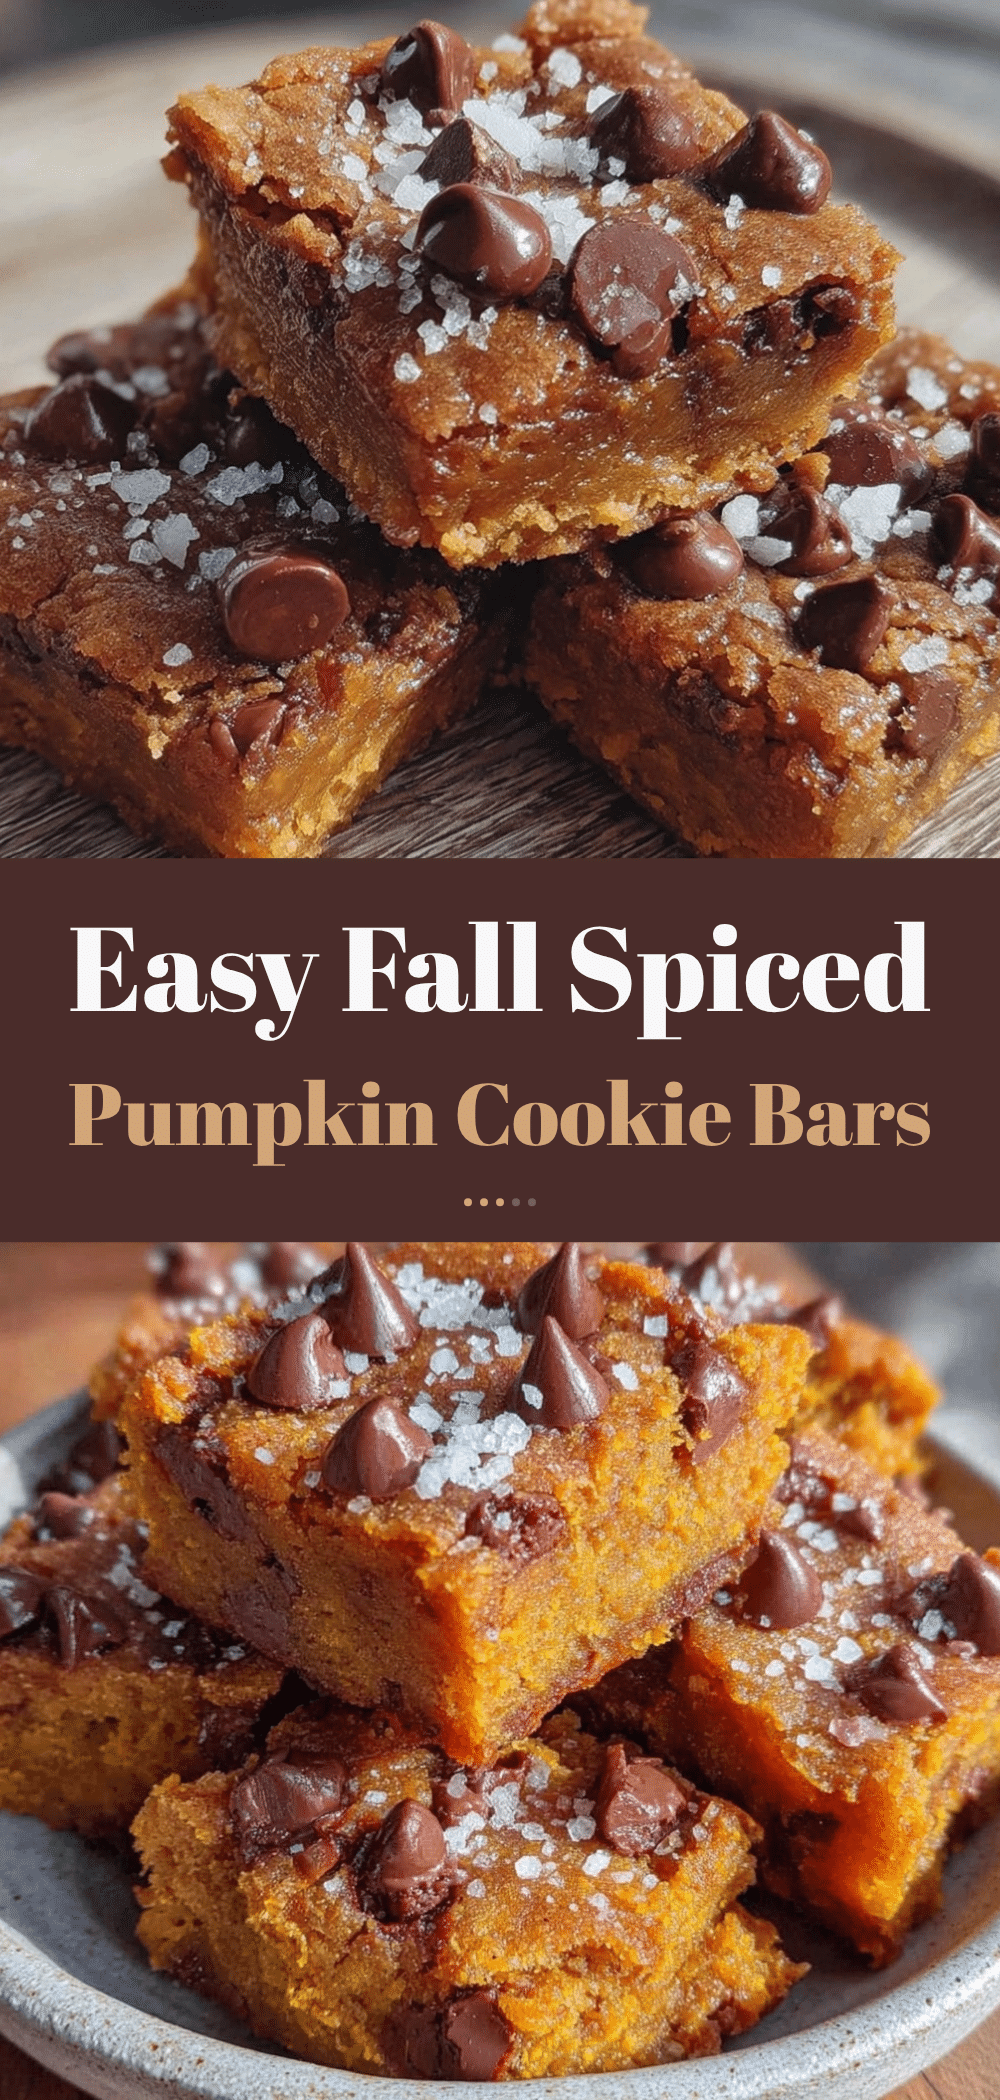
Fall Spiced Pumpkin Chocolate Chip Cookie Bars
- Total Time: 30 minutes
- Yield: 12 servings 1x
Description
Soft, chewy, and spiced pumpkin chocolate chip cookie bars that come together in one bowl in just 30 minutes. Perfect for busy weeknights and kid-approved.
Ingredients
- 2 ¼ cups all-purpose flour
- 1 cup pumpkin puree
- 1 cup packed brown sugar
- ½ cup granulated sugar
- ½ cup softened butter
- 1 large egg
- 2 teaspoons pure vanilla extract
- 1 teaspoon allspice
- 1 teaspoon ground cinnamon
- ½ teaspoon ground nutmeg
- ½ teaspoon ground ginger
- 1 teaspoon baking soda
- ½ teaspoon salt
- 1 cup chocolate chips
- ½ cup white chocolate chips (optional)
- ½ cup crushed pretzels (optional)
Instructions
- Preheat oven to 350°F (175°C) and grease a 9×13 inch baking pan with butter or cooking spray.
- In a large bowl, beat the softened butter, brown sugar, and granulated sugar until smooth.
- Add the pumpkin puree, egg, and vanilla extract; mix until combined.
- Add the flour, baking soda, salt, allspice, cinnamon, and ginger; mix on low speed or stir with a spoon until just combined. Do not overmix.
- Stir in the chocolate chips (and white chips/pretzels if using), reserving a handful to sprinkle on top.
- Transfer dough to the prepared pan and press into an even layer. Sprinkle reserved chocolate chips on top.
- Bake for 20-25 minutes until edges are golden and the center is set but slightly soft.
- Let cool in the pan for at least 15 minutes before cutting into squares.
Notes
Do not overbake; the bars will firm up as they cool. Measure flour by spooning it into the cup rather than scooping to avoid dry bars. Store in an airtight container at room temperature for up to 4 days or freeze for up to 3 months.
- Prep Time: 10 minutes
- Cook Time: 20-25 minutes
- Category: Dessert
- Cuisine: American
Nutrition
- Serving Size: 1 square
- Calories: 220
- Sugar: 20
- Sodium: 120
- Fat: 10
- Saturated Fat: 6
- Carbohydrates: 32
- Fiber: 1
- Protein: 3
Keywords: pumpkin bars, chocolate chip cookie bars, fall dessert, quick bake, one bowl recipe, weeknight dinner, kid-friendly, gluten-free option, vegan option