It’s 4:55 PM on a Tuesday. The sun is starting to dip, the house is quiet (too quiet), and I am staring into the abyss of my pantry. My kids are about to walk through the door, they’ve had a long day, and the word “dinner” is already making my stomach do a little flip-flop. I don’t want to cook. I don’t want to order out. I just want a win.
Usually, this is when I reach for the cereal box or throw together whatever random ingredients are staring at me from the fridge. But last week, I had a different problem. I had a bag of semi-sweet chocolate chips and a jar of natural peanut butter that had separated (the oil on top, the good stuff on the bottom). And I had a craving. Not for dinner. For something sweet. Something rich. Something that wouldn’t leave me feeling like I just ate a cloud of sugar.
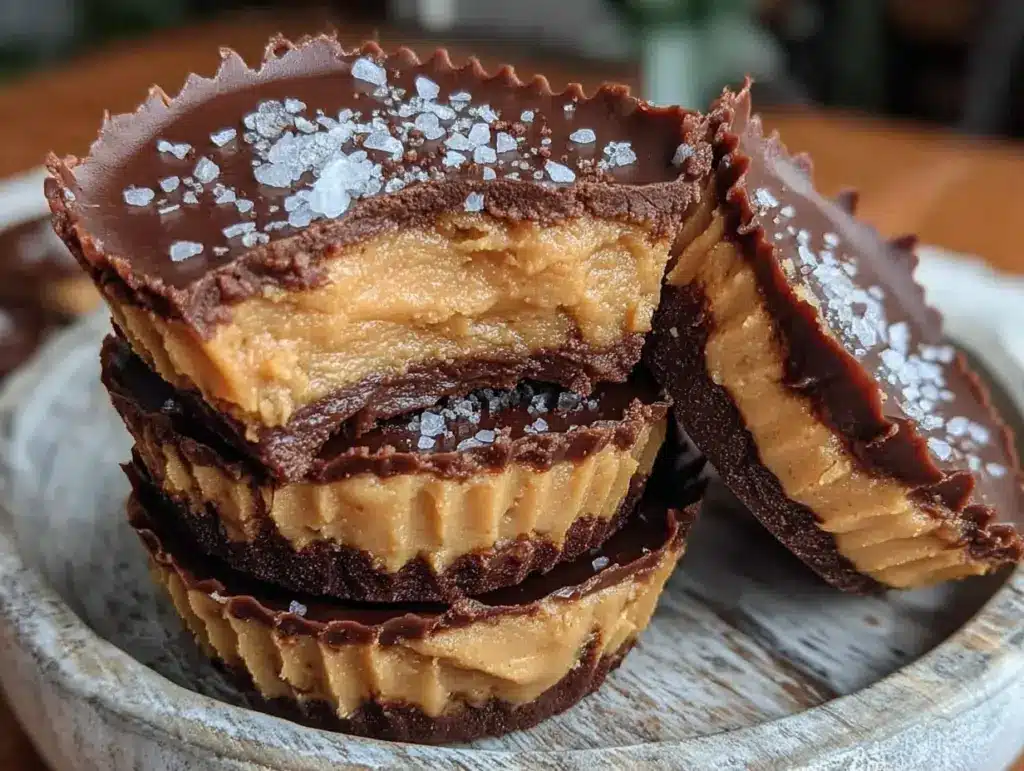
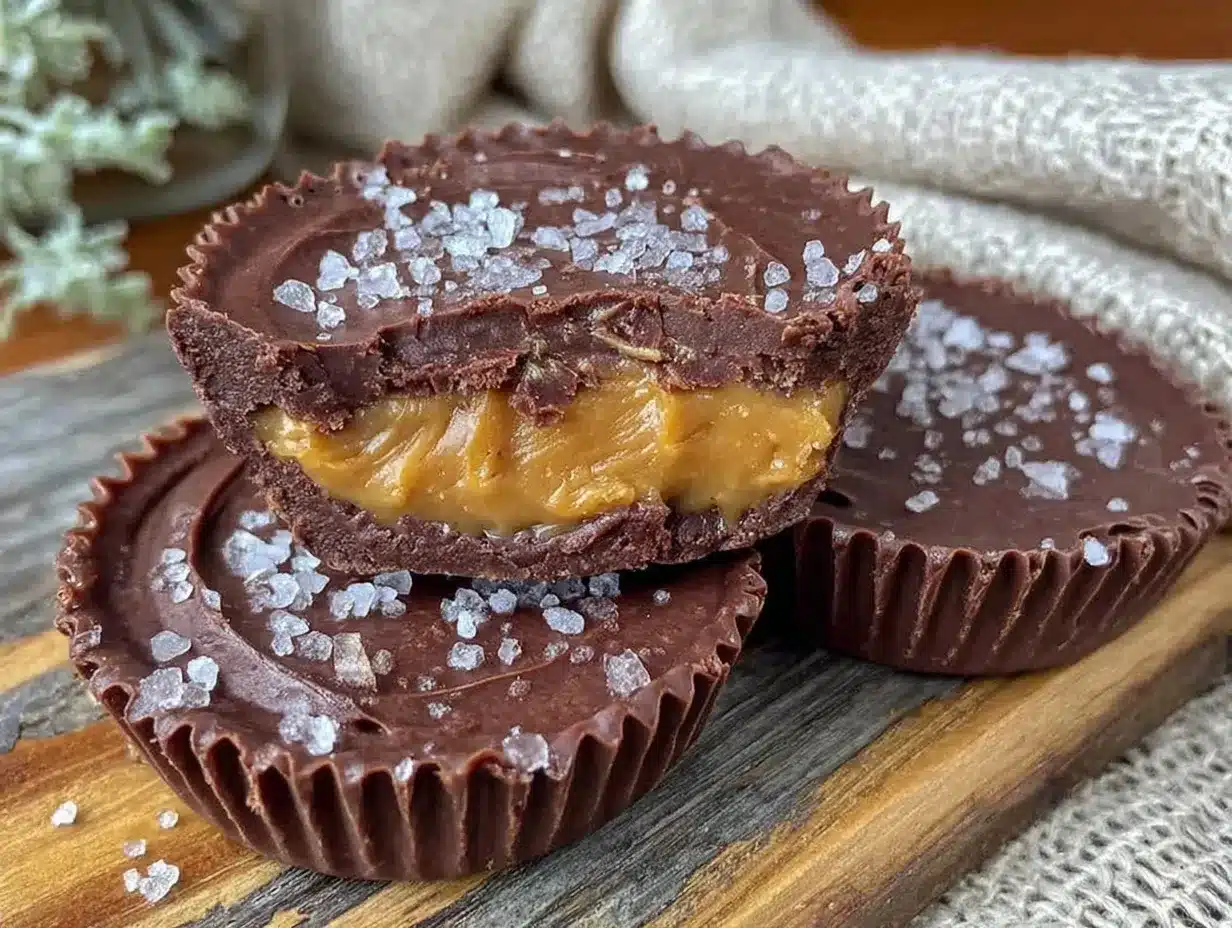
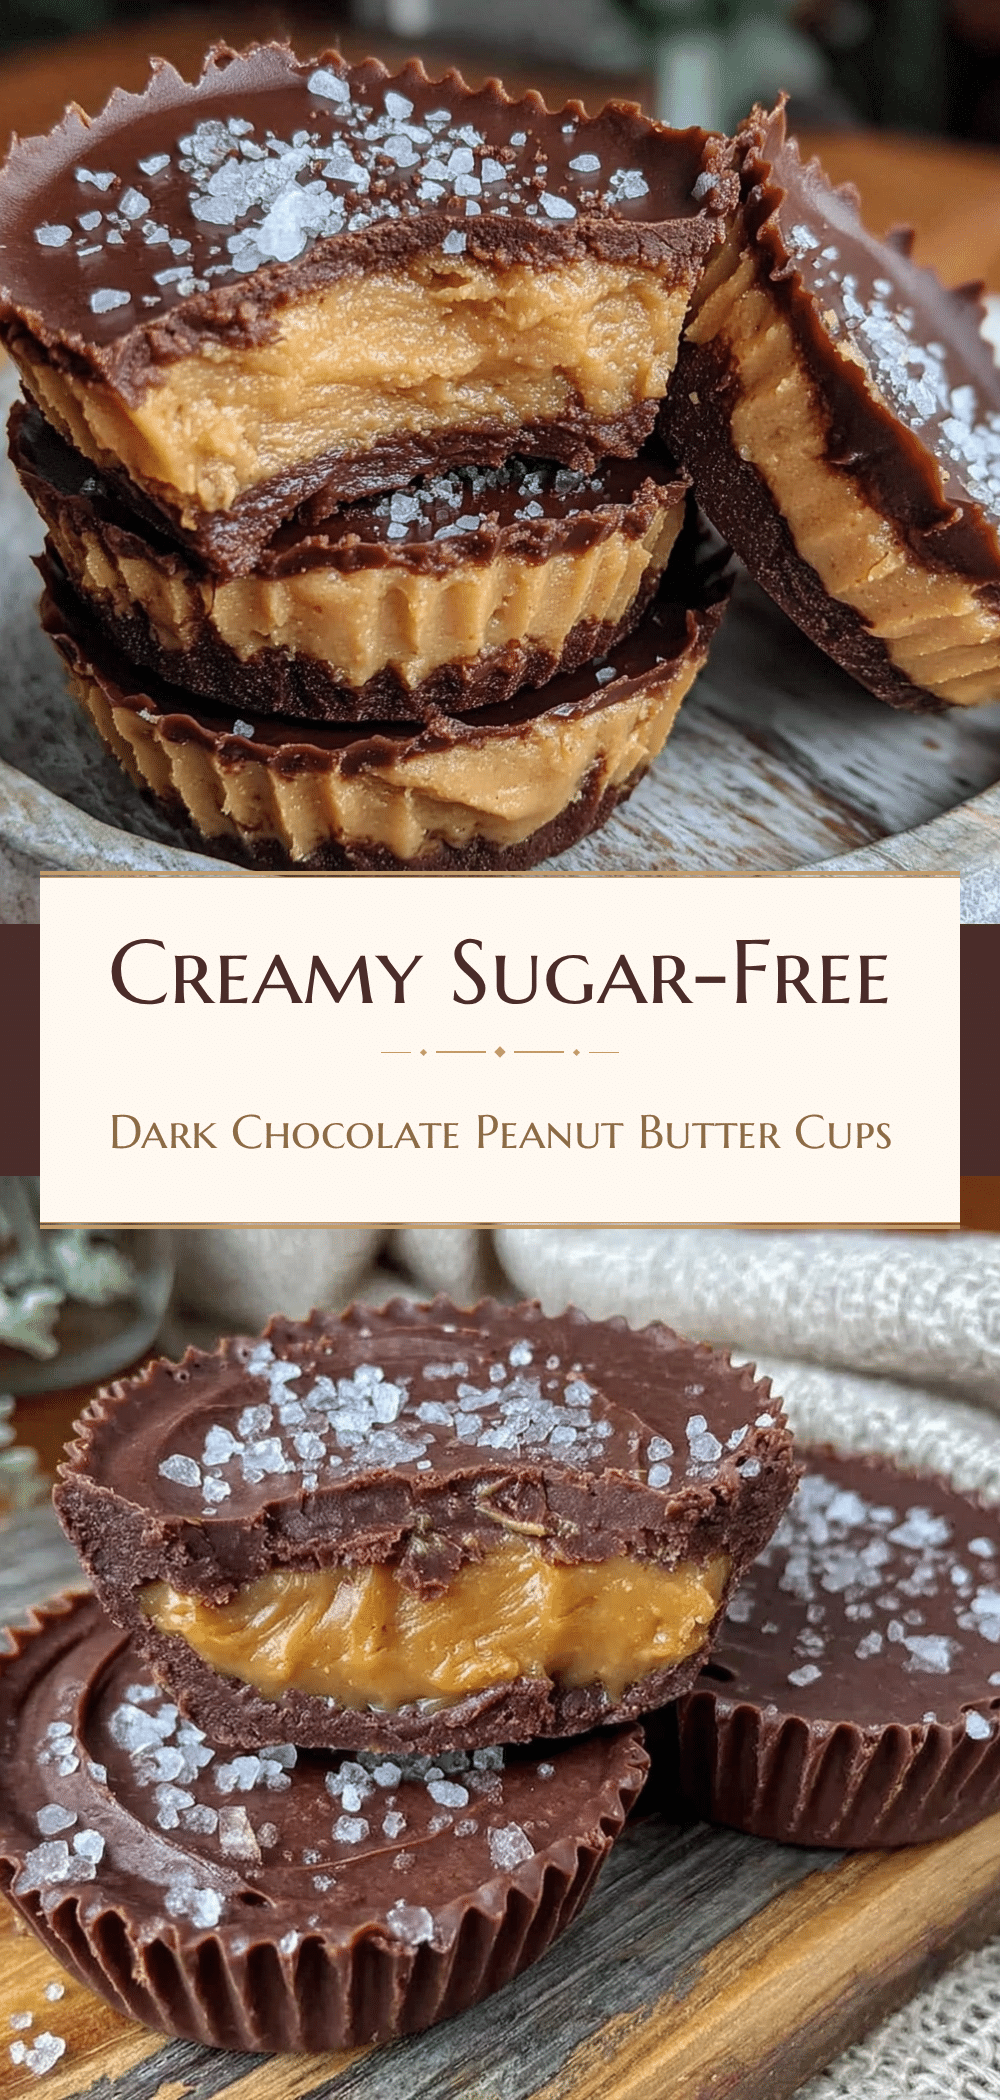
So I stopped. I stopped thinking about dinner and started thinking about these sugar-free dark chocolate peanut butter cups. I’ve made them now six times in the last month. Six. Because they take five minutes of active time, require zero baking, and solve two problems at once: the afternoon slump and the evening snack craving. They are the ultimate 5pm win. And the best part? They’re sugar-free, so I don’t feel guilty letting the kids have two while I wait for the pasta water to boil.
I used to buy the store-bought kind, you know the ones? The ones that taste like wax and artificial sweeteners. I tried making my own once and it was a disaster—grainy, too hard, and the peanut butter layer split. But after testing this recipe a dozen times (yes, I ate them all), I finally cracked the code. It’s all about the ratio of fats and how you handle the chocolate. Once you get it, you’ll never go back. These sugar-free dark chocolate peanut butter cups are creamy, intensely chocolatey, and actually taste like the real deal.
Why You’ll Love This Recipe
Look, I’m not saying this is going to replace my grandma’s apple pie. But in the world of after-school snacks and late-night cravings? This is the MVP. Here’s why these sugar-free dark chocolate peanut butter cups have taken over my kitchen:
- Zero Baking Required — Seriously. If you have a microwave or a double boiler, you can make this. No oven, no preheating, no waiting for cookies to bake. It’s literally melt, mix, freeze, eat.
- 5 Ingredients Max — I’m not kidding. Dark chocolate, peanut butter, coconut oil, a touch of vanilla, and maybe a pinch of sea salt. That’s it. You probably have all of this already. If you don’t, it’s a 10-minute trip to the store, which is faster than delivery.
- Kid-Approved (Even the Picky Ones) — My 8-year-old, who usually refuses anything that isn’t white and crunchy, asked for these yesterday. He didn’t even notice they were sugar-free. He just knew they tasted like a fancy candy bar.
- Actually Good for You — I’m not a nutritionist, but these are low-carb, gluten-free, and use natural fats. It’s a snack that satisfies the sweet tooth without the crash. Perfect for those after-school frozen yogurt bites days when you need something cool and sweet but want to keep it clean.
- Meal Prep Friendly — I make a big batch on Sunday night. They sit in the freezer for weeks. When I need a quick lunchbox treat or a 3pm pick-me-up, I just grab one. No stress. No mess.
These sugar-free dark chocolate peanut butter cups have saved me from so many bad snack choices. They’re my secret weapon against the “I’m hungry but I don’t want dinner” crowd.
Ingredients You’ll Need
Here’s the thing about this recipe: quality matters more than quantity. Since there are only five ingredients, each one plays a huge role. Don’t skimp on the chocolate, and don’t use the cheapest peanut butter you can find. Here’s what you need:
For the Chocolate Shell
Dark Chocolate Chips (1 cup / 170g) — This is the star. I use 85% or 90% dark chocolate chips. They melt smoothly and have that rich, bitter-sweet flavor that isn’t too sweet. Avoid the cheap baking chips that have weird additives. I like Ghirardelli or Lindt. If you can’t find chips, you can chop up a bar, but chips are easier.
Coconut Oil (1 tablespoon) — This is the secret weapon. It makes the chocolate shell snap and stay firm in the fridge. It also helps the chocolate melt more evenly. Use refined coconut oil if you don’t want a coconut taste. Unrefined is fine too, but it adds a slight flavor. I keep a jar of refined in my pantry specifically for this.
For the Peanut Butter Center
Natural Peanut Butter (½ cup / 125g) — This is crucial. You need smooth, natural peanut butter where the oil has separated. Stir it well before using. Do not use “processed” peanut butter with hydrogenated oils—it won’t mix right and will be grainy. I use either Jif Natural (yes, that brand) or a store-brand organic one. Just check the label: peanuts and salt only.
Sugar-Free Syrup or Powdered Sweetener (2 tablespoons) — Since we’re using dark chocolate, it’s already not super sweet. But the peanut butter needs a little lift. I use a sugar-free maple syrup or a powdered erythritol blend. Liquid works better for mixing into the peanut butter. If you use granulated sweetener, it might stay gritty. Monk fruit sweetener works great here.
Vanilla Extract (½ teaspoon) — Just a splash to round out the flavors. Don’t skip it. It makes the peanut butter taste more like a candy bar filling.
Sea Salt (a pinch) — I sprinkle this on top before the chocolate sets. It contrasts with the sweetness and makes the chocolate taste even more chocolatey. It’s a pro move.
Equipment Needed
You don’t need fancy gear for this. Here’s what I actually use:
Muffin Tin — I use a standard 12-cup muffin tin. It’s perfect for shaping the cups. If you don’t have one, you can use silicone mini-muffin molds, but the metal tin gives a nicer shape.
Microwave-Safe Bowl — For melting the chocolate. I use a glass Pyrex bowl. If you don’t have a microwave, use a small saucepan for a double boiler.
Small Mixing Bowl — Just a tiny bowl for mixing the peanut butter filling. A ramekin works too.
Spoons — You’ll need two small spoons. One to put chocolate in the cups, one to scoop the filling. Don’t worry about being perfect; these are rustic.
Parchment Paper — Optional. If your muffin tin is non-stick, you might not need it. But I line it with a little parchment or just spray it with oil to be safe.
How to Make It: Step-by-Step
Alright, let’s make these sugar-free dark chocolate peanut butter cups. It’s easier than making toast. Here’s exactly how I do it, including the little tricks I’ve learned so you don’t mess up.
Step 1: Prep Your Muffin Tin (2 minutes)
Take your muffin tin and line the cups with parchment paper liners if you’re using them. If not, just give them a quick spray with non-stick cooking spray. I like to leave the tops of the liners slightly above the rim so I can pull the cups out later if I want to. But honestly, they pop out of the metal tin pretty easily if you let them freeze long enough.
Step 2: Melt the Chocolate (2-3 minutes)
Put your dark chocolate chips and coconut oil in a microwave-safe bowl. Microwave on high for 30 seconds. Stir. Then microwave for another 15-20 seconds. Stir again. Keep doing this in 10-second bursts until the chocolate is smooth and glossy. Pro Tip: Don’t overheat it! Chocolate burns easily. If it looks lumpy, keep stirring; the residual heat will melt it. If you’re using a double boiler, just melt it over low heat, stirring constantly.
Step 3: Create the Base (2 minutes)
Take a small spoon (I use a teaspoon) and scoop a bit of melted chocolate into the bottom of each muffin cup. Use the back of the spoon to spread it up the sides and across the bottom. You want a thin, even layer. Don’t pile it up; you want room for the filling. If you have leftover chocolate, put it back in the bowl. You might need a little extra for the top.
Step 4: Make the Filling (2 minutes)
In your small mixing bowl, combine the natural peanut butter, sugar-free sweetener, and vanilla extract. Stir it vigorously. It might look a bit dry at first. Keep stirring until it’s smooth and creamy. If it’s too thick to scoop, add a tiny drop of coconut oil or milk. If it’s too runny, add a bit more peanut butter. You want a consistency like soft-serve ice cream.
Step 5: Fill the Cups (3 minutes)
Take a small spoon (I use a half-teaspoon) and drop a dollop of the peanut butter mixture into the center of each chocolate-lined cup. Press it down gently so it’s flat on top. Don’t fill it to the brim; leave about ¼ inch of space for the top layer of chocolate.
Step 6: Seal with Chocolate (2 minutes)
Take the remaining melted chocolate and spoon it over the peanut butter filling. Cover it completely. Use the back of the spoon to smooth it out. Try to get it even so the tops are flat. If you have air bubbles, tap the muffin tin gently on the counter to release them.
Step 7: Add Salt and Freeze (20+ minutes)
Immediately sprinkle a tiny pinch of sea salt on top of each cup. This is the best part. Then, put the whole muffin tin in the freezer. Let them freeze for at least 20 minutes, or until the chocolate is completely hard. I usually leave them in for an hour if I’m not in a huge rush.
Total Time: About 15 minutes active, plus freezing time. That’s it.
Expert Tips & Tricks
Here’s everything I’ve learned from making these dozens of times. These tips will save you from my mistakes.
Stir Your Peanut Butter Well
If your natural peanut butter has separated, stir it until it’s completely uniform before measuring. If you don’t, the oil might leak out later and make the center greasy. I give it a good stir right in the jar.
Don’t Rush the Melting
Chocolate is sensitive. If you melt it too hot, it seizes up and becomes grainy. Low and slow is the way to go. If you’re using a microwave, pause and stir often.
Work Quickly
Once the chocolate starts to thicken, it’s harder to spread. If it gets too thick in the bowl, microwave it for 5 seconds and stir. Don’t let it sit out too long.
Use a Small Spoon for Filling
I’ve tried using a tablespoon, but it’s too much. The ratio gets off. A half-teaspoon or a small melon baller is perfect. You want the chocolate to be the main event, with the peanut butter as a rich surprise.
Keep Them Frozen
These sugar-free dark chocolate peanut butter cups are best eaten cold. They’re like a mini ice cream bar. Keep them in the freezer until you’re ready to eat. If you leave them out, they’ll get soft and messy.
Variations & Substitutions
Once you’ve nailed the basic version, here’s how you can mix it up. I’ve tried all of these.
Almond Butter Swap
Swap the peanut butter for almond butter. It’s a bit more expensive but tastes fancy. Great for people with nut allergies? No, wait, almonds are nuts. Swap for sunflower seed butter if you have allergies. It’s a bit more bitter, so add a touch more sweetener.
Crunchy Version
Add a few crushed peanuts or crushed sugar-free cookies to the peanut butter filling before you put it in the cup. Adds a nice texture contrast.
Marshmallow Center
Instead of peanut butter, put a mini marshmallow in the chocolate shell. It’s like a s’mores cup. Melt the marshmallow slightly in the microwave before adding the top chocolate layer.
Coconut Layer
Add a thin layer of shredded coconut between the chocolate and the peanut butter. It adds a tropical twist.
Dietary Modifications:
These are already gluten-free and dairy-free (if you use dairy-free chocolate). They’re vegan if you use a vegan sweetener. They’re keto-friendly if you use erythritol or monk fruit. They’re perfect for anyone watching their sugar intake.
Serving & Storage
How to Serve:
I usually serve these straight from the freezer. They’re firm and satisfying. I put them on a plate with a napkin because they can drip a little if they get too warm. They’re great for after-school snacks or as a dessert after dinner.
Storage:
Keep them in the freezer in an airtight container. They’ll last for up to 3 months. If you want to take them to a party, keep them in a cooler bag. They melt fast at room temperature.
Reheating:
You don’t need to reheat them. If you want them slightly softer, let them sit on the counter for 5 minutes. Don’t microwave them unless you want a liquid mess.
Nutrition Information
I’m not a nutritionist, but here’s the breakdown if you’re tracking. These are low-carb and low-sugar.
Per Cup (based on 12 cups):
– Calories: 90
– Protein: 3g
– Carbs: 2g
– Fiber: 1g
– Sugar: 0g
– Fat: 8g
– Sodium: 15mg
What’s Good:
– High in healthy fats from peanut butter and coconut oil.
– Low in sugar and carbs.
– Good source of protein for a snack.
What to Know:
– Calorie-dense because of the fats. Portion control is key.
– Contains nuts. Not suitable for nut allergies.
Final Thoughts
So that’s my go-to sugar-free dark chocolate peanut butter cups! I’ve probably talked your ear off at this point, but when you make a recipe this often, you have a lot to say about it. These have saved me from so many bad snack choices. They’re my answer to “what’s for a snack” when I’m tired, don’t want to cook, and still want something that tastes really good. My kids are happy, my husband’s happy, and I’m happy because I’m not stressed about cooking.
Make it yours! Try different nuts, swap the chocolate for white chocolate (sugar-free), or add a drizzle of caramel. The best recipes are the ones you adapt to your family’s tastes.
If you make this, drop a comment and let me know what you think! I love hearing how recipes turn out in your kitchen. And if something doesn’t work, tell me that too—I’m here to help troubleshoot.
Happy snacking! And I hope your kitchen smells half as good as mine does right now.
Frequently Asked Questions
Q: Can I use regular chocolate instead of dark chocolate?
A: You can, but it will be much sweeter. If you use milk chocolate, you might want to reduce the sweetener in the peanut butter filling. Dark chocolate is better because it’s less sweet and has a richer flavor that pairs well with peanut butter.
Q: Why did my chocolate seize up?
A: Usually means a drop of water got into the chocolate. Chocolate hates water. Make sure your bowl and spoon are completely dry. If it seizes, add a little more coconut oil and stir vigorously to try to save it.
Q: Can I make these ahead for a party?
A: Absolutely! Make them up to 3 weeks ahead and store in the freezer. They actually taste better after they’ve had time to set. Just keep them in an airtight container to prevent freezer burn.
Q: Why is my peanut butter filling too hard?
A: Probably not enough fat. Natural peanut butter can vary in oil content. If it’s too hard, add a teaspoon of coconut oil or a splash of milk to soften it. It should be scoopable but not runny.
Q: Can I use almond butter instead?
A: Yes! Almond butter works great. It’s a bit drier than peanut butter, so you might need a little more coconut oil to get the right consistency. It tastes delicious, though.
Q: How do I store these if I don’t have a freezer?
A: You can store them in the fridge, but they’ll be soft. They won’t have that nice snap. For the best texture, the freezer is essential.
Q: Can I double this recipe?
A: Yes! Just use a larger bowl for the chocolate and a larger muffin tin if you have one. The process is the same. I usually double it because my kids eat them so fast.
Pin This Recipe!
Sugar-Free Dark Chocolate Peanut Butter Cups
- Total Time: 35 minutes
- Yield: 12 servings 1x
Description
These sugar-free dark chocolate peanut butter cups are a creamy, rich, and kid-approved snack that requires zero baking. Made with just five ingredients, they are low-carb, gluten-free, and perfect for satisfying sweet cravings without the sugar crash.
Ingredients
- 1 cup (170g) dark chocolate chips (85% or 90%)
- 1 tablespoon refined coconut oil
- ½ cup (125g) natural smooth peanut butter
- 2 tablespoons sugar-free syrup or powdered sweetener (e.g., erythritol or monk fruit)
- ½ teaspoon vanilla extract
- Pinch of sea salt
Instructions
- Line a standard 12-cup muffin tin with parchment paper liners or spray with non-stick cooking spray.
- Combine dark chocolate chips and coconut oil in a microwave-safe bowl. Microwave in 10-30 second bursts, stirring between each, until smooth and glossy. Avoid overheating.
- Scoop a small amount of melted chocolate into the bottom of each muffin cup, spreading it up the sides to create a thin, even shell.
- In a small mixing bowl, vigorously stir together the natural peanut butter, sugar-free sweetener, and vanilla extract until smooth and creamy. Adjust consistency with a drop of coconut oil or milk if needed.
- Drop a dollop of the peanut butter mixture into the center of each chocolate-lined cup, pressing down gently to flatten the top.
- Spoon the remaining melted chocolate over the peanut butter filling to seal it completely. Smooth the tops and tap the tin to release air bubbles.
- Sprinkle a tiny pinch of sea salt on top of each cup.
- Freeze for at least 20 minutes, or until the chocolate is completely hard.
- Store in the freezer in an airtight container for up to 3 months.
Notes
Ensure natural peanut butter is stirred well before use to prevent separation. Do not overheat chocolate as it burns easily. These treats are best eaten cold and should be kept in the freezer to maintain their texture and snap.
- Prep Time: 15 minutes
- Cook Time: 0 minutes
- Category: Dessert
- Cuisine: American
Nutrition
- Serving Size: 1 cup
- Calories: 90
- Sodium: 15
- Fat: 8
- Saturated Fat: 4
- Carbohydrates: 2
- Fiber: 1
- Protein: 3
Keywords: sugar-free, dark chocolate, peanut butter cups, keto snack, gluten-free, no-bake, low-carb, healthy dessert, kid-friendly snacks