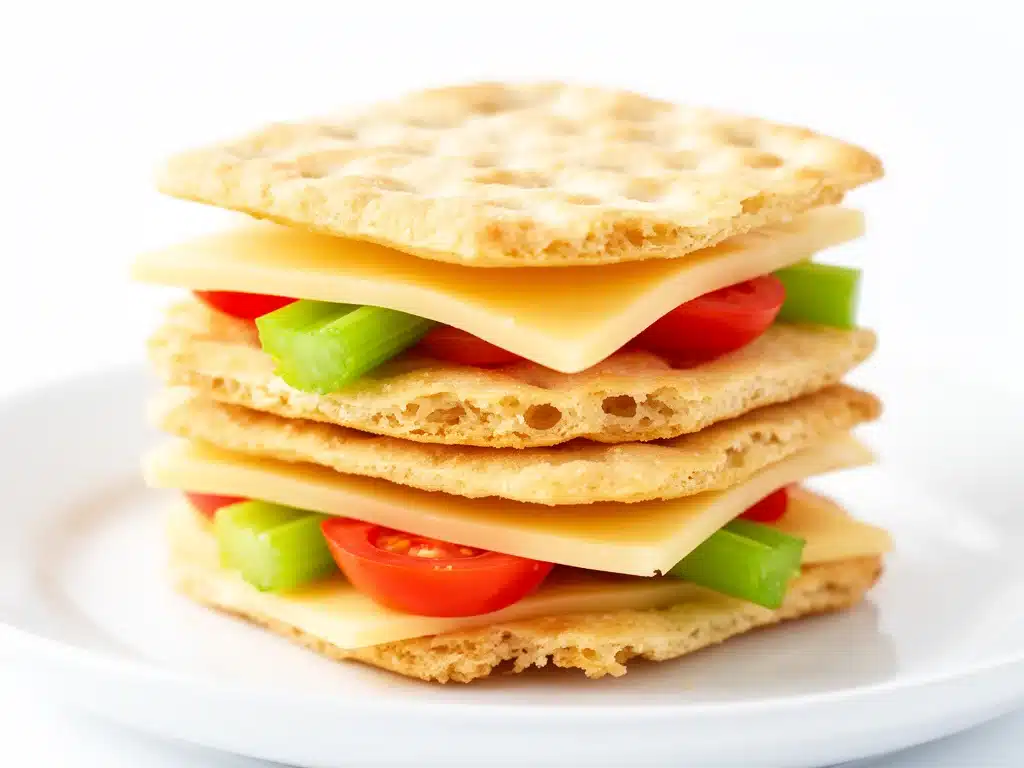
It was the third day of school, and I found myself staring into the fridge, wondering how on earth I’d make lunch exciting again without spending an hour each morning. My kids were already declaring their usual sandwiches “boring” (surprise, surprise), and I knew I needed something quick, tasty, and simple. That’s when I stumbled upon this idea for Back to School Cheese and Cracker Lunchbox Stackers. I grabbed a few basic ingredients, stacked them up, and tossed them into their lunchboxes. The result? Zero complaints and even a little excitement about lunch. I’ve since made these stackers dozens of times, tweaking them just enough to keep things interesting without ever complicating the process.
What’s really great about this easy lunchbox recipe is that it uses simple ingredients you probably already have on hand, and it comes together in under 10 minutes—perfect for those rushed school mornings. Plus, it’s endlessly adaptable, which means picky eaters and snack lovers alike can find something to enjoy. I’m sharing all my tips and tricks so you can whip these up with ease and feel good about what’s going into your kid’s lunch.
Why You’ll Love This Recipe
This recipe has completely transformed my approach to school lunches, and I’m betting it will do the same for you. Here’s why I keep coming back to these cheese and cracker stackers:
- Ridiculously Easy — No baking, no complicated prep. If you can open a package and slice some cheese, you’re already halfway there. I’ve even made these while juggling a toddler and a dog underfoot.
- Super Quick — From fridge to lunchbox in less than 10 minutes. That’s a game changer when you’re trying to get out the door on school mornings.
- Simple Ingredients — You don’t need specialty items or weird stuff. Just crackers, cheese, and a few extras to keep things interesting. I usually have everything in my pantry or fridge already.
- Kid-Approved — My kids, who are notoriously picky, actually ask for these. They love the fun of stacking and unstacking, and I love that they’re eating real food.
- Customizable — Whether your kid loves turkey, veggies, or just cheese, you can swap in what you have. I’ve tried everything from ham slices to cucumber rounds, and it all works.
- Less Waste — Since everything’s bite-sized and portable, there’s rarely anything left behind. Bonus: no soggy sandwiches to throw away.
Honestly, this recipe feels like a lifesaver for busy mornings. It’s reliable, fuss-free, and makes lunch fun again. That’s a win in my book!
Ingredients You’ll Need
Here’s the best part: you probably have most of these ingredients already, and the few extras are easy to find at any grocery store. I’m picky about a few key things here, and I’ll tell you why as we go.
- Crackers (about 40 crackers) — I use sturdy, slightly salty crackers like Wheat Thins or Triscuit because they hold up well without getting soggy. Avoid overly delicate ones unless you’re eating immediately.
- Sliced cheese (8 ounces / 225g) — Sharp cheddar is my go-to for flavor, but Colby Jack, Swiss, or even pepper jack work great. I recommend slicing your own cheese blocks for freshness, but pre-sliced is fine in a pinch.
- Deli meat (optional, about 8 ounces / 225g) — Turkey, ham, or roast beef thinly sliced. Adds protein and makes the stackers more filling. I sometimes leave this out for a vegetarian option.
- Pickles or cucumber slices (about 1 cup / 120g) — Adds crunch and a little tang. I usually slice pickles thinly or use cucumber rounds for a fresh twist.
- Spread options (optional) — Mustard, cream cheese, or hummus. Just a thin layer to keep things from sliding around and to add flavor. I find cream cheese works best for holding everything together.
- Fresh herbs (optional) — A few leaves of basil or parsley can brighten the flavor without overwhelming the kids.
- Olives or cherry tomatoes (optional) — For a pop of color and extra nutrition. These are great if your child likes a little variety.
Pro tip: I always double-check the cracker package for salt content because some kids need lower sodium. And when it comes to cheese, avoid processed singles for this—real cheese melts and tastes way better.
Equipment Needed
You don’t need anything fancy for these stackers. Here’s what I actually use:
- Sharp knife — For slicing cheese and veggies. A dull knife makes things harder and more dangerous—trust me, I’ve learned that the hard way.
- Cutting board — Any size works. I use plastic for easy cleanup.
- Small spreader or butter knife — For spreading cream cheese or hummus thinly on crackers.
- Lunchbox or container — Something with compartments helps keep the stackers from toppling over. I like using bento-style boxes.
- Paper towels or napkins — Because inevitably, there’s a little mess during assembly and lunchtime.
If you want to get fancy, a small cookie cutter can turn cheese slices into fun shapes, but that’s totally optional. The goal is easy and quick, remember?
How to Make It: Step-by-Step
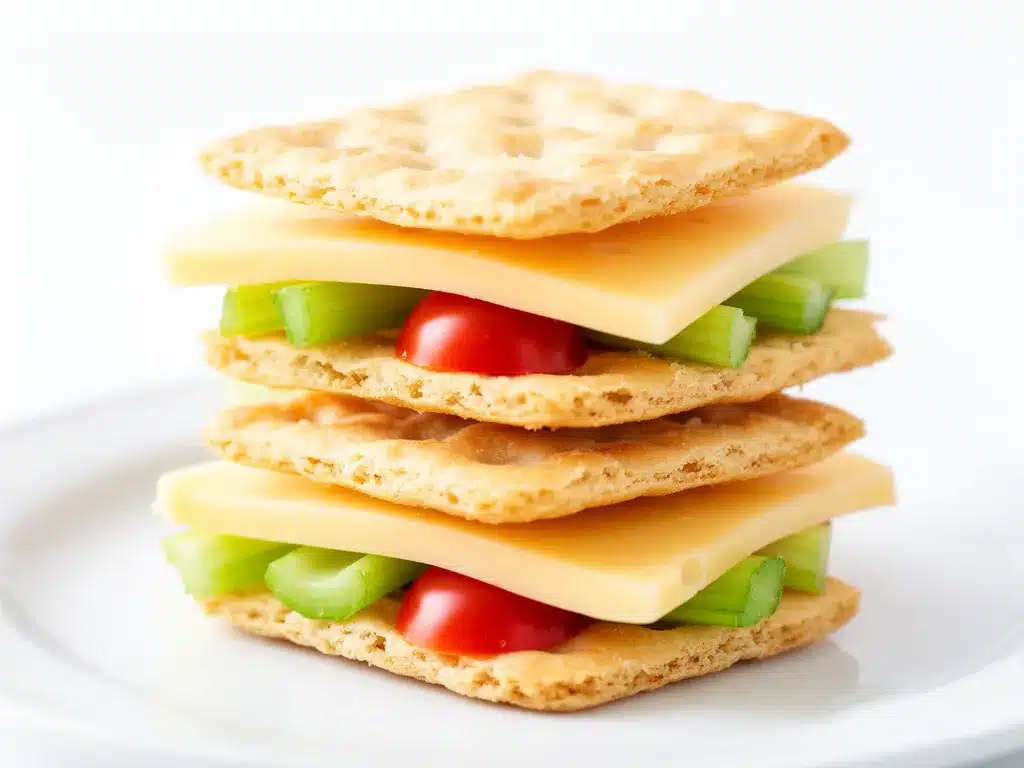
Alright, let’s put these together! I’m walking you through exactly how I do it, including the little tricks that make the assembly smooth and mess-free.
Step 1: Prep Your Ingredients (5 minutes)
Start by slicing your cheese into squares or rectangles about the size of your crackers. If you’re using deli meat, fold or slice it into manageable pieces. Slice cucumbers or pickles thinly. Set out your spreads and have your crackers ready on a clean surface. Doing this prep all at once keeps the assembly line moving fast.
Step 2: Spread the Base (2 minutes)
Take one cracker and spread a thin layer of cream cheese, mustard, or hummus. This helps hold the layers together and adds flavor. Don’t go overboard—just a little bit so the stack doesn’t slide apart.
Step 3: Layer Cheese and Meat (2 minutes)
Place a slice of cheese on top of the spread cracker, then add a folded slice of deli meat (if using). If you’re skipping meat, just add an extra slice of cheese or a cucumber round here. The key is a balanced, not-too-tall stack.
Step 4: Add Crunch and Finish (2 minutes)
Top with a pickle or cucumber slice, then finish with another cracker. Press gently to help everything stick together. If you want, garnish the top with a small fresh herb leaf or an olive for color and fun.
Step 5: Pack and Store
Place the stackers carefully in your lunchbox or container to avoid squishing. Add a napkin or parchment between layers if you’re stacking more than one. Store in the fridge until ready to eat.
Total Time:
Less than 10 minutes, hands down. Perfect for busy mornings or prepping the night before.
Expert Tips & Tricks
Here’s everything I’ve learned from making these stackers dozens of times. These tips will save you from the little headaches I ran into.
- Use sturdy crackers: Thin, delicate crackers break easily. I’ve learned this the hard way when my kids ended up eating just the cheese.
- Keep spreads thin: Too much spread makes everything soggy or sliding apart. A thin layer is enough to act as glue and add flavor.
- Prep ingredients the night before: Slicing cheese and meat ahead saves precious morning minutes.
- Layer thoughtfully: Alternate flavors and textures—cheese, meat, crunchy pickle—to keep it interesting in every bite.
- Wrap individual stackers: If you’re sending more than one, wrapping each in wax paper helps keep them intact.
- Change up the cheese: Sometimes I swap in pepper jack for a little spice or Swiss for a milder taste. Keeps lunchbox excitement alive.
Common mistake: Building stacks that are too tall. Keep them no more than 3 layers high or they topple in transit.
Variations & Substitutions
Once you’ve nailed the basic version, here’s how you can mix it up. I’ve tried all of these and they all work great.
- Vegetarian stackers: Leave out the meat, add sliced avocado or roasted red peppers instead. I like adding a little hummus for extra protein.
- Gluten-free option: Use gluten-free crackers. I’ve had good luck with almond flour crackers—they add a nice nutty flavor.
- Kid-friendly cheese: If your kid isn’t a fan of sharp cheddar, try mozzarella or mild Colby instead.
- Flavor boosters: Add a sprinkle of everything bagel seasoning or a dash of smoked paprika to the spread for a twist.
- Protein-packed: Add a hard-boiled egg on the side or toss in some roasted chickpeas for crunch.
- Snack-sized stackers: Make mini versions with smaller crackers for after-school snacks or parties.
Personally, I like to keep a few extras in the fridge to mix and match based on what mood strikes me or my kids. It keeps lunchtime fresh and fun.
Serving & Storage
I usually pack these stackers directly into lunchboxes with a few extra sides like apple slices or carrot sticks. They travel well and don’t need reheating, which is perfect for school.
Storage tips: Store in an airtight container or wrap individually in wax paper and place in the fridge. They keep well for up to 2 days—though honestly, they rarely last that long in my house.
Reheating: These are best eaten cold or at room temperature. If your child prefers warm, I recommend packing the ingredients separately and assembling at lunchtime if possible.
For after-school snacks, these stackers are great paired with a glass of milk or a small fruit smoothie for a balanced boost.
Nutrition Information
| Nutrient | Per Serving (2 stackers) |
|---|---|
| Calories | 320 |
| Protein | 14g |
| Carbohydrates | 22g |
| Fiber | 2g |
| Sugar | 3g |
| Fat | 18g |
| Saturated Fat | 8g |
| Sodium | 450mg |
| Calcium | 280mg |
I’m not a nutritionist, but this recipe hits a nice balance of protein, healthy fats, and carbs to keep growing kids fueled through the afternoon. Using lower-sodium crackers or skipping meat can reduce sodium further. Adding fresh veggies boosts fiber and vitamins.
At the end of the day, this is a simple, satisfying lunch that feels way better than the usual sandwich rut.
Final Thoughts
So that’s my favorite Back to School Cheese and Cracker Stackers recipe! I’ve probably talked your ear off, but when something saves me time and makes lunch a little more exciting, I get passionate about it.
These stackers have made mornings less stressful and lunchtime more fun. My kids are happy, I’m happy, and the whole process just flows better. The best part? You can customize it however you like and still keep it simple.
Try swapping in your kid’s favorite cheese or adding a new veggie for a change. The goal is to keep lunch easy, tasty, and something they look forward to eating.
If you make these, drop a comment and tell me how it went! I love hearing what tweaks you make or any questions you have. And if you hit a snag, I’m here to help troubleshoot.
Happy packing and even happier eating! Here’s to stress-free school lunches that actually get eaten.
Frequently Asked Questions
Q: Can I make these stackers the night before?
A: Absolutely! I often prep the cheese, meat, and veggies the night before to save time in the morning. Just assemble the stackers the day you plan to eat them so crackers stay crisp. If you must assemble ahead, wrap them individually and store in an airtight container.
Q: What if my kids don’t like pickles or cucumbers?
A: No problem! You can swap in other crunchy veggies like bell pepper strips, carrot slices, or even apple slices for a sweet crunch. The key is a little texture contrast to keep the stack from being too soft.
Q: Can I use other types of crackers?
A: Yes! Just choose sturdy crackers that won’t get soggy quickly. Whole grain, multigrain, or even gluten-free options work as long as they hold together well. Avoid thin butter crackers as they tend to crumble.
Q: How do I keep the stackers from falling apart?
A: The trick is a thin spread layer on the bottom cracker to act as glue, and not stacking too high. Three layers max is my rule of thumb. Also, packing them snugly in the lunchbox helps keep them upright.
Q: Can I freeze these stackers?
A: I wouldn’t recommend freezing assembled stackers because crackers get soggy. You can freeze deli meat or cheese separately, but these are best fresh or refrigerated.
Q: My stacker got soggy by lunchtime—how can I prevent that?
A: To avoid sogginess, keep spreads thin and pack any juicy veggies like tomatoes separately. Wrapping stackers individually in wax paper or parchment also helps keep crackers crisp.
Q: Can I add fruit to these stackers?
A: You can, but I prefer serving fruit on the side because juicy fruit can make crackers soggy. That said, small slices of apple or pear between cheese and crackers can work if eaten soon after assembly.
For a little extra lunchbox inspiration, I sometimes pair these stackers with my easy peanut butter and jelly roll-ups or homemade hummus and veggie snacks to keep things balanced and fun.
Pin This Recipe!
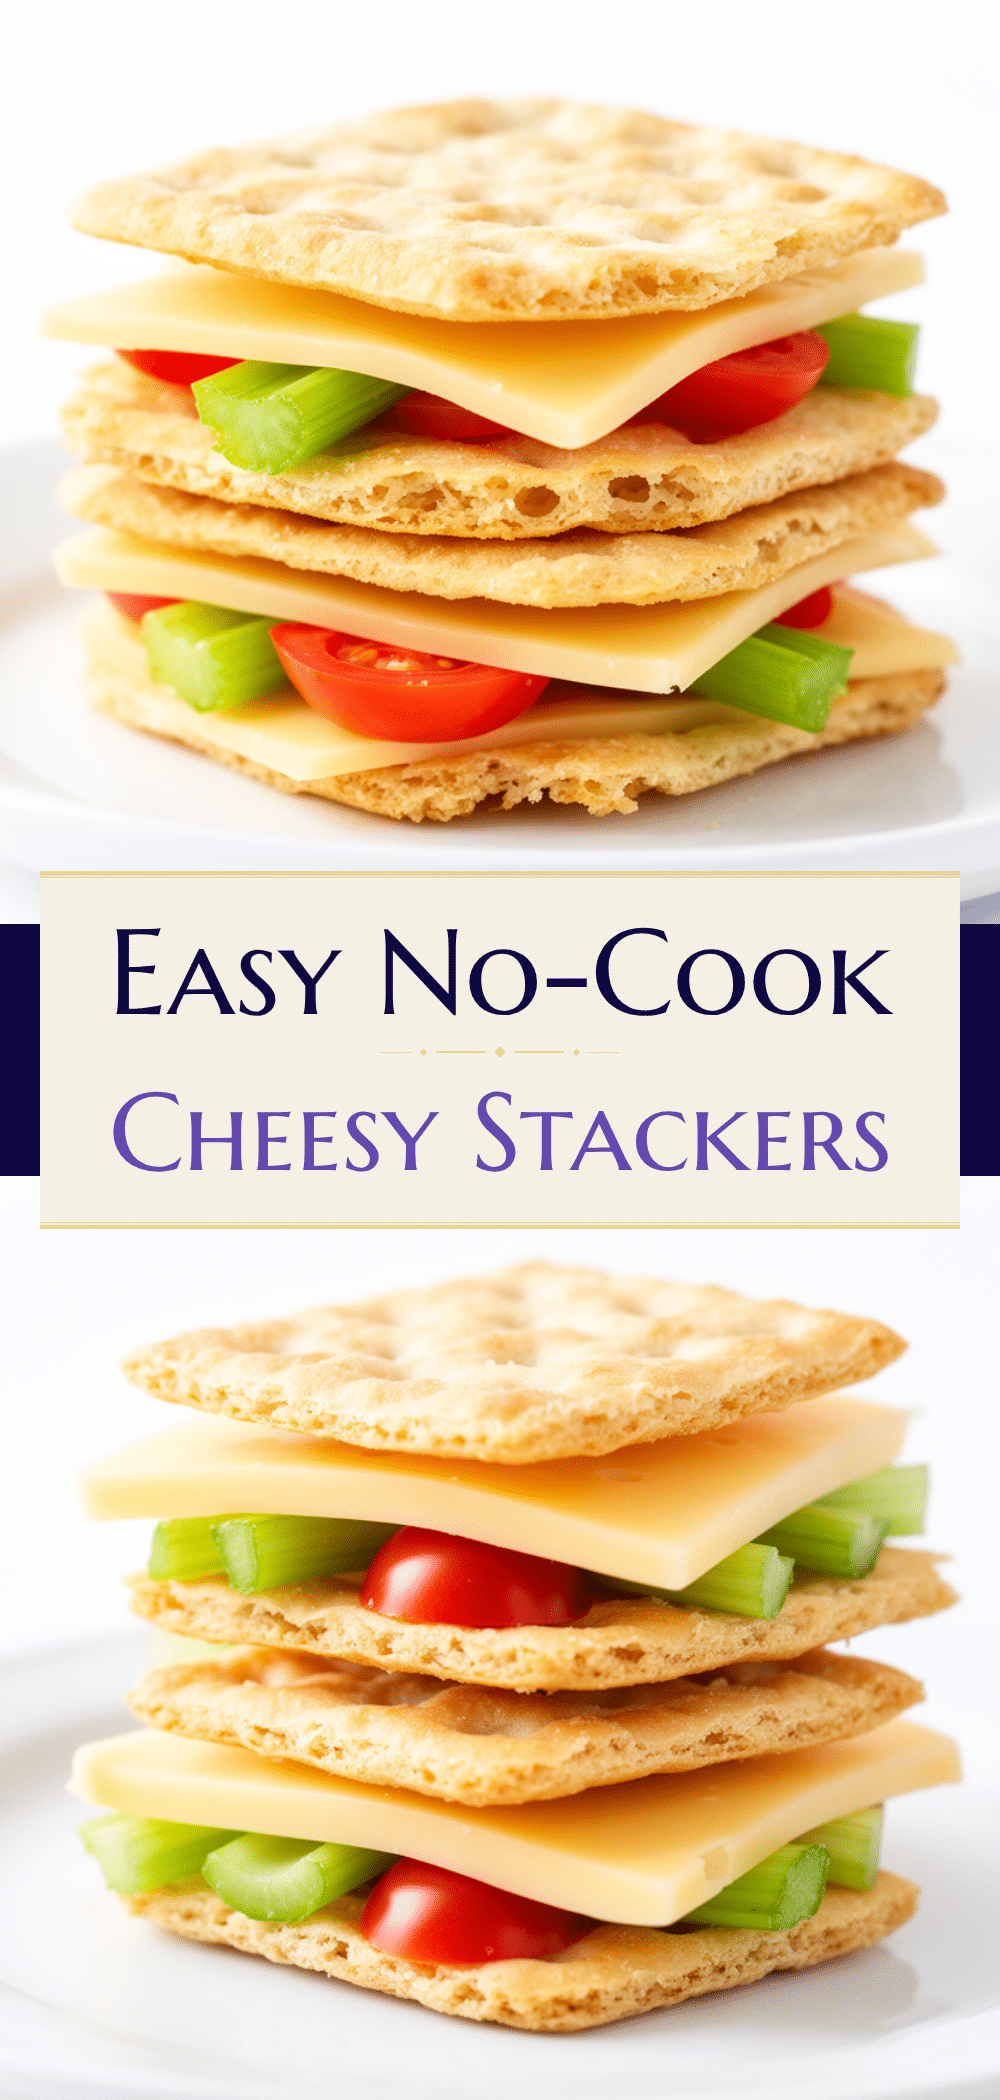

Back to School Cheese and Cracker Stackers Easy Lunchbox Recipe
- Total Time: 9 minutes
- Yield: 4 servings 1x
Description
A quick, easy, and customizable lunchbox recipe featuring stacked crackers, cheese, deli meat, and veggies. Perfect for busy school mornings and picky eaters.
Ingredients
- About 40 sturdy, slightly salty crackers (e.g., Wheat Thins or Triscuit)
- 8 ounces (225g) sliced cheese (sharp cheddar recommended, or Colby Jack, Swiss, pepper jack)
- Optional: 8 ounces (225g) deli meat (turkey, ham, or roast beef, thinly sliced)
- About 1 cup (120g) pickles or cucumber slices
- Optional spread: mustard, cream cheese, or hummus (thin layer)
- Optional fresh herbs (basil or parsley leaves)
- Optional olives or cherry tomatoes for garnish
Instructions
- Prep your ingredients: slice cheese into squares or rectangles about the size of your crackers; fold or slice deli meat into manageable pieces; slice cucumbers or pickles thinly; set out spreads and crackers.
- Spread a thin layer of cream cheese, mustard, or hummus on one cracker to act as glue and add flavor.
- Layer a slice of cheese on top of the spread cracker, then add a folded slice of deli meat if using. If skipping meat, add an extra slice of cheese or a cucumber round.
- Top with a pickle or cucumber slice, then finish with another cracker. Press gently to help everything stick together. Garnish with a small fresh herb leaf or an olive if desired.
- Place the stackers carefully in a lunchbox or container to avoid squishing. Add a napkin or parchment between layers if stacking more than one. Store in the fridge until ready to eat.
Notes
Use sturdy crackers to prevent sogginess. Keep spread layers thin to avoid sliding apart. Prep ingredients the night before to save time. Keep stacks no more than 3 layers high to prevent toppling. Wrap individual stackers in wax paper if packing multiple. Customize with different cheeses, meats, or veggies as desired.
- Prep Time: 5 minutes
- Cook Time: 0 minutes
- Category: Lunch
- Cuisine: American
Nutrition
- Serving Size: 2 stackers
- Calories: 320
- Sugar: 3
- Sodium: 450
- Fat: 18
- Saturated Fat: 8
- Carbohydrates: 22
- Fiber: 2
- Protein: 14
Keywords: cheese and cracker stackers, easy lunchbox recipe, school lunch, quick lunch, kid-friendly lunch, no bake lunch, deli meat snack, healthy snack