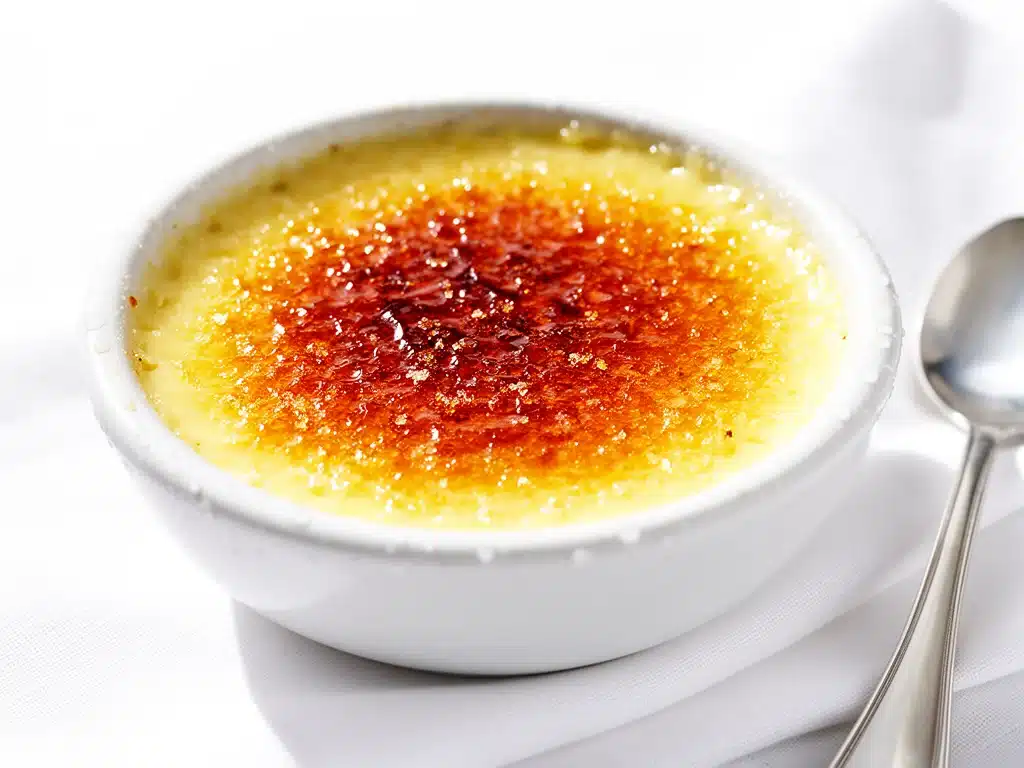
There was this one evening, years ago, when I nervously decided to make crème brûlée for a dinner party. I’d always admired the glossy, caramelized sugar crust that cracks with the perfect snap, but every time I tried, it either burned or stayed stubbornly soft. After several failed attempts and a slightly smoky kitchen, I finally nailed a method that delivers that flawless caramelized sugar top every single time. Since then, this classic crème brûlée recipe has become my secret weapon for impressing guests and indulging myself on quiet weekends.
What makes this recipe stand out? It’s the balance of a silky, custardy base paired with that addictive crunchy sugar crust. Plus, it’s easier than you think once you know the tricks. I’ve tested this recipe over a dozen times (and yes, burnt the sugar more than a few times) until I found the sweet spot. If you’ve ever been intimidated by this dessert, stick around—I’ll walk you through everything, from ingredients to equipment, so your crème brûlée turns out flawless and impresses every time.
And if you’re wondering how to make that caramelized sugar topping perfect, I’ve got you covered. There’s nothing like cracking through that glossy, golden layer right into a creamy vanilla custard underneath. This classic crème brûlée recipe is a game-changer, and I can’t wait for you to try it out.
Why You’ll Love This Classic Creme Brulee Recipe
This crème brûlée has completely changed how I approach homemade desserts. There are a handful of reasons why I keep coming back to this recipe:
- Consistently Perfect Caramelized Sugar — The secret technique I share guarantees a crackling top that’s neither burnt nor underdone. My friends always ask how I get it so spot-on.
- Silky, Smooth Custard — No graininess here. After tweaking the cooking temperature and timing, the custard is rich and creamy every time, just like a high-end bistro.
- Simple Ingredients — You probably have most of these in your pantry and fridge. No fancy stuff, just basics like eggs, cream, sugar, and vanilla.
- Impresses Every Time — Whether it’s a romantic dinner or a holiday gathering, this dessert always earns compliments. It feels fancy but is actually approachable.
- Make-Ahead Friendly — You can prepare the custards a day ahead, then torch the sugar just before serving. Saves you from last-minute stress.
For me, crème brûlée isn’t just dessert; it’s a way to elevate an ordinary night without too much fuss. If you love rich, creamy desserts with a satisfying crunch on top, this recipe will quickly become your go-to for special occasions and casual indulgences alike.
Ingredients You’ll Need
Here’s the best part about this classic crème brûlée recipe: the ingredients are straightforward and familiar. I’m particular about three of them, which I’ll explain as we go.
- Heavy cream (2 cups / 480ml) — Full-fat cream is a must for that rich, velvety texture. I don’t recommend substitutes here; lighter creams just don’t give the same luscious mouthfeel.
- Egg yolks (5 large) — Use fresh eggs for the best flavor and consistency. The yolks are what give the custard its smooth, rich body.
- Granulated sugar (½ cup / 100g) — Half goes into the custard, and the rest is for caramelizing the top. I always use regular white sugar for the brûlée crust; brown sugar doesn’t caramelize properly.
- Vanilla bean or vanilla extract (1 vanilla bean split or 1 tsp pure extract) — A split vanilla bean gives the most authentic flavor with those tiny black flecks. If you don’t have one, pure vanilla extract works great.
- Salt (a pinch) — Just a tiny pinch to balance the sweetness and enhance the depth of flavor.
Optional but recommended:
- Demerara or turbinado sugar — If you want an extra crunchy, caramelized crust, you can use these coarser sugars for the topping. They caramelize beautifully and add texture.
If you want to experiment beyond this classic, I’ve had great success adding citrus zest or a splash of liqueur to the custard for a twist. But for now, stick with these basics to master the technique.
Equipment Needed
You don’t need fancy tools to make this crème brûlée, just the essentials.
- Ramekins (4 to 6, 6-ounce / 180ml size) — These shallow dishes are perfect for even cooking and that signature caramelized top. I’ve used both ceramic and glass; ceramic holds heat a bit better.
- Baking dish or roasting pan — Big enough to fit your ramekins with some space between them. You’ll be making a water bath, so it needs to hold hot water halfway up the ramekin sides.
- Kitchen torch — The secret weapon for that perfect caramelized sugar crust. I tried broiling in the oven for years, but a torch gives you control and consistently great results.
- Fine mesh sieve — For straining the custard mixture. This step smooths out any lumps and ensures a silky texture.
- Mixing bowls and whisk — Basic stuff. A heatproof bowl for mixing the hot cream into the yolks is helpful to temper the eggs gently.
- Oven mitts — Trust me, you’ll want to be safe when handling hot water baths.
Don’t have a kitchen torch? You can use the oven broiler, but watch carefully to avoid burning. I’ve tried broiling banana bread before and learned that keeping your eye on the food is key—same advice applies here.
How to Make It: Step-by-Step
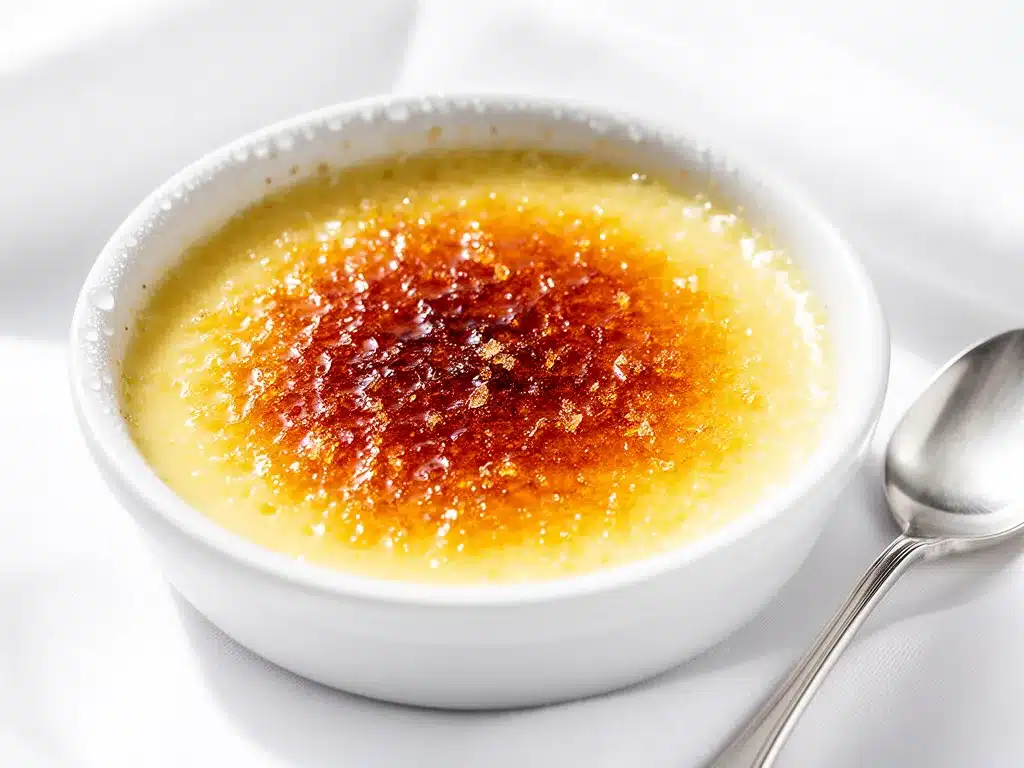
Alright, here’s how I make this classic crème brûlée with caramelized sugar that impresses every time. Follow along and take your time—this dessert is all about patience and precision.
Step 1: Prep the Vanilla-Infused Cream (5 minutes)
Pour the heavy cream into a saucepan. If you’re using a vanilla bean, split it lengthwise and scrape out the seeds, then add both seeds and pod to the cream. Heat over medium until just simmering—not boiling. You’ll see tiny bubbles forming at the edges, and the cream will smell fragrant. Remove from heat and let it steep for 10-15 minutes to really infuse the vanilla.
Step 2: Whisk Egg Yolks and Sugar (3 minutes)
While the cream is steeping, whisk together the egg yolks, half of the granulated sugar (¼ cup / 50g), and a pinch of salt in a mixing bowl. Whisk until the mixture is pale and slightly thickened. This helps dissolve the sugar and prepares the yolks for the hot cream.
Step 3: Temper the Eggs (3 minutes)
Slowly pour the warm vanilla cream into the yolk mixture while whisking constantly. This gradual mixing (called tempering) prevents the eggs from scrambling. Once combined, strain the custard through a fine mesh sieve into a clean bowl to catch any cooked egg bits or vanilla pods. This step guarantees a silky smooth custard.
Step 4: Pour Into Ramekins and Prepare Water Bath (5 minutes)
Divide the custard evenly among the ramekins, filling them nearly to the top. Place the ramekins in your baking dish or roasting pan, then carefully pour hot water into the pan until it reaches about halfway up the sides of the ramekins. The water bath ensures gentle, even cooking and prevents the custard from curdling.
Step 5: Bake the Custards (40-45 minutes)
Preheat your oven to 325°F (160°C). Place the water bath with the ramekins in the oven and bake for 40 to 45 minutes. The custards are done when the edges are set but the centers still wobble slightly when you gently shake the pan. Don’t overbake; the residual heat will finish cooking them.
Step 6: Chill Thoroughly (2+ hours)
Remove the ramekins from the water bath and let them cool to room temperature. Then cover each with plastic wrap and refrigerate for at least 2 hours, preferably overnight. This chilling step makes the custard firm and ready for the final caramelized sugar topping.
Step 7: Caramelize the Sugar Topping (5 minutes)
When you’re ready to serve, sprinkle a thin, even layer of the remaining sugar (about 1 teaspoon per ramekin) over the custard surface. Use a kitchen torch to melt and caramelize the sugar, moving the flame in small circles until it turns golden and bubbly. The sugar should crack when tapped with a spoon. If you don’t have a torch, place the ramekins under a hot broiler for 1-2 minutes—but watch closely to avoid burning.
Step 8: Serve Immediately
Serve the crème brûlée right after caramelizing the sugar for that satisfying crack and contrast between crunchy top and smooth custard. You can garnish with fresh berries or a sprig of mint if you want to get fancy.
Expert Tips & Tricks
- Don’t Skip the Water Bath: This is key to even cooking. Without it, your custard will likely curdle or become grainy.
- Patience with the Sugar: Applying sugar in a thin, even layer helps it caramelize evenly. Don’t dump on too much or it won’t cook properly.
- Use a Kitchen Torch: It’s worth the investment. The control and quick caramelization are unbeatable compared to broiling.
- Watch Your Oven Temperature: Too hot and the custard will bubble or crack. I use an oven thermometer to double-check mine isn’t running hot.
- Vanilla Bean Magic: The little black specks from the vanilla bean aren’t just pretty—they pack a flavor punch that extract can’t quite match.
- Make Ahead: You can prep the custards up to 2 days in advance and torch the sugar just before serving to keep that fresh crunch.
Variations & Substitutions
Once you’ve nailed the classic crème brûlée, trying out variations is a fun way to mix things up.
- Citrus Crème Brûlée — Add zest of one orange or lemon to the cream before heating. It brightens the custard beautifully.
- Espresso Crème Brûlée — Stir in 1 tablespoon of espresso powder into the cream for a coffee twist that pairs wonderfully with the caramelized sugar.
- Chocolate Crème Brûlée — Melt 3 ounces of dark chocolate into the warm cream before mixing with yolks for a rich, decadent dessert.
- Dairy-Free version — Substitute full-fat coconut milk for cream and use a plant-based sweetener. Texture will be slightly different but still tasty.
- Alcohol Infused — Add 1 tablespoon of Grand Marnier, Frangelico, or bourbon into the custard for an adult touch.
For a fun dinner party, I served this alongside my fudgy brookies for a dessert combo that was impossible to resist.
Serving & Storage
Crème brûlée is best enjoyed fresh right after torching the sugar, but here’s what I’ve learned about serving and storing it:
- Serving: Serve ramekins on small dessert plates with a spoon ready to crack the sugar crust. A few fresh berries or a sprig of mint add a pop of color.
- Storage: Un-torched custards can be refrigerated for up to 2 days. Once you caramelize the sugar, it’s best to serve immediately.
- Reheating: This dessert isn’t great reheated since the custard can become watery. If you want a warm version, try making the custard fresh and caramelizing the sugar right before serving.
- Make Ahead: Prepare custards up to 2 days in advance, keep covered in the fridge, and torch the sugar topping just before serving.
Nutrition Information
| Nutrient | Per Serving (based on 6 servings) |
|---|---|
| Calories | 340 |
| Protein | 6g |
| Carbohydrates | 28g |
| Fiber | 0g |
| Sugar | 25g |
| Fat | 22g |
| Saturated Fat | 14g |
| Cholesterol | 195mg |
| Sodium | 65mg |
| Calcium | 70mg |
This is definitely a rich dessert thanks to the cream and egg yolks, but it’s portion-controlled and feels indulgent without being overwhelming. I like to think of it as a treat worth savoring.
Final Thoughts
So that’s my classic crème brûlée recipe with caramelized sugar that impresses every time. I’ve probably rambled on enough, but when you make a dessert this often, you get a lot of insights to share. This recipe has saved me during countless dinner parties and quiet nights when I want something special but don’t want to fuss endlessly in the kitchen.
It’s creamy, comforting, and the crackly sugar top is pure magic. Make it your own—try different vanilla varieties or add your favorite zest, but don’t skip the water bath or the torch. Those are the keys to success.
If you decide to make it, drop a comment below and tell me how it went! I’m always here to help if something doesn’t come out quite right. Happy cooking, and may your kitchen smell as amazing as mine does right now.
Frequently Asked Questions
Q: Can I make crème brûlée without a kitchen torch?
A: You can use your oven’s broiler to caramelize the sugar, but it requires close attention because it can burn quickly. Place the ramekins under the broiler about 3-4 inches from the heat and watch them like a hawk. Another trick is to use a hot spoon to press on the sugar to melt it, but it’s nowhere near as effective as a torch.
Q: Why did my custard turn out grainy?
A: Graininess usually means the eggs cooked too quickly or the mixture curdled. To avoid this, temper the eggs by slowly adding warm cream while whisking constantly. Also, bake the custards gently in a water bath at a low oven temperature (325°F / 160°C). No shortcuts here!
Q: How long can I store un-torched custard? Can I freeze it?
A: Un-torched custard can be stored in the fridge for up to 2 days. I don’t recommend freezing because the texture changes and can become grainy. It’s best to make fresh when you want to serve.
Q: Can I use milk instead of heavy cream?
A: Using milk will make the custard less rich and creamy. I’ve tried this, and it just doesn’t have the same luxurious texture. If you must, use whole milk and add a bit of butter to increase fat content, but heavy cream is really the best choice.
Q: What’s the best way to get the sugar crust to crack perfectly?
A: Use a fine, even layer of granulated sugar and a kitchen torch. Move the flame slowly and evenly over the surface until the sugar bubbles and turns golden. Let it cool for a minute before tapping—it should crack easily. Using turbinado sugar can add extra crunch but melts a bit differently.
Q: Can I add flavors like coffee or citrus to this recipe?
A: Absolutely! Adding orange or lemon zest to the cream before heating adds brightness. Stirring in espresso powder or melted chocolate creates delicious variations. Just don’t add too much liquid or it might affect the custard’s set.
Q: How do I reheat leftover crème brûlée without ruining the crust?
A: Unfortunately, reheating caramelized sugar usually softens or melts the crust. If you have leftovers, enjoy them cold or at room temperature. You can re-torch the sugar with a kitchen torch to refresh the crust if you have one.
Pin This Recipe!


Classic Creme Brulee Recipe Easy Homemade Dessert with Caramelized Sugar That Impresses Every Time
- Total Time: 3 hours
- Yield: 6 servings 1x
Description
A classic crème brûlée recipe featuring a silky, custardy base paired with a perfectly caramelized sugar crust that cracks with the perfect snap. Easy to make and impresses every time.
Ingredients
- 2 cups (480 ml) heavy cream
- 5 large egg yolks
- ½ cup (100 g) granulated sugar, divided
- 1 vanilla bean, split and seeds scraped or 1 tsp pure vanilla extract
- Pinch of salt
- Optional: Demerara or turbinado sugar for topping
Instructions
- Pour the heavy cream into a saucepan. If using a vanilla bean, split it lengthwise and scrape out the seeds, then add both seeds and pod to the cream. Heat over medium until just simmering, then remove from heat and let steep for 10-15 minutes.
- While the cream is steeping, whisk together the egg yolks, half of the granulated sugar (¼ cup / 50g), and a pinch of salt in a mixing bowl until pale and slightly thickened.
- Slowly pour the warm vanilla cream into the yolk mixture while whisking constantly to temper the eggs. Strain the custard through a fine mesh sieve into a clean bowl.
- Divide the custard evenly among 4 to 6 ramekins, filling nearly to the top. Place ramekins in a baking dish and pour hot water into the dish until it reaches halfway up the sides of the ramekins.
- Preheat oven to 325°F (160°C). Bake the custards in the water bath for 40 to 45 minutes until edges are set but centers wobble slightly.
- Remove ramekins from water bath and cool to room temperature. Cover with plastic wrap and refrigerate for at least 2 hours or overnight.
- Before serving, sprinkle about 1 teaspoon of remaining sugar evenly over each custard. Use a kitchen torch to caramelize the sugar until golden and bubbly. Alternatively, use the oven broiler for 1-2 minutes, watching carefully to avoid burning.
- Serve immediately after caramelizing the sugar, optionally garnished with fresh berries or mint.
Notes
Use a water bath to ensure even cooking and prevent curdling. Use a kitchen torch for best caramelized sugar crust results. Custards can be made up to 2 days ahead and refrigerated before torching sugar. Avoid overheating to prevent grainy custard. Vanilla bean provides the most authentic flavor. If no torch is available, use oven broiler carefully.
- Prep Time: 15 minutes
- Cook Time: 45 minutes
- Category: Dessert
- Cuisine: French
Nutrition
- Serving Size: 1 ramekin (about 6 o
- Calories: 340
- Sugar: 25
- Sodium: 65
- Fat: 22
- Saturated Fat: 14
- Carbohydrates: 28
- Protein: 6
Keywords: crème brûlée, classic dessert, caramelized sugar, custard, homemade dessert, vanilla custard, easy crème brûlée