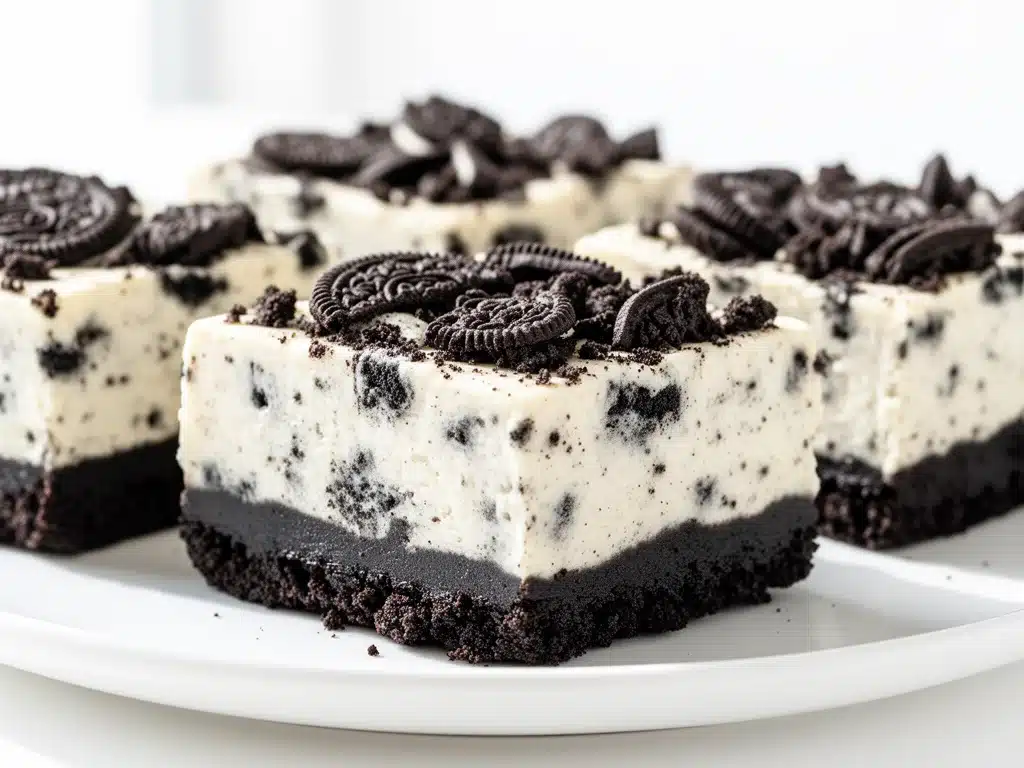
One sticky summer afternoon, I found myself staring blankly into the pantry, trying to figure out a dessert that required zero oven time and only a handful of ingredients. My oven had been on the fritz for days, and frankly, I was over the idea of complicated desserts with a million steps. I wanted something easy, indulgent, and, if possible, Oreo-filled (because, well, Oreos fix everything). That’s when I stumbled on this no bake Oreo cheesecake bars recipe. I whipped it up on a whim, expecting a decent treat, but what I got was pure magic—a creamy, crunchy, and utterly addictive dessert that my whole family begged me to make again the very next week.
After testing this recipe over a dozen times (because yes, I wanted to get it just right), I can confidently say these bars are a game-changer. No complicated baking, no fancy ingredients—just simple, straightforward goodness that comes together in under 20 minutes. If you love cheesecake but hate heating up the kitchen or spending hours baking, these bars are about to become your new obsession.
Here’s the thing: this no bake Oreo cheesecake bars recipe doesn’t just taste amazing; it’s also incredibly versatile and perfect for everything from last-minute guests to potlucks. I’ve tweaked it so much that it’s foolproof now. And the best part? You’ll make it on repeat, just like I do.
Why You’ll Love This Recipe
This recipe has seriously changed how I approach dessert—especially when I need something quick but impressive. Here are the top reasons why these Oreo cheesecake bars will be your new favorite sweet treat:
- Ridiculously Simple — You need just 5 ingredients and zero baking skills. I’ve handed this recipe to my teenage niece, and she nailed it the first time.
- No Oven Required — Perfect for hot days when you don’t want to heat up the kitchen, or for those times when your oven just isn’t cooperating.
- Crowd-Pleaser — Every time I bring these bars to gatherings, they disappear fast. Kids, adults, picky eaters—everyone loves them.
- Make-Ahead Friendly — You can prepare these bars a day or two in advance. They actually taste better after chilling overnight.
- Perfect Portion Size — Bars are easy to slice and serve at parties, or just to grab for a sweet snack without overindulging.
- Budget-Friendly — Uses staple ingredients you likely already have or can grab on a budget. No fancy specialty items here.
Honestly, if you want a dessert that feels indulgent but is surprisingly easy, this is it. I love that it satisfies my sweet tooth without turning into a full afternoon project. Plus, the Oreo crunch combined with the creamy cheesecake filling? Pure heaven every single time.
Ingredients You’ll Need
Here’s the best part: you probably already have most of these ingredients in your pantry or fridge. I’m picky about a couple of things here, and I’ll explain the why’s and how’s along the way.
- Oreo cookies (24 cookies, roughly 1.5 cups crushed) — Use classic Oreos for that perfect balance of chocolate and cream. You can swap with gluten-free Oreos if needed. I always crush half for the crust and save the rest for topping.
- Butter (6 tablespoons / 85g, melted) — This binds the crust. Unsalted is best so you control the salt level. I use salted only if I’m in a pinch.
- Cream cheese (16 ounces / 450g, softened) — Full-fat cream cheese gives the best texture and richness. Let it sit out for about 30 minutes before mixing for smooth blending.
- Powdered sugar (¾ cup / 90g) — Sweetens the cheesecake filling without any grit. Don’t substitute granulated sugar here or the texture will be grainy.
- Whipped topping (1 cup / 240ml, like Cool Whip) — Adds lightness and creaminess. You can make your own whipped cream if you want, but store-bought works great and saves time.
Optional add-ins:
- Vanilla extract (1 teaspoon) — A splash amps up the flavor. I usually add it, but it’s fine without.
- Mini Oreos or chopped Oreos — Stir into the filling or sprinkle on top for extra texture.
Quick tip: If you don’t have a food processor for crushing Oreos, put them in a zip-top bag and bash them with a rolling pin or heavy pan until you get coarse crumbs.
Equipment Needed
You don’t need much to whip these up. Here’s what I actually use:
- 9×9-inch baking pan — Glass or metal works. I use glass because I like seeing the layers through the sides.
- Mixing bowls — One large for the filling, one small for the crust.
- Hand mixer or stand mixer
- Food processor or rolling pin — For crushing Oreos. Not mandatory but definitely makes life easier.
- Spatula — For folding whipped topping and scraping bowls.
That’s it! No fancy gadgets required.
How to Make It: Step-by-Step
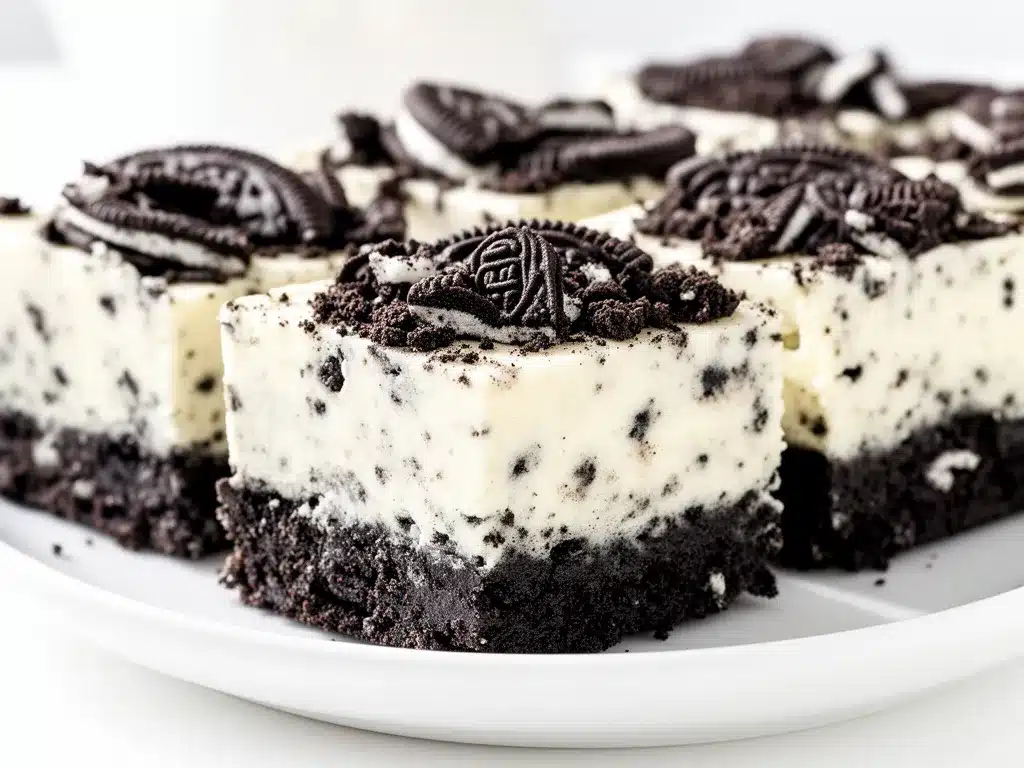
Alright, let’s make these no bake Oreo cheesecake bars together! I’m sharing every little trick I’ve learned to get them perfect.
Step 1: Crush the Oreos (5 minutes)
Separate about 24 Oreo cookies and crush half of them finely in a food processor. If you don’t have one, put the cookies in a sealed plastic bag and smash with a rolling pin until you have fine crumbs. Reserve the other half for topping later.
Step 2: Make the Crust (5 minutes)
Mix the finely crushed Oreos with 6 tablespoons of melted butter in a bowl. Stir until the crumbs are evenly coated and look like wet sand. Press this mixture firmly into the bottom of your 9×9 pan—use the back of a spoon or a flat-bottomed glass to get an even layer. Pop it in the fridge while you make the filling.
Step 3: Whip the Cream Cheese Filling (8-10 minutes)
In a large bowl, beat the softened cream cheese until smooth and creamy—no lumps. Add the powdered sugar and vanilla extract (if using) and mix until fully combined. Gently fold in the whipped topping with a spatula, being careful not to deflate the mixture. The filling should be light, fluffy, and creamy.
Step 4: Assemble the Bars (3 minutes)
Spread the cream cheese filling evenly over the chilled Oreo crust. Sprinkle the reserved crushed Oreos on top for that extra crunch and Oreo goodness. Press down lightly to help them stick.
Step 5: Chill and Set (4+ hours)
Cover the pan with plastic wrap and refrigerate for at least 4 hours, but overnight is best. This chilling time lets the cheesecake filling firm up so you can cut clean bars.
Step 6: Serve
Slice into squares, wipe your knife clean between cuts for neat edges, and enjoy! These bars are creamy, crunchy, and just the right amount of sweet.
Expert Tips & Tricks
- Don’t skip chilling — The bars need time to set or they’ll be too soft to cut cleanly. Overnight is ideal.
- Softened cream cheese is key — Cold cream cheese makes lumpy filling. Leave it out 30 minutes or microwave for 10 seconds if in a hurry.
- Use real whipped topping — Store-bought whipped toppings like Cool Whip hold up better than homemade here because of the stabilizers.
- Press crust firmly — If the crust is loose, the bars will crumble. Take your time pressing it evenly.
- Freeze for easier slicing — If you want perfect edges, pop the pan in the freezer for 20 minutes before cutting.
- Mix it up with add-ins — Stir mini Oreos or chocolate chips into the filling for texture. I’ve even added a swirl of peanut butter for a twist.
Variations & Substitutions
Once you have the basic recipe down, there’s plenty of room to play around:
- Mint Oreo Bars — Swap classic Oreos for mint-flavored ones. The filling stays the same, but you get a refreshing twist.
- Peanut Butter Swirl — Drop dollops of peanut butter on top of the filling and swirl with a knife before chilling.
- Berry Topping — Add fresh raspberries or strawberries on top before chilling for a fruity contrast.
- Vegan Version — Use vegan cream cheese, dairy-free whipped topping, and vegan Oreos (check packaging). Texture differs but still tasty.
- Gluten-Free — Use gluten-free sandwich cookies for the crust and topping. I’ve tested this with good results.
I’ve even paired these bars with my crispy baked chicken nuggets for a perfect after-school treat combo. It’s a winner every time!
Serving & Storage
Serving Suggestions: These bars are great on their own, but I love serving them with a simple dollop of whipped cream or a drizzle of chocolate sauce for extra indulgence. They’re a perfect finish to casual dinners or a crowd-pleasing addition to potlucks.
For a fun twist, set up a mini dessert bar with extra crushed Oreos, sprinkles, and chocolate chips so guests can customize their bars.
Storage: Store leftovers in an airtight container in the fridge for up to 4 days. The bars hold their shape well but can get a little softer over time.
To re-firm the bars, pop them in the freezer for 15-20 minutes before serving. Avoid freezing long-term as the texture changes once thawed.
This no bake dessert is a lifesaver for busy days—especially when paired with quick meals like my cheesy ham and cheddar quesadilla. Easy, fast, and delicious all around.
Nutrition Information
| Per Serving (1 bar, 12 total) | |
|---|---|
| Calories | 320 |
| Protein | 5g |
| Carbohydrates | 30g |
| Fiber | 1g |
| Sugar | 22g |
| Fat | 20g |
| Saturated Fat | 12g |
| Cholesterol | 55mg |
| Sodium | 180mg |
Look, this is a dessert—rich and indulgent with cream cheese and butter. But it’s homemade, so you know exactly what’s inside. If you want to lighten it up, try reducing the butter in the crust or swapping out the whipped topping for a lighter whipped cream. Adding fresh fruit on top is an easy way to boost nutrition too.
Final Thoughts
So that’s my no bake Oreo cheesecake bars recipe—simple, delicious, and made with ingredients you can trust. I’ve probably made these bars more times than I can count, and each time I’m amazed at how easy it is to get a dessert that looks fancy but takes barely any effort.
This recipe has saved me on busy nights, last-minute get-togethers, and whenever I just want a sweet treat without the hassle of baking. My family can’t get enough, and I love that I don’t have to stress about it.
Make it yours—try swapping in your favorite cookie, adding mix-ins, or topping with fresh fruit. And if you’re looking for more quick and easy recipes to pair with this, my turkey and cheese kabobs are a perfect match for a no-fuss meal.
If you make these bars, please drop a comment and tell me how they turned out! I love hearing your twists and stories. And if something doesn’t go quite right, I’m here to help troubleshoot.
Happy no-baking! I hope your kitchen smells as good as mine does right now.
Frequently Asked Questions
Can I use regular whipped cream instead of store-bought whipped topping?
You absolutely can! Homemade whipped cream adds a fresh taste but is less stable, so the bars might be softer and won’t hold as well if left out too long. For the easiest, fluffiest filling that holds its shape, store-bought whipped topping is my go-to.
Can I freeze these bars?
Technically yes, but I don’t recommend it. The texture changes when thawed, and the filling can get watery. If you want to freeze, wrap tightly and thaw in the fridge overnight, then chill again before serving.
What if I don’t have a 9×9 pan?
Any similar-sized pan works. If it’s bigger, your bars will be thinner; smaller, thicker. Adjust chilling time accordingly if thicker.
Can I substitute graham crackers for Oreos?
Sure! You’ll get a more traditional cheesecake crust flavor. Just crush grahams and mix with melted butter for the crust, and use Oreos as a topping or skip altogether.
How long do I need to chill the bars?
At least 4 hours to set properly, but overnight is best for clean slicing and the best texture.
Can I add more Oreos to the filling?
Definitely! I sometimes fold in chopped Oreos or mini Oreos right before spreading the filling. It adds extra crunch and Oreo flavor in every bite.
Is this recipe kid-friendly?
Yes! My kids love helping crush the Oreos and mixing the filling. It’s a fun, no-bake treat that’s perfect for little hands.
Pin This Recipe!
No Bake Oreo Cheesecake Bars
- Total Time: 4 hours 15 minutes
- Yield: 12 servings 1x
Description
A simple, no-bake Oreo cheesecake bars recipe with just 5 ingredients that comes together in under 20 minutes. Creamy, crunchy, and perfect for any occasion.
Ingredients
- 24 Oreo cookies (roughly 1.5 cups crushed)
- 6 tablespoons (85g) unsalted butter, melted
- 16 ounces (450g) cream cheese, softened
- 3/4 cup (90g) powdered sugar
- 1 cup (240ml) whipped topping (like Cool Whip)
- 1 teaspoon vanilla extract (optional)
- Mini Oreos or chopped Oreos for topping (optional)
Instructions
- Crush half of the Oreo cookies finely using a food processor or by placing them in a sealed plastic bag and smashing with a rolling pin. Reserve the other half for topping.
- Mix the finely crushed Oreos with melted butter until evenly coated. Press the mixture firmly into the bottom of a 9×9-inch pan to form the crust. Refrigerate while preparing the filling.
- Beat the softened cream cheese until smooth. Add powdered sugar and vanilla extract (if using) and mix until combined.
- Gently fold in the whipped topping with a spatula, being careful not to deflate the mixture.
- Spread the cream cheese filling evenly over the chilled Oreo crust. Sprinkle the reserved crushed Oreos on top and press lightly to adhere.
- Cover the pan with plastic wrap and refrigerate for at least 4 hours, preferably overnight, to set.
- Slice into 12 bars and serve. Wipe the knife clean between cuts for neat edges.
Notes
Chill bars overnight for best texture and clean slicing. Use softened cream cheese for smooth filling. Press crust firmly to avoid crumbling. Freeze for 20 minutes before slicing for easier cutting. Store leftovers in an airtight container in the fridge for up to 4 days.
- Prep Time: 15 minutes
- Cook Time: 0 minutes
- Category: Dessert
- Cuisine: American
Nutrition
- Serving Size: 1 bar (1/12 of recip
- Calories: 320
- Sugar: 22
- Sodium: 180
- Fat: 20
- Saturated Fat: 12
- Carbohydrates: 30
- Fiber: 1
- Protein: 5
Keywords: no bake, Oreo, cheesecake bars, easy dessert, no oven, quick dessert, Oreo cheesecake