It’s 5:05 PM. The kids are still at practice, the dishwasher is full, and you are staring into the abyss of the refrigerator. You know what’s in there: a sad container of leftover rice, half a bell pepper that’s starting to get soft, and three chicken breasts that look like they’ve been waiting for you to notice them since Tuesday.
Your brain immediately screams “takeout.” But your wallet is already crying about last week’s Uber Eats bill, and you know that deep down, you’d rather just eat something that didn’t come in a cardboard box.
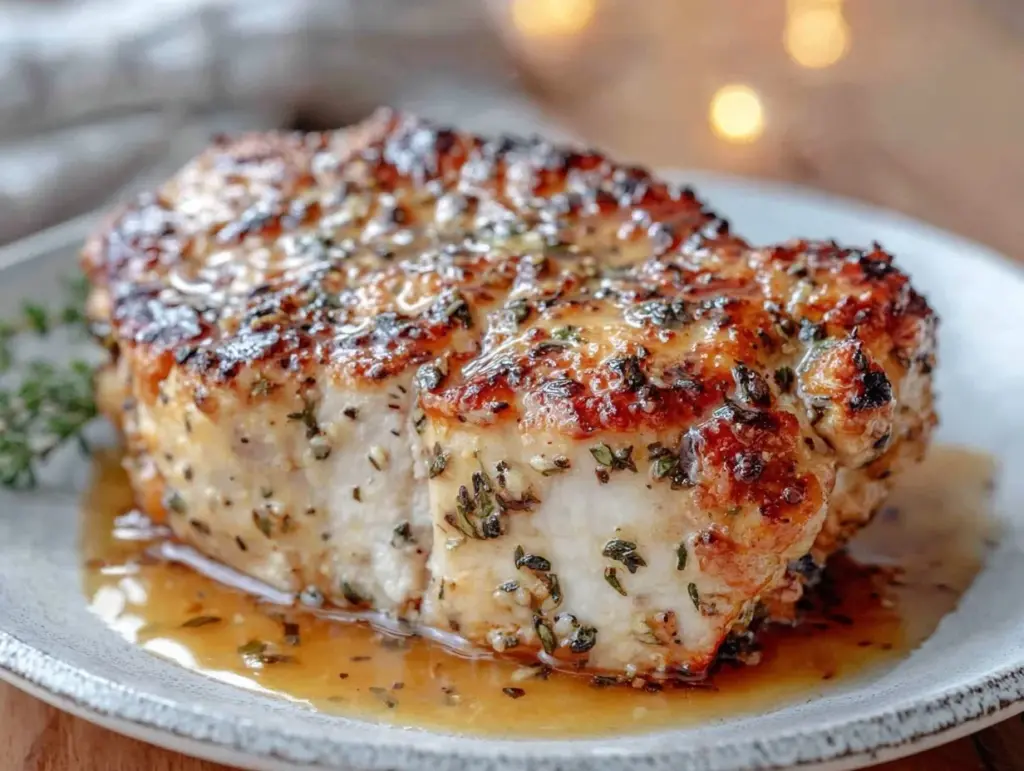
So, I did what I always do when I’m stuck in this specific 5pm panic. I grabbed the chicken, slapped some butter on it, threw it in the oven, and went to do literally anything else. Ten minutes later, the house smelled like a fancy restaurant, and my family was asking what I put in that “magic sauce.” It wasn’t magic. It was just this Never-Dry Oven-Baked Chicken Breast with Herb Butter.
I’ve made this specific chicken recipe so many times that I can probably do it in my sleep. And I do. Often. It has become my ultimate answer to “what’s for dinner” when energy levels are low but taste expectations are high. If you’ve ever been disappointed by dry, rubbery chicken breast (and let’s be honest, who hasn’t?), this method is going to change your weeknight life. It’s juicy, it’s flavorful, and it takes almost zero effort. Seriously. If you can melt butter, you can master this.
Why This Herb Butter Chicken Is Your New Best Friend
Look, I’m not going to sit here and tell you that cooking chicken breast is easy. It’s actually kind of finicky. It goes from “perfectly juicy” to “shoe leather” in about two seconds if you’re not careful. But this oven-baked method? It’s foolproof.
Here’s why this recipe has completely taken over my weeknight rotation:
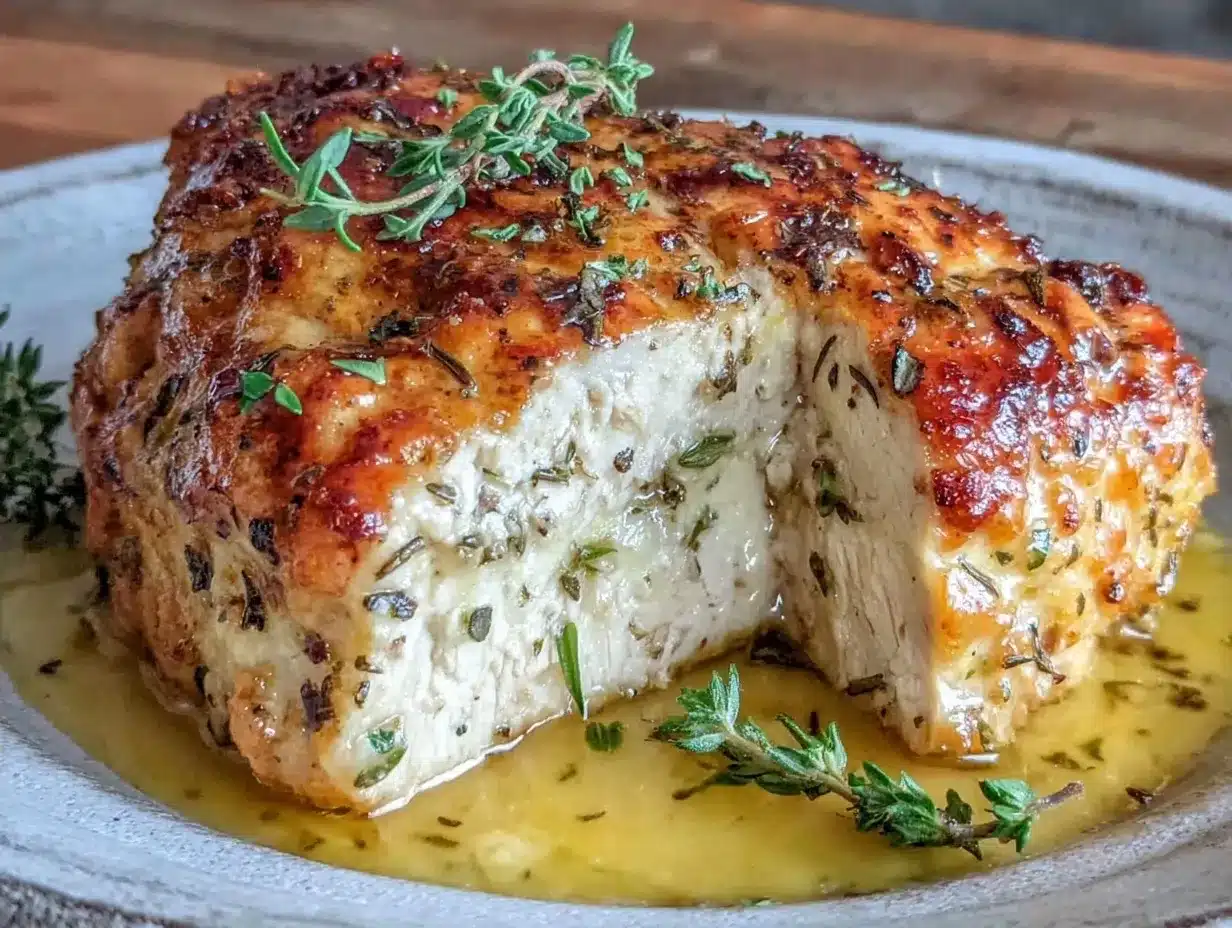
It Actually Stays Juicy — The secret isn’t fancy equipment; it’s the butter. By wrapping the chicken in herbed butter, you’re essentially braising it in its own fat as it bakes. The butter melts into the meat, keeping it moist from the inside out. I’ve tested this against plain baked chicken and roasted chicken, and nothing compares to the texture here. It’s tender, flaky, and succulent.
Zero Active Stress — This is the ultimate “set it and forget it” meal. You spend about five minutes rubbing butter on the chicken. Then? You put it in the oven and walk away. You can help with homework, fold laundry, or just sit on the couch for twenty minutes. There’s no standing over the stove stirring. There’s no splattering oil. It’s clean, calm cooking.
Pantry-Friendly Ingredients — You probably already have everything you need. Chicken breasts, butter, garlic, and some dried herbs (or whatever you have in that spice rack). I don’t even bother buying fresh herbs for this because dried works perfectly and saves a trip to the store. It’s budget-smart and lazy-friendly.
Meal Prep Friendly — I make this for dinner on Sunday, and the leftovers are amazing for lunch on Monday. The flavors actually deepen overnight. I slice it up and throw it into salads, wrap it in tortillas with some BLT lunchbox wraps ingredients, or just eat it cold straight from the fridge. It holds up better than any other protein I’ve tried.
Family-Approved Flavor — My picky eaters who usually only eat chicken nuggets (which, by the way, I also make a healthier version of with these crispy baked chicken nuggets) actually ask for seconds of this. The herb butter makes it feel like a treat, but it’s still wholesome and simple. It’s a win-win.
Ingredients You’ll Need
This list is short because we’re focusing on quality, not quantity. You don’t need a grocery store haul for this. Here’s exactly what you need to get that restaurant-quality result at home.
Chicken Breasts (1.5 to 2 pounds / 700-900g) — Go for boneless, skinless. I like to buy the ones that are roughly the same size so they cook evenly. If they’re huge, pound them down a bit so they’re even thickness. Uniformity is key for even cooking.
Unsalted Butter (4 tablespoons / 60g) — This is the star of the show. Use good quality butter if you can. It melts into the chicken, so cheap butter will taste like cheap butter. I use salted butter sometimes, but if you do, reduce the added salt in the seasoning.
Garlic (3-4 cloves, minced) — Fresh garlic is non-negotiable here. Jarred garlic has a weird metallic taste that clashes with the delicate butter. Fresh cloves give it that warm, savory base note. Mince them finely so they stick to the butter.
Dried Herbs (2 teaspoons total) — I use a mix of dried thyme, dried oregano, and dried parsley. If you have an “Italian Seasoning” blend, use that. It’s basically the same thing. Dried herbs hold up better in the oven than fresh ones, which can burn. Trust me on this.
Onion Powder (1 teaspoon) — This adds a savory depth without the sharp bite of raw onion. It’s a pantry staple that makes a huge difference.
Garlic Powder (1 teaspoon) — Another layer of flavor. Don’t skip it. It amplifies the fresh garlic.
Salt (1 teaspoon, or to taste) — Since we’re using unsalted butter, this is where you control the saltiness. I start with a teaspoon and adjust after cooking. Kosher salt is best because it’s easier to control.
Black Pepper (½ teaspoon, freshly cracked) — Adds a little heat and aroma. Freshly cracked is better, but pre-ground works in a pinch.
Optional: Paprika (½ teaspoon) — If you want a little color and a smoky hint, add a pinch of paprika. It’s not essential, but it makes the chicken look more appetizing.
Equipment Needed
You don’t need anything fancy. In fact, the simpler the equipment, the easier the cleanup. Here’s what I use:
Baking Sheet or Sheet Pan — I use a standard 13×9 inch metal pan. It conducts heat well. Glass pans work too, but they might need a minute or two extra in the oven. Line it with parchment paper or foil for literally zero cleanup. I always use foil because I like to wipe it down while it’s still warm.
Parchment Paper or Aluminum Foil — Essential for easy cleanup. I prefer foil because it’s sturdier and I can just ball it up and throw it away. Parchment is great if you’re worried about sticking, but a light oil spray usually does the trick.
Small Bowl — For mixing the butter and herbs. Any small bowl works. I use one of my little prep bowls.
Fork or Whisk — To mash the butter and herbs together. A fork is fine. You’re making a paste, not a mayonnaise.
Cutting Board and Knife — For trimming any excess fat off the chicken. Not strictly necessary, but I like to tidy them up.
How to Make It: Step-by-Step
Alright, let’s get this bird in the oven. It’s going to be done before you know it. I’m walking you through exactly how I do it, including the little tricks I’ve picked up over the years.
Step 1: Prep the Chicken (5 minutes)
Preheat your oven to 400°F (200°C). While it’s heating, take your chicken breasts out of the fridge. Pat them dry with paper towels. This seems minor, but drying the surface helps the butter stick and promotes better browning. If the breasts are very thick, place them between two sheets of plastic wrap and gently pound them with a rolling pin or meat mallet until they’re about ¾ inch thick. Even thickness means even cooking. No more dry edges and raw centers.
Step 2: Make the Herb Butter (2 minutes)
In your small bowl, combine the softened butter, minced garlic, dried herbs, onion powder, garlic powder, salt, pepper, and paprika (if using). Mash it all together with a fork until it forms a fragrant, green-flecked paste. If the butter is too cold and hard to mix, microwave it for 10 seconds. You want it soft enough to spread easily.
Step 3: Season the Chicken
Lightly spray your baking sheet with oil or line it with foil. Place the chicken breasts on the sheet. Sprinkle a little extra salt and pepper over the top of the chicken. This seasons the meat itself, not just the surface.
Step 4: Add the Herb Butter
This is the crucial step. Take a generous dollop of the herb butter (about a tablespoon per breast) and spread it evenly over the top of each chicken breast. Make sure you cover the entire surface. If you have leftover butter, rub it into the sides of the chicken too. The butter will melt and baste the chicken as it cooks.
Step 5: Bake
Place the chicken in the preheated oven. Bake for 18-22 minutes. Do not open the oven door for the first 15 minutes! I know it’s tempting, but letting the heat escape can lower the temperature and affect the cooking time. After 18 minutes, check the internal temperature with a meat thermometer. It should read 165°F (74°C) at the thickest part.
Step 6: Rest the Chicken
Once it hits 165°F, take it out of the oven. This is the most important step for juicy chicken. Let it rest on the pan for at least 5 minutes before cutting or serving. If you cut into it immediately, all those precious juices will run out onto the plate, leaving you with dry meat. Resting lets the juices redistribute. I use this time to quickly wipe down the baking sheet or start cooking some veggies.
Expert Tips & Tricks
Here’s everything I’ve learned from making this dozens of times. These tips will save you from my mistakes.
Don’t Overcook It
Chicken breast dries out the second it goes past 165°F. I actually pull mine out at 160°F and let the residual heat carry it to 165°F while it rests. This extra buffer ensures it stays juicy. A meat thermometer is your best friend here. If you don’t have one, cut into the thickest part to check—juices should run clear, not pink.
Butter Temperature Matters
Make sure your butter is softened before you mix it. Cold butter won’t spread evenly, and you’ll end up with big chunks of butter on the chicken rather than a thin, flavorful coating. If you forget to take it out, microwave it in 5-second bursts.
Flavor Variations
This base recipe is versatile. Swap the dried herbs for lemon pepper seasoning for a zesty twist. Add a teaspoon of Dijon mustard to the butter for a tangy kick. Or use Cajun seasoning for a spicy version. I love adding a little grated parmesan to the butter mix for a cheesy crust.
Pound for Evenness
I can’t stress this enough. Chicken breasts are rarely uniform. One end is thick, the other is thin. If you don’t pound them, the thin end will be dry by the time the thick end is cooked. Take the extra 2 minutes to flatten them.
Don’t Skip the Rest
I know you’re hungry. I know you want to eat. But wait those 5 minutes. It’s the difference between “meh” chicken and “wow” chicken. The texture difference is night and day.
Variations & Substitutions
Once you’ve nailed the basic version, here’s how you can mix it up. I’ve tried all of these, and they’re all winners.
Lemon Herb Chicken
Add the zest of one lemon to the butter mixture. Squeeze a little fresh lemon juice over the chicken right after it comes out of the oven. It brightens everything up and cuts through the richness of the butter.
Spicy Buffalo Style
Mix 2 tablespoons of hot sauce into the butter. Use cayenne pepper instead of paprika. Serve with ranch dressing on the side. This is great for game day or if you like a kick.
Garlic Parmesan
Double the garlic in the butter and add ¼ cup of grated parmesan cheese to the mix. Sprinkle extra parmesan on top before baking. It creates a delicious, cheesy crust.
Honey Garlic
Add 1 tablespoon of honey to the butter mixture. The honey caramelizes in the oven, creating a sticky, sweet-savory glaze. This is a family favorite.
Gluten-Free
This recipe is naturally gluten-free. Just make sure your spices and butter are certified gluten-free if you have celiac disease or a severe sensitivity.
Dairy-Free
Swap the butter for olive oil or a dairy-free butter alternative. The texture won’t be quite as rich, but it will still be moist. Use olive oil and rub it into the chicken along with the herbs.
Serving & Storage
How to Serve:
I usually serve this straight from the pan with a side of roasted vegetables or a simple green salad. It pairs well with almost anything. My go-to sides are loaded bacon ranch potato salad for a hearty meal, or just steamed broccoli with lemon. It’s also great sliced over a bed of quinoa or rice.
Storage:
Store leftovers in an airtight container in the refrigerator for up to 4 days. The chicken stays moist in the fridge because of the butter coating. Reheat gently in the microwave with a splash of water or broth to keep it from drying out. Or reheat it in a skillet over low heat.
Freezing:
You can freeze this chicken, but the texture of the butter might separate slightly upon thawing. It’s still good, just not as perfect as fresh. Freeze in a single layer on a baking sheet, then transfer to a freezer bag. Thaw in the fridge overnight before reheating.
Nutrition Information
I’m not a nutritionist, but here’s the breakdown if you’re tracking. Keep in mind that this depends on the exact size of your chicken breasts and the amount of butter used.
Per serving (based on 4 servings):
- Calories: 320
- Protein: 35g
- Carbs: 1g
- Fat: 18g
- Saturated Fat: 11g
- Cholesterol: 120mg
- Sodium: 450mg
It’s high in protein and low in carbs, making it great for keto or low-carb diets. The fat content comes from the butter, which adds flavor and moisture. If you’re watching calories, you can reduce the butter to 2 tablespoons total, but it won’t be as juicy.
Final Thoughts
So that’s my go-to Never-Dry Oven-Baked Chicken Breast! I’ve probably talked your ear off at this point, but when you make a recipe this often, you have a lot to say about it. This has saved weeknight dinners more times than I can count. It’s my answer to “what’s for dinner” when I’m tired, don’t want takeout, and still want something that tastes really good. My kids are happy, my husband’s happy, and I’m happy because I’m not stressed about cooking.
Make it yours! Try different herbs, add some spice, or swap the butter for olive oil. The best recipes are the ones you adapt to your family’s tastes. If you make this, drop a comment and let me know what you think! I love hearing how recipes turn out in your kitchen. And if something doesn’t work, tell me that too—I’m here to help troubleshoot.
Happy cooking! And I hope your kitchen smells half as good as mine does right now.
Frequently Asked Questions
Can I use frozen chicken breasts?
You can, but it’s not ideal. Frozen chicken cooks unevenly, and the texture can suffer. If you must use frozen, thaw it completely in the fridge overnight before cooking. If you’re in a huge rush, you can bake it from frozen, but it will take about 10-15 minutes longer, and you’ll need to check the temperature frequently to ensure it doesn’t dry out.
Why is my chicken dry?
Overcooking is the #1 culprit. Chicken breast has very little fat, so it goes from juicy to dry very quickly. Use a meat thermometer and pull it out at 160°F. Let it rest. If you don’t have a thermometer, cut into the thickest part to check. If the juices run clear and the meat is opaque, it’s done.
Can I make this in an air fryer?
Yes! Cook at 375°F for 10-12 minutes, flipping halfway through. The air fryer circulates hot air, so the chicken will cook faster. Keep an eye on it so it doesn’t dry out. The herb butter will still work, but it might drip off more easily.
What herbs work best with this recipe?
Dried thyme, oregano, and parsley are classic. Rosemary and sage also work well if you like a stronger herbal flavor. If you have fresh herbs, you can use them, but add them at the end of cooking or mix them into the butter right before applying to avoid burning.
How do I reheat leftovers without drying them out?
Never microwave it on high for a long time. Add a splash of water or broth to the chicken, cover it with a damp paper towel, and microwave on medium power in 30-second intervals. Or reheat it gently in a skillet over low heat with a little broth or butter.
Can I double this recipe?
Absolutely! Just make sure your baking sheet isn’t overcrowded. Chicken needs space for air to circulate. If you’re doubling, use two sheets or cook in batches. The cooking time should remain the same.
Print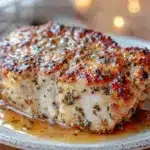
Never-Dry Oven-Baked Chicken Breast: 5pm Dinner Hack
- Total Time: 29 minutes
- Yield: 4 servings 1x
Description
A foolproof, juicy oven-baked chicken breast recipe coated in a savory herb butter. This low-stress, weeknight-friendly meal stays moist and flavorful with minimal active prep time.
Ingredients
- 1.5 to 2 pounds boneless, skinless chicken breasts
- 4 tablespoons unsalted butter, softened
- 3–4 cloves garlic, minced
- 2 teaspoons dried herbs (thyme, oregano, parsley, or Italian seasoning)
- 1 teaspoon onion powder
- 1 teaspoon garlic powder
- 1 teaspoon salt (or to taste)
- ½ teaspoon black pepper, freshly cracked
- ½ teaspoon paprika (optional)
Instructions
- Preheat oven to 400°F (200°C). Pat chicken breasts dry with paper towels. If breasts are thick, pound them to an even ¾ inch thickness.
- In a small bowl, mash together softened butter, minced garlic, dried herbs, onion powder, garlic powder, salt, pepper, and paprika until a paste forms.
- Lightly oil a baking sheet or line with foil. Place chicken on the sheet and sprinkle lightly with extra salt and pepper.
- Spread a generous dollop of herb butter (about 1 tablespoon per breast) evenly over the top of each chicken breast. Rub any remaining butter into the sides.
- Bake for 18-22 minutes. Do not open the oven for the first 15 minutes. Check internal temperature; it should reach 165°F (74°C). Ideally, pull at 160°F to allow for carryover cooking.
- Remove from oven and let rest for at least 5 minutes before cutting or serving to retain juices.
Notes
Do not overcook the chicken; use a meat thermometer to ensure it reaches 165°F but consider pulling it at 160°F for residual heat. Ensure butter is softened for even spreading. Pound chicken to uniform thickness for even cooking. Let chicken rest for 5 minutes after baking to redistribute juices.
- Prep Time: 7 minutes
- Cook Time: 22 minutes
- Category: Main Course
- Cuisine: American
Nutrition
- Serving Size: 1 chicken breast
- Calories: 320
- Sodium: 450
- Fat: 18
- Saturated Fat: 11
- Carbohydrates: 1
- Protein: 35
Keywords: chicken breast, oven baked chicken, herb butter chicken, weeknight dinner, juicy chicken, easy chicken recipe, gluten-free dinner, keto chicken