It was 5 PM on a Tuesday, and my brain was officially fried. You know that specific kind of exhaustion where the idea of chopping vegetables feels like climbing a mountain? I was staring into the fridge, hoping for a miracle, and all I found was a carton of eggs and a half-empty bottle of maple syrup. I didn’t have the energy for dinner. I definitely didn’t have the patience for a complicated recipe.
So, I did what any desperate home cook does: I made breakfast for dinner. But not just any breakfast. I decided to tackle those viral Japanese soufflé pancakes that always look too good to be true. I was skeptical, honestly. I’ve been burned before by recipes that promised “fluffy” but delivered “dense and sad.”
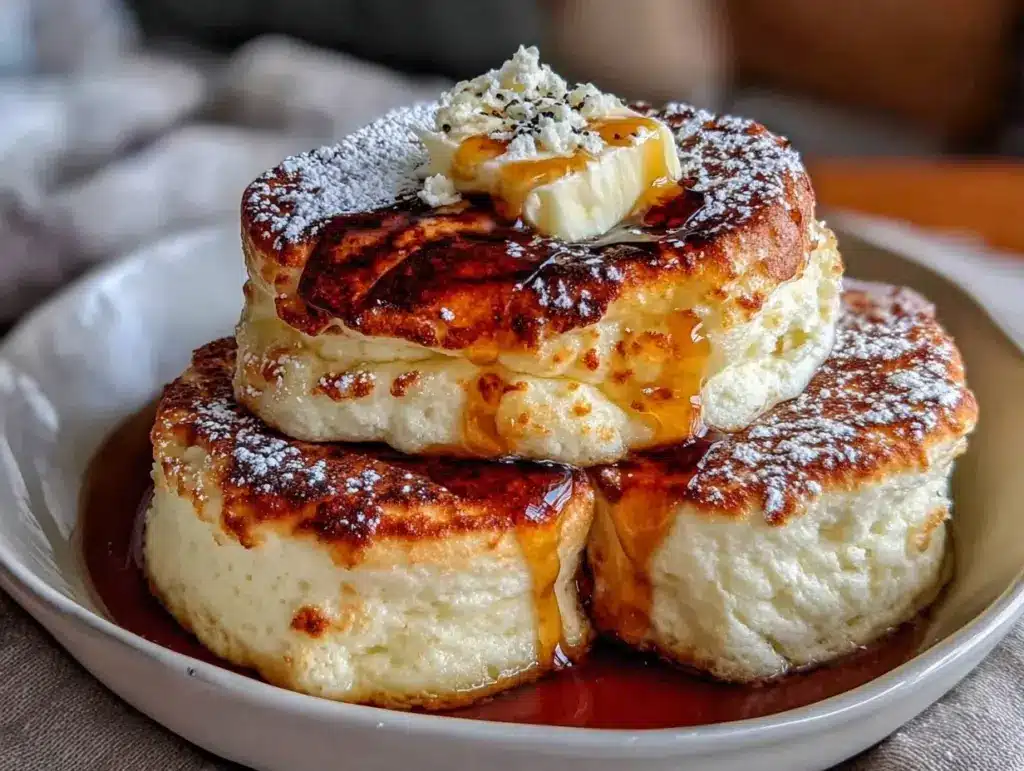
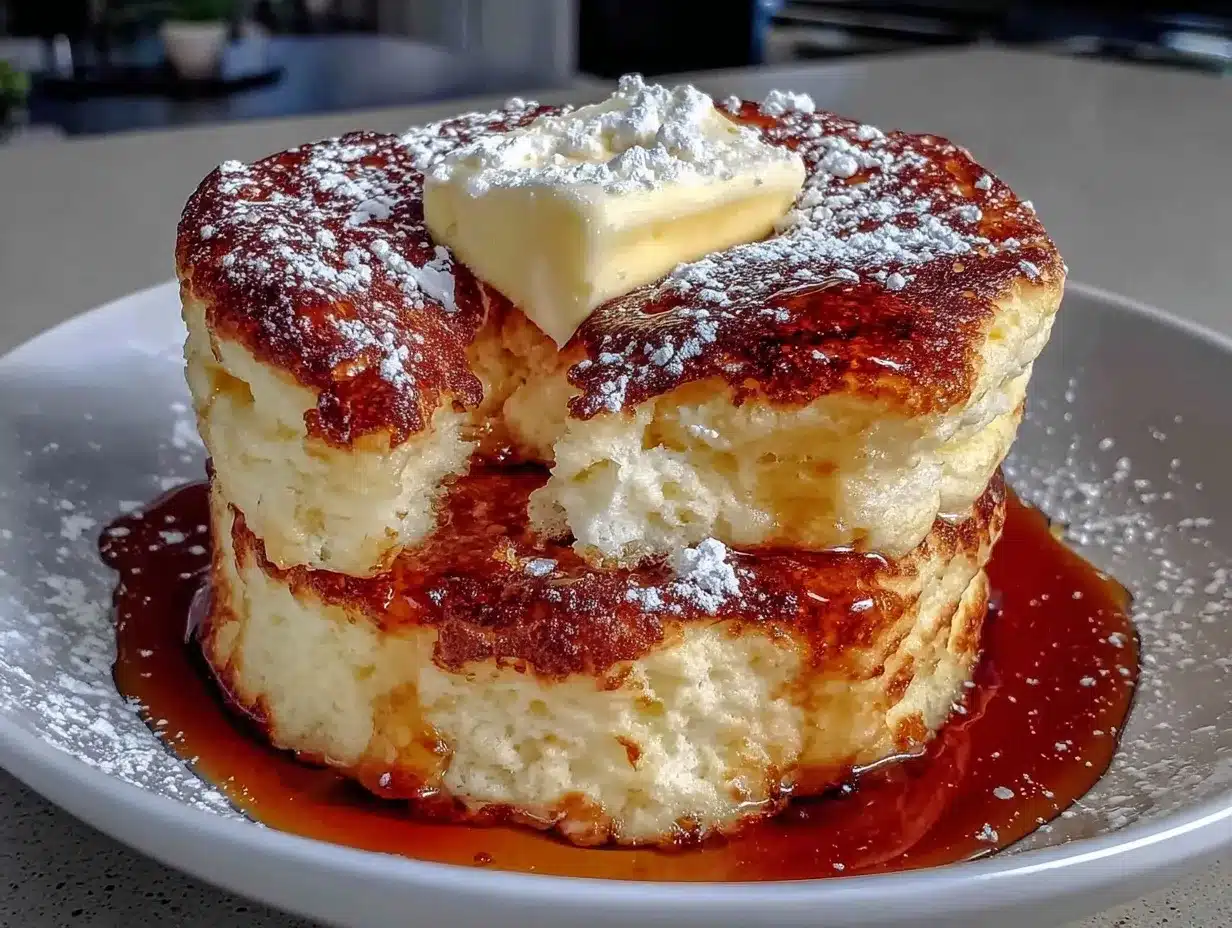
But here’s the thing: these ultra-fluffy Japanese soufflé pancakes with maple syrup actually work. And they work fast. Like, seriously fast. Once you get the hang of the technique, you’re looking at about 5 minutes of active prep time. The rest is just waiting for magic to happen in the pan. I made them last night, and within ten minutes, the entire house smelled like a cozy coffee shop in Kyoto. My kids thought I was a genius. I didn’t have the heart to tell them it was just eggs, flour, and a little bit of patience.
If you’re stuck in the 5 PM slump, or if you just want to treat yourself to something that feels fancy but takes zero effort, this is your answer. These aren’t your average griddle cakes. They wobble. They jiggle. They are clouds on a plate. And once you try them, you’ll be making them on repeat. I promise.
Why You’ll Love This Recipe
Look, I’m not going to lie to you—making soufflé pancakes requires a tiny bit of focus. But the payoff? Huge. Here’s why these have taken over my weekend mornings (and random Tuesday nights):
- They’re Stupidly Fast — Seriously, if you can whisk eggs, you can make these. The prep is under 5 minutes. I’ve whipped this up while my toddler was having a meltdown in the other room. It’s that simple.
- Texture Overload — I’ve tried everything from classic banana bread to dense oat bars, but nothing compares to the jiggly, cloud-like texture of a proper Japanese soufflé pancake. They’re crispy on the edges, soft in the middle, and melt in your mouth.
- Zero Fancy Equipment — You don’t need a stand mixer or a special soufflé dish. A medium bowl, a whisk, and a non-stick skillet with a lid are all you need. I use the same skillet I use for loaded bacon ranch potato salad side dishes (okay, maybe not that specific skillet, but you get the idea—basic kitchen gear).
- They Feel Fancy — Serving these makes you look like a professional pastry chef. Dripping them with warm maple syrup, adding a dusting of powdered sugar, maybe some fresh berries? It feels like a special occasion, even if it’s just a random Wednesday.
- Kid-Approved — My kids are picky. Like, *really* picky. They usually reject anything that isn’t breaded or fried. But these? They devoured them. I’ve even packed them in lunchboxes alongside mini egg and cheese breakfast muffins for a special treat, and they were a hit.
This is my go-to when I need dinner (or breakfast) to just work. No complicated techniques, no weird ingredients you can’t find, just reliable, delicious food that makes everyone happy. And the cleanup? One bowl, one whisk, one pan. Done.
Ingredients You’ll Need
Here’s the best part: you probably have most of this already. Japanese soufflé pancakes rely on simple, pantry-friendly ingredients. The magic isn’t in exotic spices; it’s in the technique. But let’s talk about the specific items that make or break this recipe.
For the Batter
Egg yolks (2 large) — These provide richness and structure. Don’t skip them. You’ll separate the eggs, so make sure your bowl is clean and dry.
Egg whites (2 large) — The star of the show. These are whipped into a meringue to create that signature fluffy height. They need to be at room temperature for best results.
Milk (2 tablespoons) — Whole milk is best for richness, but any milk works. I keep 2% on hand because it’s versatile.
Vanilla extract (1 teaspoon) — Pure vanilla, please. I know it’s pricey, but the artificial stuff tastes chemical in delicate pancakes. It adds that warm, comforting aroma.
Flour (2 tablespoons) — All-purpose flour is perfect. Cake flour makes them even fluffier, but AP flour works fine if that’s what you have. Sift it if you can—lumpy flour is the enemy.
Cornstarch (1 tablespoon) — This is the secret weapon. It lowers the protein content slightly, making the texture more delicate and tender. You can use more flour if you don’t have cornstarch, but the texture changes.
Sugar (2 tablespoons) — Granulated white sugar. It helps stabilize the meringue and adds a subtle sweetness. I’ve tried honey, but it weighs down the whites too much.
Cream of tartar (½ teaspoon) — Or a squeeze of lemon juice. This stabilizes the egg whites so they hold their shape. It’s crucial for getting that tall, jiggly rise.
For Cooking
Butter or oil (1 tablespoon) — For greasing the pan. I use butter for flavor, but oil works if you’re dairy-free. You’ll also use a bit to grease the sides of the pan.
Water (1-2 tablespoons) — For creating steam. This is how they cook through without burning the bottoms.
Maple syrup (for serving) — Real maple syrup, not the pancake syrup stuff. The good stuff. Drizzle it generously.
Optional: Powdered sugar and fresh berries — For that restaurant-style presentation. I love adding a few blueberries or sliced strawberries on top.
Equipment Needed
You don’t need fancy equipment for this. Here’s what I actually use:
Medium mixing bowl — For the egg yolks. Any size works, just make sure it’s clean.
Large mixing bowl — For whipping the egg whites. It needs to be big enough to hold the volume when they’re whipped.
Electric hand mixer — Or a whisk. I use a hand mixer because it’s faster and gets stiffer peaks easier. But if you’re strong, a whisk works. It just takes more arm power.
Rubber spatula — For folding the meringue into the yolk mixture. This is the most important tool. You need to be gentle to keep the air in the batter.
Non-stick skillet with a tight-fitting lid — This is non-negotiable. The lid traps steam, which helps the pancakes cook through. I use an 8-inch skillet for two medium pancakes. If you have a larger pan, you can make more, but adjust the heat.
Pastry brush or paper towel — For greasing the pan.
How to Make It: Step-by-Step
Alright, let’s make this! I’m walking you through exactly how I do it, including the little tricks I’ve picked up. This is easier than it looks, and I’ll have you making these in no time.
Step 1: Separate the Eggs (2 minutes)
Separate your eggs carefully. You want only yolks in one bowl and only whites in another. Make sure there’s absolutely no yolk in the whites, or they won’t whip up properly. I usually crack the egg into my hand and let the white slip through my fingers into the bowl, keeping the yolk in my palm. It’s a bit messy but effective.
Step 2: Mix the Yolk Batter (3 minutes)
In the bowl with the egg yolks, add the milk, vanilla extract, and sugar. Whisk until smooth. Then, sift in the flour and cornstarch. Whisk again until you have a smooth, lump-free batter. It should look like thick pancake batter. Set this aside.
Step 3: Whip the Egg Whites (3-4 minutes)
This is the critical step. Add the cream of tartar (or lemon juice) to the egg whites. Using your hand mixer, beat on medium-high speed until stiff peaks form. What does that mean? When you lift the beaters, the peaks should stand straight up without drooping. It should look like glossy marshmallow fluff. This usually takes about 3-4 minutes with a hand mixer.
Step 4: Fold the Batter (2 minutes)
Take about one-third of the whipped egg whites and fold them into the yolk mixture. Use your rubber spatula and cut down through the middle, sweep across the bottom, and fold over the top. This loosens the yolk mixture. Then, gently fold in the rest of the egg whites. Be gentle! You’re trying to keep all that air in the batter. Stop when there are just a few streaks of white left. Don’t overmix, or you’ll deflate the batter.
Step 5: Cook the Pancakes (10-12 minutes)
Heat your non-stick skillet over low heat. Add a small pat of butter or a brush of oil. Once melted, use a pastry brush or paper towel to grease the sides of the pan about 1 inch up. This helps the pancakes climb higher.
Scoop about ½ cup of batter into the center of the pan. Shape it into a round circle with the back of your spoon. It should be about 3-4 inches wide. Reduce the heat to low-low. Cover with the lid.
Cook for 6-7 minutes. Do not peek! The steam is doing the work. After 6 minutes, add 1-2 tablespoons of water to the pan (carefully, away from you) and immediately cover again. This creates more steam. Cook for another 3-4 minutes.
Step 6: Flip and Finish (2 minutes)
Check if they’re done. The bottom should be golden brown. Carefully flip the pancakes. They will be jiggly and soft—that’s normal. Cook the other side for 1-2 minutes covered. They should be set and springy to the touch.
Step 7: Serve Immediately
Transfer to a plate. They deflate slightly as they cool, so serve them right away. Drizzle with warm maple syrup. Add powdered sugar and berries if you’re feeling fancy. Eat while they’re warm and jiggly.
Expert Tips & Tricks
Here’s everything I’ve learned from making these dozens of times. These tips will save you from my mistakes.
Room Temperature Eggs — Cold egg whites don’t whip as well. Take them out of the fridge 15 minutes before you start. If you forget, you can warm the whites by placing the bowl in a larger bowl of warm water for a few minutes.
Clean Bowls — Any trace of oil or yolk in the egg white bowl will prevent them from whipping. Wipe your bowl with a bit of lemon juice to ensure it’s grease-free.
Low Heat is Key — I know it’s tempting to crank up the heat, but low and slow is the only way. High heat burns the outside before the inside is cooked. If your stove runs hot, use a heat diffuser or just be very careful.
Don’t Overmix — When folding the whites, stop as soon as they’re incorporated. Overmixing knocks out the air, and you’ll end up with flat, dense pancakes. It’s a balance, but err on the side of undermixing.
The Water Steam Trick — Adding water halfway through is crucial. It creates the steam that puffs them up and cooks the center. Don’t skip this step.
Serve Immediately — These pancakes deflate quickly. They are best eaten the moment they come off the heat. If you need to make a batch for family, make them one at a time and keep the finished ones warm in a low oven (200°F) while you cook the next ones.
Variations & Substitutions
Once you’ve nailed the basic version, here’s how you can mix it up. I’ve tried all of these.
Berry Stuffed — Before covering the pan, drop a few fresh blueberries or raspberries onto the batter. They get warm and juicy inside.
Chocolate Chip — Fold a few chocolate chips into the batter before cooking. It’s like a fluffy chocolate pancake. My kids love this version.
Pumpkin Spice — Add 1 teaspoon pumpkin puree and ½ teaspoon pumpkin pie spice to the yolk mixture. Great for fall.
Gluten-Free — Use a 1:1 gluten-free flour blend. The texture might be slightly different, but it still works. I’ve used Bob’s Red Mill with good results.
Dairy-Free — Swap milk for almond or oat milk. Use oil instead of butter for greasing. The eggs provide enough richness that you won’t miss the dairy.
Vegan — This is trickier. You can use aquafaba (chickpea water) instead of egg whites, but the texture won’t be quite the same. I haven’t perfected a vegan version, but I’ve seen people use flax eggs with mixed results.
Serving & Storage
How to Serve
I usually serve these straight from the pan. They look rustic and stay warm. But here are other ways I’ve enjoyed them:
Classic — Warm maple syrup and a dusting of powdered sugar. Simple is best.
Fruit Salad — Top with sliced strawberries, blueberries, and a dollop of whipped cream. It’s light and refreshing.
Bacon Side — If you’re making them for dinner, pair with crispy bacon or sausage. I often serve them with crispy baked chicken nuggets on the side for a fun, mixed meal for the kids.
Yogurt Bowl — Stack them like a small cake and top with Greek yogurt and honey. It’s like a deconstructed cheesecake.
Storage Instructions
Refrigerator: These are best eaten fresh. If you have leftovers (unlikely), store them in an airtight container for up to 2 days. They will deflate and become soggy.
Reheating: Reheat in a toaster oven or skillet over low heat. Microwave them, and they’ll turn rubbery. Trust me, don’t microwave soufflé pancakes.
Freezing: I don’t recommend freezing these. The texture changes too much. Make them fresh whenever you want them.
Nutrition Information
I’m not a nutritionist, but here’s the breakdown if you’re tracking. Keep in mind that this is a treat, so enjoy it!
Per serving (based on 2 pancakes):
| Nutrient | Amount |
|---|---|
| Calories | 280 |
| Protein | 12g |
| Carbs | 32g |
| Fiber | 1g |
| Sugar | 18g |
| Fat | 12g |
| Sodium | 150mg |
What’s Good: Decent protein from the eggs. Low in saturated fat if you use minimal butter.
What to Know: Higher in sugar due to the meringue and maple syrup. Contains eggs and dairy.
My Take: This is comfort food. It’s not a diet recipe. But it’s way better than takeout, costs less, and I know exactly what’s in it. When I want to make it lighter, I skip the syrup and top with fresh fruit. But usually? I just enjoy the fluffy goodness.
Final Thoughts
So that’s my ultra-fluffy Japanese soufflé pancakes! I’ve probably talked your ear off at this point, but when you make a recipe this often, you have a lot to say about it.
This has saved weeknight dinners (and breakfasts) more times than I can count. It’s my answer to “what’s for dinner” when I’m tired, don’t want takeout, and still want something that tastes really good. My kids are happy, my husband’s happy, and I’m happy because I’m not stressed about cooking.
Make it yours! Try different add-ins, swap in your favorite fruits, adjust the sweetness. The best recipes are the ones you adapt to your family’s tastes.
If you make this, drop a comment and let me know what you think! I love hearing how recipes turn out in your kitchen. And if something doesn’t work, tell me that too—I’m here to help troubleshoot.
Happy cooking! And I hope your kitchen smells half as good as mine does right now.
Frequently Asked Questions
Why are my pancakes flat?
Usually, this means the egg whites weren’t whipped stiff enough, or you overmixed the batter when folding. Make sure your peaks stand straight up, and be gentle when combining the mixtures. Also, check your heat—if it’s too high, the outside sets before the inside can puff up.
Can I make these ahead of time?
Not really. Soufflé pancakes are best eaten immediately. They deflate quickly as they cool. If you need to feed a crowd, make them in batches. Keep the finished ones warm in a 200°F oven while you cook the next batch.
Can I use a regular skillet?
Yes, but it must be non-stick. A stainless steel or cast iron skillet will stick badly unless you’re very experienced with butter basting. An 8-inch skillet is ideal for two medium pancakes. If you have a larger pan, you can make more, but adjust the cooking time.
What if I don’t have cream of tartar?
You can use lemon juice instead. Use about ½ teaspoon of lemon juice for every 2 egg whites. It serves the same purpose of stabilizing the egg whites.
Can I double the recipe?
Yes, but you’ll need to whip the egg whites in batches if your bowl is small. Cook the pancakes in batches too. Don’t try to cook all of them at once unless you have a very large griddle.
Do they have to be served with maple syrup?
No! While maple syrup is classic, you can serve them with honey, fruit compote, yogurt, or even just powdered sugar. Get creative. I love them with a dollop of whipped cream and fresh berries.
Can I freeze the batter?
No. The egg whites will deflate if you let the batter sit. Make the batter fresh and cook it immediately. If you have extra batter, just eat it or cook it as a regular pancake.
Pin This Recipe!
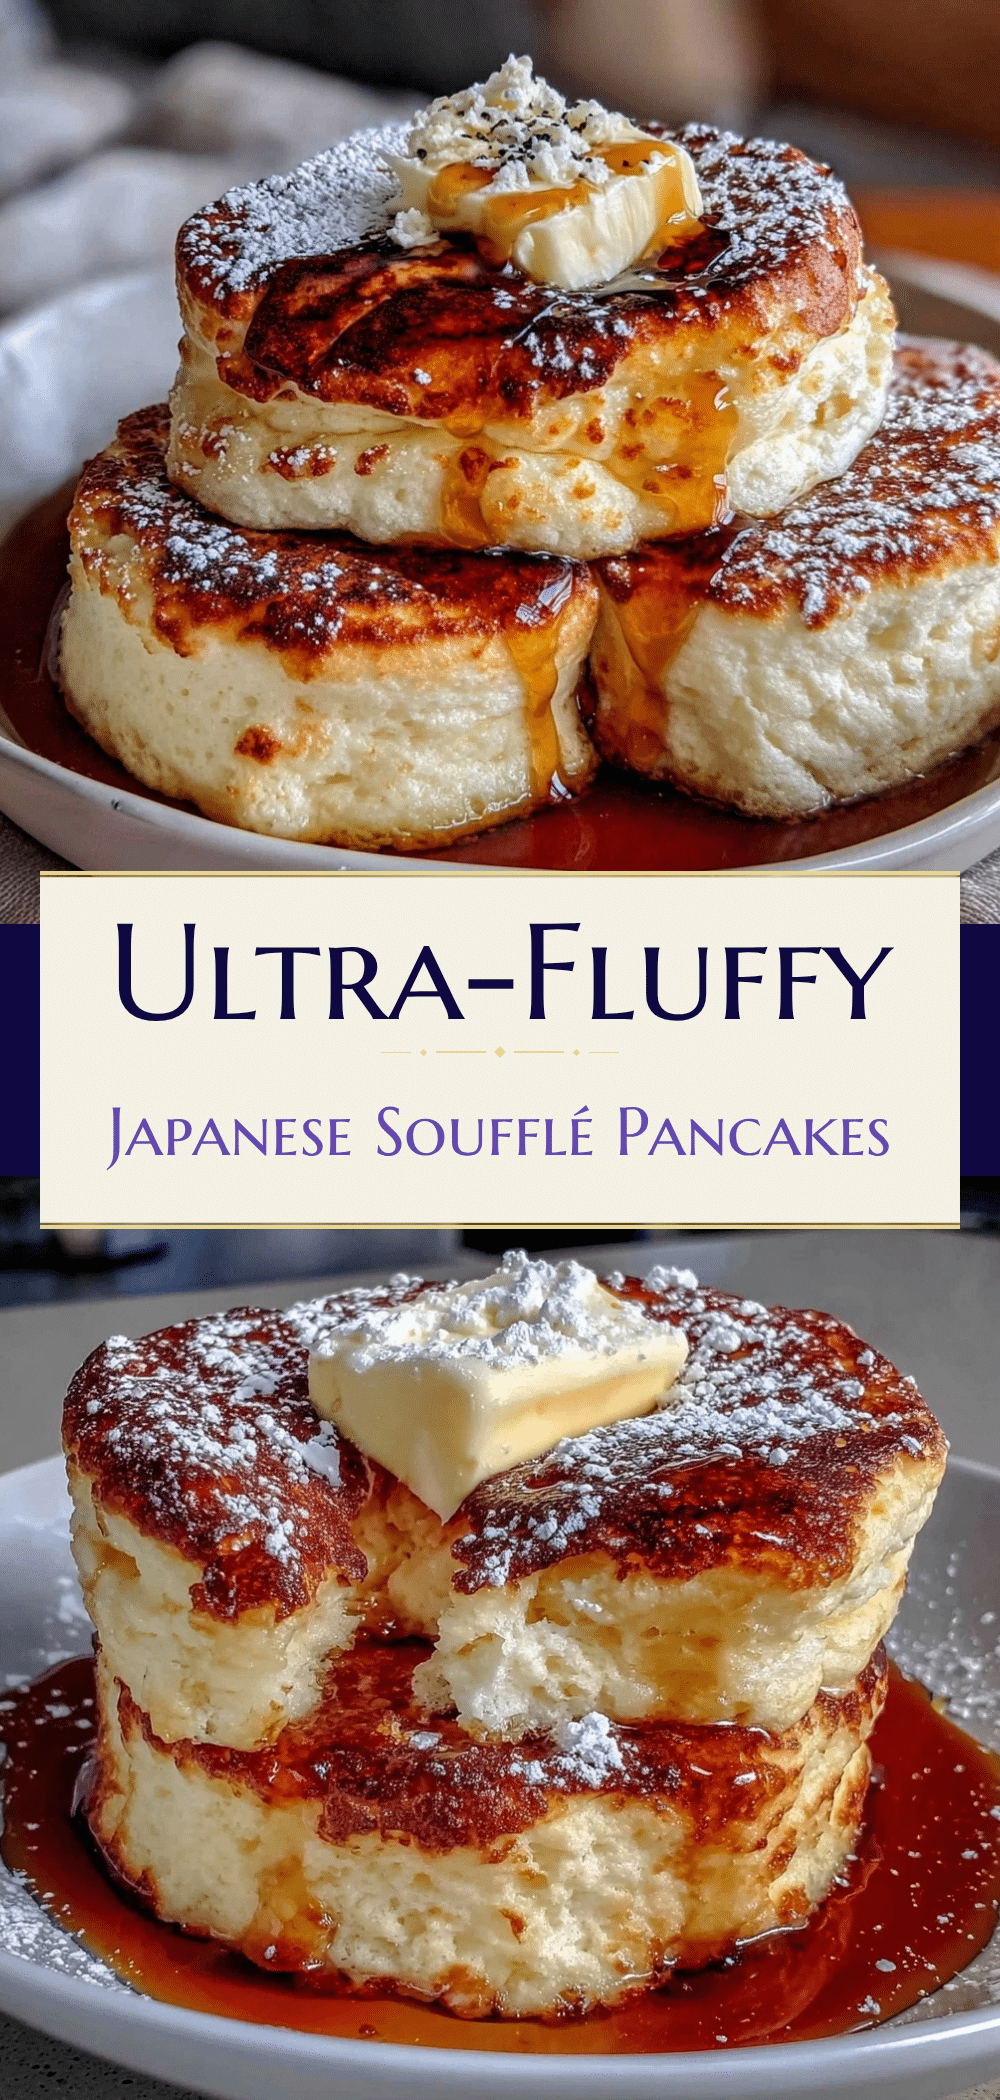
Ultra-Fluffy Japanese Soufflé Pancakes
- Total Time: 15-17 minutes
- Yield: 2 servings 1x
Description
These ultra-fluffy Japanese soufflé pancakes are crispy on the edges, soft in the middle, and melt in your mouth. They require only simple pantry ingredients and basic equipment, making them a perfect quick meal for breakfast or dinner.
Ingredients
- 2 large eggs (separated, room temperature)
- 2 tablespoons milk (whole milk recommended)
- 1 teaspoon vanilla extract
- 2 tablespoons all-purpose flour (sifted)
- 1 tablespoon cornstarch
- 2 tablespoons granulated white sugar
- ½ teaspoon cream of tartar (or lemon juice)
- 1 tablespoon butter or oil (for greasing)
- 1–2 tablespoons water (for steam)
- Maple syrup (for serving)
- Powdered sugar (optional, for serving)
- Fresh berries (optional, for serving)
Instructions
- Separate the eggs carefully, ensuring no yolk gets into the whites. Place yolks in a medium bowl and whites in a large, clean, grease-free bowl.
- To the egg yolks, add milk, vanilla extract, and sugar. Whisk until smooth.
- Sift in the flour and cornstarch. Whisk again until you have a smooth, lump-free batter. Set aside.
- Add cream of tartar to the egg whites. Using an electric hand mixer on medium-high speed, beat until stiff peaks form (glossy marshmallow fluff).
- Take one-third of the whipped egg whites and fold them into the yolk mixture using a rubber spatula to loosen it.
- Gently fold in the remaining egg whites. Stop when just a few streaks of white remain; do not overmix.
- Heat a non-stick skillet over low heat. Add butter/oil and grease the pan and the sides about 1 inch up.
- Scoop ½ cup of batter into the center, shaping it into a 3-4 inch round circle.
- Reduce heat to low-low. Cover with a tight-fitting lid and cook for 6-7 minutes without peeking.
- After 6 minutes, carefully add 1-2 tablespoons of water to the pan and immediately cover again. Cook for another 3-4 minutes.
- Check if the bottom is golden brown. Carefully flip the pancakes.
- Cook the other side for 1-2 minutes covered until set and springy to the touch.
- Serve immediately with warm maple syrup, powdered sugar, and/or fresh berries.
Notes
Ensure egg whites are at room temperature for best whipping results. Use a clean, grease-free bowl for egg whites. Low heat is crucial to cook the inside without burning the outside. Adding water creates steam which helps the pancakes rise. Serve immediately as they deflate quickly. Do not microwave leftovers as they become rubbery.
- Prep Time: 5 minutes
- Cook Time: 10-12 minutes
- Category: Breakfast
- Cuisine: Japanese
Nutrition
- Serving Size: 2 pancakes
- Calories: 280
- Sugar: 18
- Sodium: 150
- Fat: 12
- Saturated Fat: 3
- Carbohydrates: 32
- Fiber: 1
- Protein: 12
Keywords: Japanese soufflé pancakes, fluffy pancakes, breakfast for dinner, easy breakfast, kid-friendly recipes, quick meals, vegan options, gluten-free options