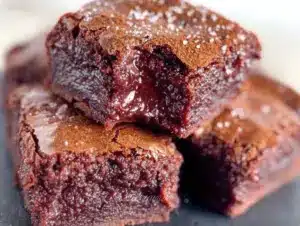
It all started one chilly December afternoon when I brought a batch of these soft red velvet crinkle cookies with cream cheese filling to my book club. I thought, “Eh, they’ll be fine,” but within minutes, the cookies vanished like magic. Someone literally whispered, “You have to share this recipe.” Since then, I’ve been making these cookies for every holiday, birthday, and really any excuse to bake. They’re that good—the kind of treat that people ask for again and again, not just because they’re delicious, but because they’re soft, rich, and have that surprise cream cheese center that makes each bite feel like a warm hug.
What makes these soft red velvet crinkle cookies with cream cheese filling stand out? It’s the balance—velvety red velvet dough dusted in powdered sugar that cracks just right when baked, revealing that snowy white contrast, and then the luscious cream cheese filling that oozes out softly when you bite in. I’ve tested this recipe more times than I can count (and yes, I’ve eaten my fair share of “practice” cookies), tweaking the cream cheese ratio and baking time to get the perfect softness without losing that iconic crinkle look.
Honestly, these cookies have become my secret weapon for impressing guests without spending hours in the kitchen. Plus, they’re surprisingly easy to make, which is a lifesaver when you want to whip up something special but don’t want to go full-on baker mode. If you love red velvet and cream cheese frosting as much as I do, you’re going to fall hard for these cookies. Let me tell you why.
Why You’ll Love This Recipe
I can’t say enough good things about this soft red velvet crinkle cookies with cream cheese filling recipe. Here are the top reasons I keep coming back to it:
- Heavenly Soft Texture — These cookies are tender and cakey, not dry or crumbly. The cream cheese filling keeps every bite moist and decadent.
- Eye-Catching Crinkles — The powdered sugar coating cracks beautifully during baking, making these cookies look as good as they taste. My kids love how “fancy” they look without me having to decorate.
- Surprise Cream Cheese Center — The filling is just enough to give you that creamy, tangy contrast without overwhelming the cookie. I’ve had people guess what the secret ingredient was, and they’re always surprised.
- Perfect for Any Occasion — Whether it’s a holiday cookie swap, a birthday party, or just a weekend indulgence, these cookies fit right in. They’ve been a hit at school bake sales and after-school snacks alike.
- Easy to Make Ahead — You can prep the dough and filling ahead of time and freeze the cookies before baking. This makes holiday baking stress-free and lets you enjoy the process more.
Every time I make these, I’m reminded why they’re a crowd favorite. They’re indulgent without being intimidating, and they bring a little sparkle to any gathering. Ready to dive into the recipe? Let’s get to the ingredients.
Ingredients You’ll Need
Here’s the thing: this recipe might look like it’s loaded, but most of these ingredients are pantry staples or easy to find at any grocery store. I’m picky about a few key items, and I’ll tell you why as we go.
- All-purpose flour (2 ½ cups / 310g) — The foundation for the cookie dough. I sift mine to avoid lumps and keep the cookies light.
- Cocoa powder (2 tablespoons / 15g) — Use natural unsweetened cocoa powder. It gives that subtle chocolate flavor without bitterness.
- Baking powder (1 teaspoon) — Helps the cookies rise and get fluffy.
- Baking soda (½ teaspoon) — Works with the cocoa powder to create that tender crumb.
- Salt (¼ teaspoon) — Balances sweetness.
- Unsalted butter (1 cup / 225g, softened) — Room temperature butter is key. I never use margarine here—real butter makes a huge difference for flavor and texture.
- Granulated sugar (1 ½ cups / 300g) — Sweetens the dough nicely.
- Eggs (2 large) — Bring the dough together and add richness.
- Vanilla extract (1 teaspoon) — For warmth and depth.
- Buttermilk (½ cup / 120ml) — Adds tang and moisture. Don’t skip or substitute with regular milk; the tanginess is part of the magic.
- Red food coloring (2 tablespoons) — I use gel for vibrant color without thinning the dough.
- Powdered sugar (1 cup / 120g) — For rolling the cookie dough before baking, creating those iconic crinkles.
- Cream cheese filling:
- Cream cheese (8 oz / 225g, softened) — Full-fat only. This is the star of the filling.
- Powdered sugar (½ cup / 60g) — Sweetens and smooths the cream cheese.
- Vanilla extract (½ teaspoon) — Adds a hint of flavor to the filling.
If you want to experiment, don’t hesitate to try swapping buttermilk with a mixture of milk and a splash of lemon juice (let it sit for 10 minutes) if you don’t have buttermilk on hand. But trust me, the real deal is worth it here.
Equipment Needed
You don’t need fancy gear for these cookies. Here’s what I use every time:
- Mixing bowls — One large for dough, one medium for cream cheese filling.
- Electric mixer — Handheld or stand mixer makes creaming butter and sugar easier. I’ve tried mixing by hand, but it’s just more work.
- Measuring cups and spoons — Accuracy matters here, especially with baking powder and soda.
- Spatula — For folding ingredients and scraping bowls.
- Baking sheet — I use a rimmed half-sheet pan lined with parchment paper for easy cleanup.
- Parchment paper or silicone baking mat — Prevents sticking and helps cookies bake evenly.
- Small cookie scoop or tablespoon — For portioning dough consistently.
- Cooling rack — Essential for letting the cookies cool without getting soggy.
Optional but helpful:
- Electric hand mixer — Speeds up creaming and mixing the filling.
- Plastic wrap — For chilling the dough and wrapping the filling.
How to Make Soft Red Velvet Crinkle Cookies with Cream Cheese Filling: Step-by-Step

Alright, here’s where the fun begins. I’m going to walk you through this recipe with all the little tweaks I’ve learned along the way to make sure your cookies come out soft, vibrant, and perfectly filled every time.
Step 1: Make the Cream Cheese Filling (10 minutes + chill)
Beat the softened cream cheese with powdered sugar and vanilla extract until smooth and creamy. Scrape down the sides as needed. Once smooth, cover the bowl with plastic wrap and refrigerate for at least 30 minutes so it firms up enough to handle. This step is key for making the filling easy to shape later.
Step 2: Prepare the Cookie Dough (15 minutes)
In a medium bowl, whisk together the flour, cocoa powder, baking powder, baking soda, and salt. Set aside.
In a large bowl, cream the softened butter and granulated sugar using an electric mixer until light and fluffy—this usually takes about 3-4 minutes. Then, beat in the eggs one at a time, followed by the vanilla extract and red food coloring until the dough is evenly tinted a deep red.
Alternate adding the dry ingredients and buttermilk to the butter mixture in three parts, starting and ending with the dry ingredients. Mix just until combined after each addition. Don’t overmix or your cookies will be tough.
Step 3: Chill the Dough (At least 1 hour)
Cover the dough with plastic wrap and chill it in the refrigerator for a minimum of 1 hour. This step helps the dough firm up and makes it easier to form the cookies without losing their shape during baking.
Step 4: Assemble the Cookies (15 minutes)
Preheat your oven to 350°F (175°C) and line baking sheets with parchment paper.
Using a small cookie scoop or tablespoon, scoop out about 2 tablespoons of cookie dough. Flatten it slightly in your palm, then place about 1 teaspoon of the chilled cream cheese filling in the center. Fold the dough around the filling, sealing it completely, and roll it into a ball.
Roll each cookie dough ball generously in powdered sugar, covering it well. This coating is what creates those classic crinkles as the cookies bake.
Step 5: Bake (12-14 minutes)
Arrange the coated cookie balls on the baking sheet about 2 inches apart. Bake for 12 to 14 minutes, until the cookies have spread and the powdered sugar has cracked, but the centers still look soft. The edges might be just set but not browned—this is perfect for that melt-in-your-mouth texture.
Step 6: Cool and Enjoy (15 minutes)
Let the cookies cool on the baking sheet for 5 minutes before transferring them to a wire rack to cool completely. This helps prevent them from breaking apart. The cream cheese filling should be soft but set enough to hold its shape.
Serve fresh or store in an airtight container at room temperature for up to 3 days. (Though, good luck making them last that long!)
Expert Tips & Tricks
- Don’t skip chilling: Both the dough and cream cheese filling need to chill so they’re easy to work with and don’t melt out during baking.
- Use gel food coloring: It delivers vibrant color without making the dough too wet.
- Roll generously in powdered sugar: This helps create the signature crinkle pattern and balances the dough’s sweetness.
- Watch your bake time: Overbaking dries the cookies out. Pull them out when edges are set but centers still look soft.
- Try a test batch: If it’s your first time, bake 2-3 cookies first. It helps you get a feel for timing and texture.
- Mix fillings variations: Swap the cream cheese filling for flavored versions by adding lemon zest or a pinch of cinnamon.
Variations & Substitutions
After making the classic version, I like to shake things up. Here are a few ideas you might want to try:
- Chocolate Lover’s Twist — Add mini chocolate chips to the dough for extra bursts of chocolate.
- Nutty Crunch — Roll the filled dough balls in finely chopped pecans instead of powdered sugar for a crunchy coating.
- Berry Surprise — Mix a teaspoon of raspberry jam into the cream cheese filling for a fruity pop.
- Dairy-Free Version — Use vegan cream cheese and dairy-free butter substitutes. I’ve had success with this for friends with allergies.
- Holiday Spice — Add ½ teaspoon cinnamon and ¼ teaspoon nutmeg to the dry ingredients for a cozy flavor.
Feel free to experiment—you might create your family’s new favorite! If you like recipes that save you time on busy nights, you might also enjoy my after-school crispy baked chicken nuggets or cheesy ham and cheddar quesadillas. Both are quick, kid-friendly hits.
Serving & Storage
Serving: These cookies shine on their own, but you can jazz them up by dusting extra powdered sugar before serving or pairing them with a cold glass of milk or hot cocoa. They’re also a hit on dessert trays during parties.
Storage: Store your cookies in an airtight container at room temperature for up to 3 days. The cream cheese filling stays soft and delicious, but the cookies might lose a bit of their crinkle charm over time.
Reheating: If you want to warm them up, pop a cookie in the microwave for about 10 seconds. It revives that soft, melty texture.
Freezing: You can freeze unbaked dough balls on a parchment-lined tray, then transfer to a freezer bag. Bake straight from frozen, adding a couple extra minutes to the baking time. This is my go-to during the holidays when I want fresh cookies on demand.
Nutrition Information
| Nutrient | Amount per Cookie (based on 24 cookies) |
|---|---|
| Calories | 160 |
| Protein | 2g |
| Carbohydrates | 22g |
| Fiber | 1g |
| Sugar | 12g |
| Fat | 7g |
| Saturated Fat | 4g |
| Cholesterol | 25mg |
| Sodium | 95mg |
| Calcium | 30mg |
This isn’t a diet cookie, and that’s okay! It has a decent protein boost from eggs and cream cheese, and a good amount of calcium from the dairy. The cream cheese filling adds richness and moisture, making it feel indulgent without being overly heavy.
Final Thoughts
So there you have it—my soft red velvet crinkle cookies with cream cheese filling that everyone keeps asking for. I probably sound like I’m gushing, but after making these cookies for years, I still get excited every time I see those cracks form on the cookie tops and that creamy filling peek out.
These cookies have saved me when I needed a show-stopping dessert with minimal fuss. They’re perfect for holidays, parties, or just because you deserve something special. Don’t be afraid to customize the filling or add your own twist—the best recipes evolve with each baker’s touch.
If you give these a try, drop a comment below and tell me how they turned out! I love hearing your stories, and if you run into any hiccups, I’m here to help troubleshoot. Happy baking, and may your kitchen smell as amazing as mine does right now.
Frequently Asked Questions
Q: Can I make these cookies without cream cheese filling?
A: Absolutely! You can bake the red velvet crinkle cookies on their own without filling. Just shape the dough into balls, roll in powdered sugar, and bake. They’ll still be soft and delicious but lose that creamy surprise center.
Q: My cookies spread too much and lost their crinkle—what did I do wrong?
A: This usually happens if the dough is too warm or soft. Make sure to chill the dough for at least an hour before baking. Also, don’t skip rolling the dough balls generously in powdered sugar—that helps the crinkles form.
Q: Can I use regular milk instead of buttermilk?
A: You can substitute by adding 1 tablespoon of lemon juice or white vinegar to ½ cup of milk, letting it sit for 10 minutes to create a buttermilk substitute. But I recommend real buttermilk when possible—it makes the cookies tangier and softer.
Q: How do I store leftover cookies with cream cheese filling?
A: Store them in an airtight container at room temperature for up to 3 days. The filling stays soft and creamy, but if you refrigerate them, the texture will firm up and the cookies might dry out a bit.
Q: Can I freeze the baked cookies?
A: I don’t recommend freezing baked cookies with cream cheese filling because the filling can change texture when thawed. Instead, freeze the unbaked dough balls and bake fresh when you want them.
Q: Why is my cream cheese filling too runny?
A: Make sure the cream cheese is fully chilled and well beaten before mixing with powdered sugar. If your filling is too soft, refrigerate it longer before assembling the cookies.
Q: Can I make these cookies vegan or dairy-free?
A: Yes! Use vegan cream cheese and dairy-free butter alternatives. I’ve had success with these swaps for friends with allergies, but the texture and flavor will be slightly different.
Pin This Recipe!


Soft Red Velvet Crinkle Cookies with Cream Cheese Filling
- Total Time: 1 hour 39 minutes
- Yield: 24 cookies 1x
Description
Soft, rich red velvet crinkle cookies with a surprise creamy cream cheese center. These tender, cakey cookies are perfect for holidays, parties, or any occasion.
Ingredients
- 2 ½ cups (310g) all-purpose flour
- 2 tablespoons (15g) natural unsweetened cocoa powder
- 1 teaspoon baking powder
- ½ teaspoon baking soda
- ¼ teaspoon salt
- 1 cup (225g) unsalted butter, softened
- 1 ½ cups (300g) granulated sugar
- 2 large eggs
- 1 teaspoon vanilla extract
- ½ cup (120ml) buttermilk
- 2 tablespoons red gel food coloring
- 1 cup (120g) powdered sugar (for rolling)
- Cream cheese filling:
- 8 oz (225g) full-fat cream cheese, softened
- ½ cup (60g) powdered sugar
- ½ teaspoon vanilla extract
Instructions
- Make the Cream Cheese Filling: Beat softened cream cheese with powdered sugar and vanilla extract until smooth and creamy. Cover and refrigerate for at least 30 minutes.
- Prepare the Cookie Dough: Whisk together flour, cocoa powder, baking powder, baking soda, and salt in a medium bowl.
- In a large bowl, cream butter and granulated sugar with an electric mixer until light and fluffy (3-4 minutes). Beat in eggs one at a time, then vanilla extract and red food coloring until evenly tinted.
- Alternate adding dry ingredients and buttermilk in three parts, starting and ending with dry ingredients. Mix just until combined.
- Chill the Dough: Cover dough with plastic wrap and refrigerate for at least 1 hour.
- Assemble the Cookies: Preheat oven to 350°F (175°C). Line baking sheets with parchment paper.
- Scoop about 2 tablespoons of dough, flatten slightly, place 1 teaspoon of chilled cream cheese filling in center, fold dough around filling, and roll into a ball.
- Roll each ball generously in powdered sugar to coat.
- Bake: Place cookies 2 inches apart on baking sheet. Bake for 12-14 minutes until powdered sugar cracks and edges are set but centers remain soft.
- Cool: Let cookies cool on baking sheet for 5 minutes, then transfer to wire rack to cool completely.
Notes
[‘Chill both dough and cream cheese filling to prevent melting during baking.’, ‘Use gel food coloring for vibrant color without thinning dough.’, ‘Roll dough balls generously in powdered sugar for signature crinkle effect.’, ‘Avoid overbaking to keep cookies soft and moist.’, ‘Test bake 2-3 cookies first to adjust timing if needed.’, ‘Try variations like adding mini chocolate chips, chopped pecans, or raspberry jam in filling.’, ‘For dairy-free version, use vegan cream cheese and dairy-free butter substitutes.’]
- Prep Time: 25 minutes
- Cook Time: 14 minutes
- Category: Dessert
- Cuisine: American
Nutrition
- Serving Size: 1 cookie
- Calories: 160
- Sugar: 12
- Sodium: 95
- Fat: 7
- Saturated Fat: 4
- Carbohydrates: 22
- Fiber: 1
- Protein: 2
Keywords: red velvet cookies, crinkle cookies, cream cheese filling, holiday cookies, soft cookies, baked treats