It was 5 PM on a Tuesday. You know the time. The sun was starting to dip, the house was already getting messy from the morning rush, and I had absolutely zero plans for dinner. I was staring into the fridge, hoping a miracle would appear, but all I found was half a carton of milk and a sad-looking bunch of spinach. I didn’t want takeout. I didn’t want to wash a bunch of pots. And I definitely didn’t want to spend two hours proofing dough when I just wanted to sit down and eat.
So, I did what I always do when I’m stressed: I grabbed a bowl and started throwing things together. I had some leftover brown butter from a batch of classic banana bread with brown butter I’d made the weekend before (yes, I freeze brown butter, don’t judge me), some pecans, and maple syrup. I figured, why not? If it tastes like dessert for dinner, who cares?
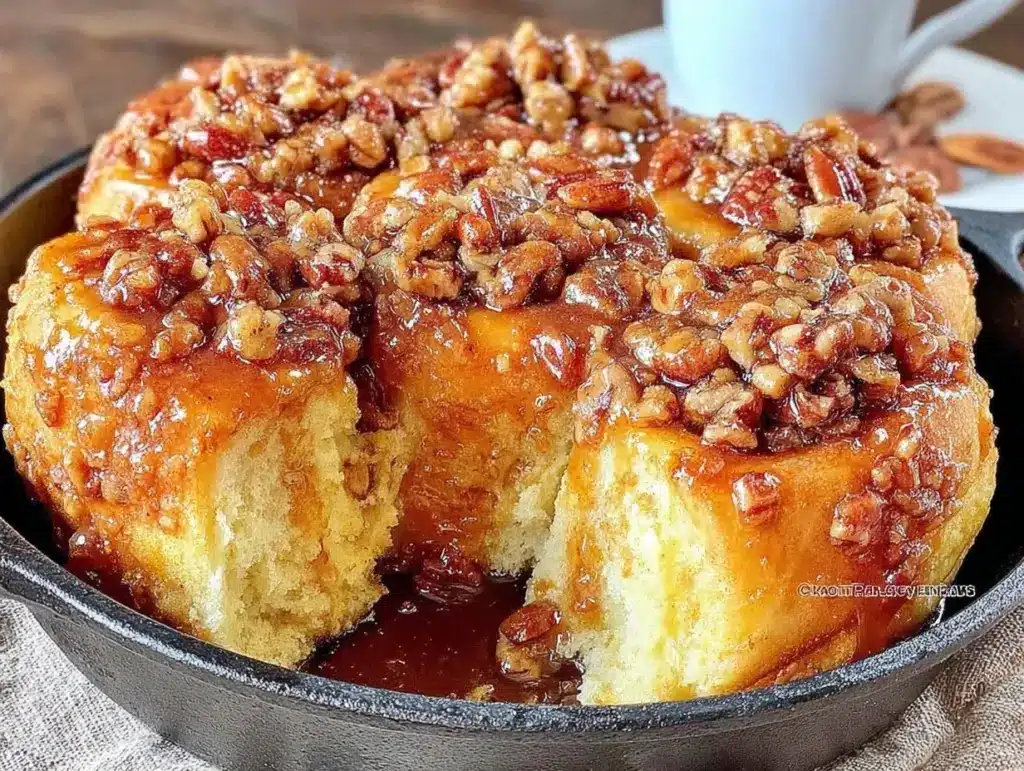
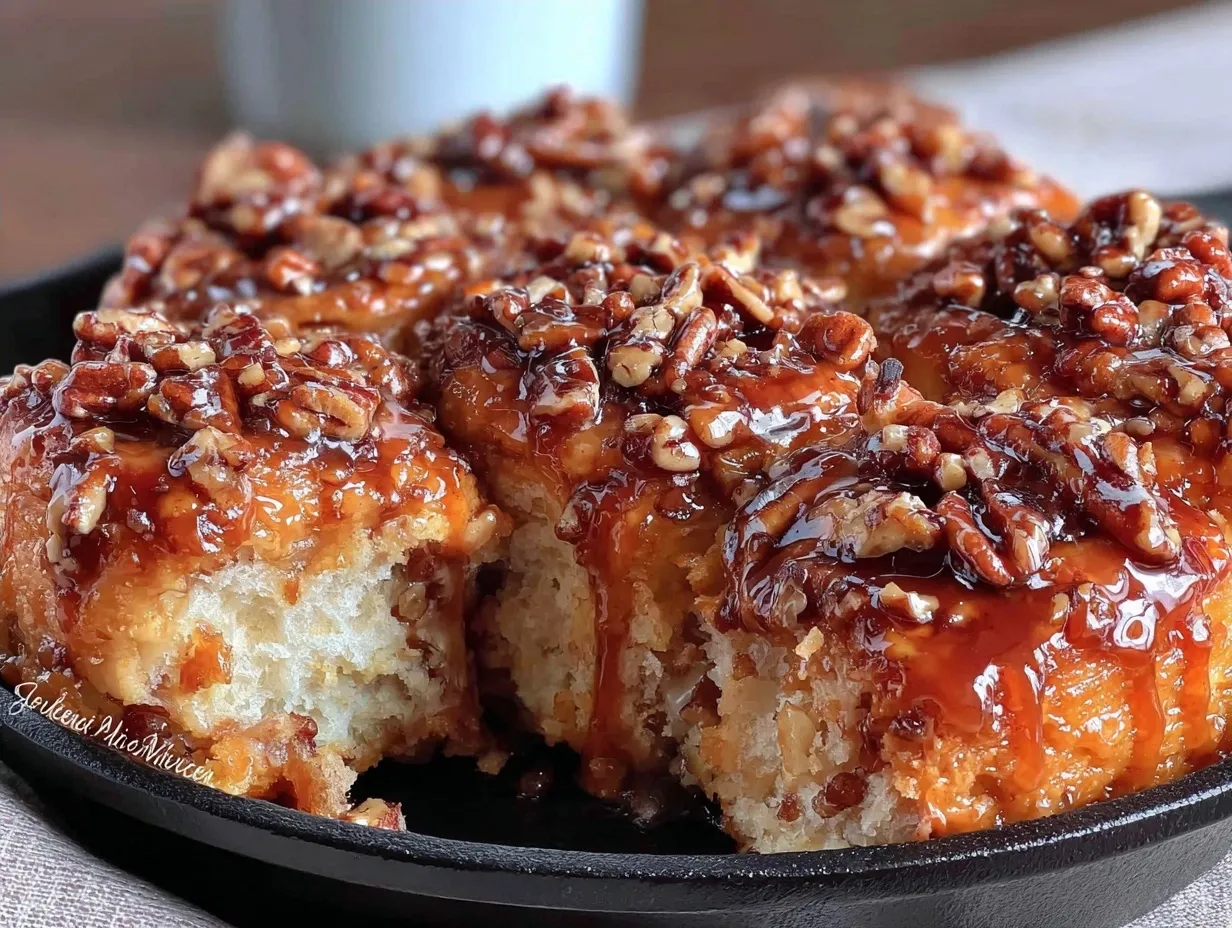
Three hours later, the smell of toasted pecans and warm cinnamon had completely taken over the house. My family walked in thinking something was burning, but then they realized it was the best thing they’d ever smelled. Those fall maple pecan sticky buns with brown butter glaze turned out to be so gooey, so rich, and so ridiculously easy to make that they became our new weekend tradition. But here’s the secret: you can make them on a weeknight too. It’s the ultimate “5 PM panic” saver that actually feels like a treat.
I’ve made these at least a dozen times since that random Tuesday. Some weekends they’re for breakfast, some nights they’re dessert, and some times they’re just “I need a hug in food form.” The best part? You only need one bowl to mix the dough. One pan to bake them. And one glaze to drizzle over the top. It’s sticky, it’s sweet, and it’s hands-down the easiest way to impress people without spending your entire day in the kitchen.
Why You’ll Love This Recipe
Look, I’m not going to lie to you. Baking can be intimidating. But this recipe? It’s different. It’s forgiving. It’s fast. And it tastes like you spent hours in a fancy bakery. Here’s why these sticky buns have completely taken over our weeknights:
One-Bowl Magic — Seriously. I mixed the entire dough in one large bowl. No stand mixer required, no fancy equipment, no flour dusting the counters everywhere. Just a whisk, a spoon, and maybe your hands. If you can mix cake batter, you can make this. I’ve even made it while helping my kid with homework. It’s that simple.
Brown Butter Glaze — This is the game-changer. Regular glaze is just sugar and milk. Brown butter glaze? That’s nutty, toasty, deep flavor that makes everyone ask, “What is this? Where did you learn to bake?” I used the same technique from my banana bread recipe because once you brown your butter, you never go back. It adds a sophisticated depth that masks the fact that you threw these together in under an hour.
Pantry-Friendly — You probably have 80% of these ingredients already. Flour, sugar, butter, eggs, milk, maple syrup, pecans. No weird specialty items. No trip to three different stores. This is the recipe you make when you’re tired and just want something sweet without the stress.
Make-Ahead Friendly — Need to prep for Sunday brunch on Saturday night? These buns rise in the fridge overnight. You pull them out in the morning, pop them in the oven, and have fresh, warm buns by the time the kids wake up. It’s the ultimate lazy parent hack.
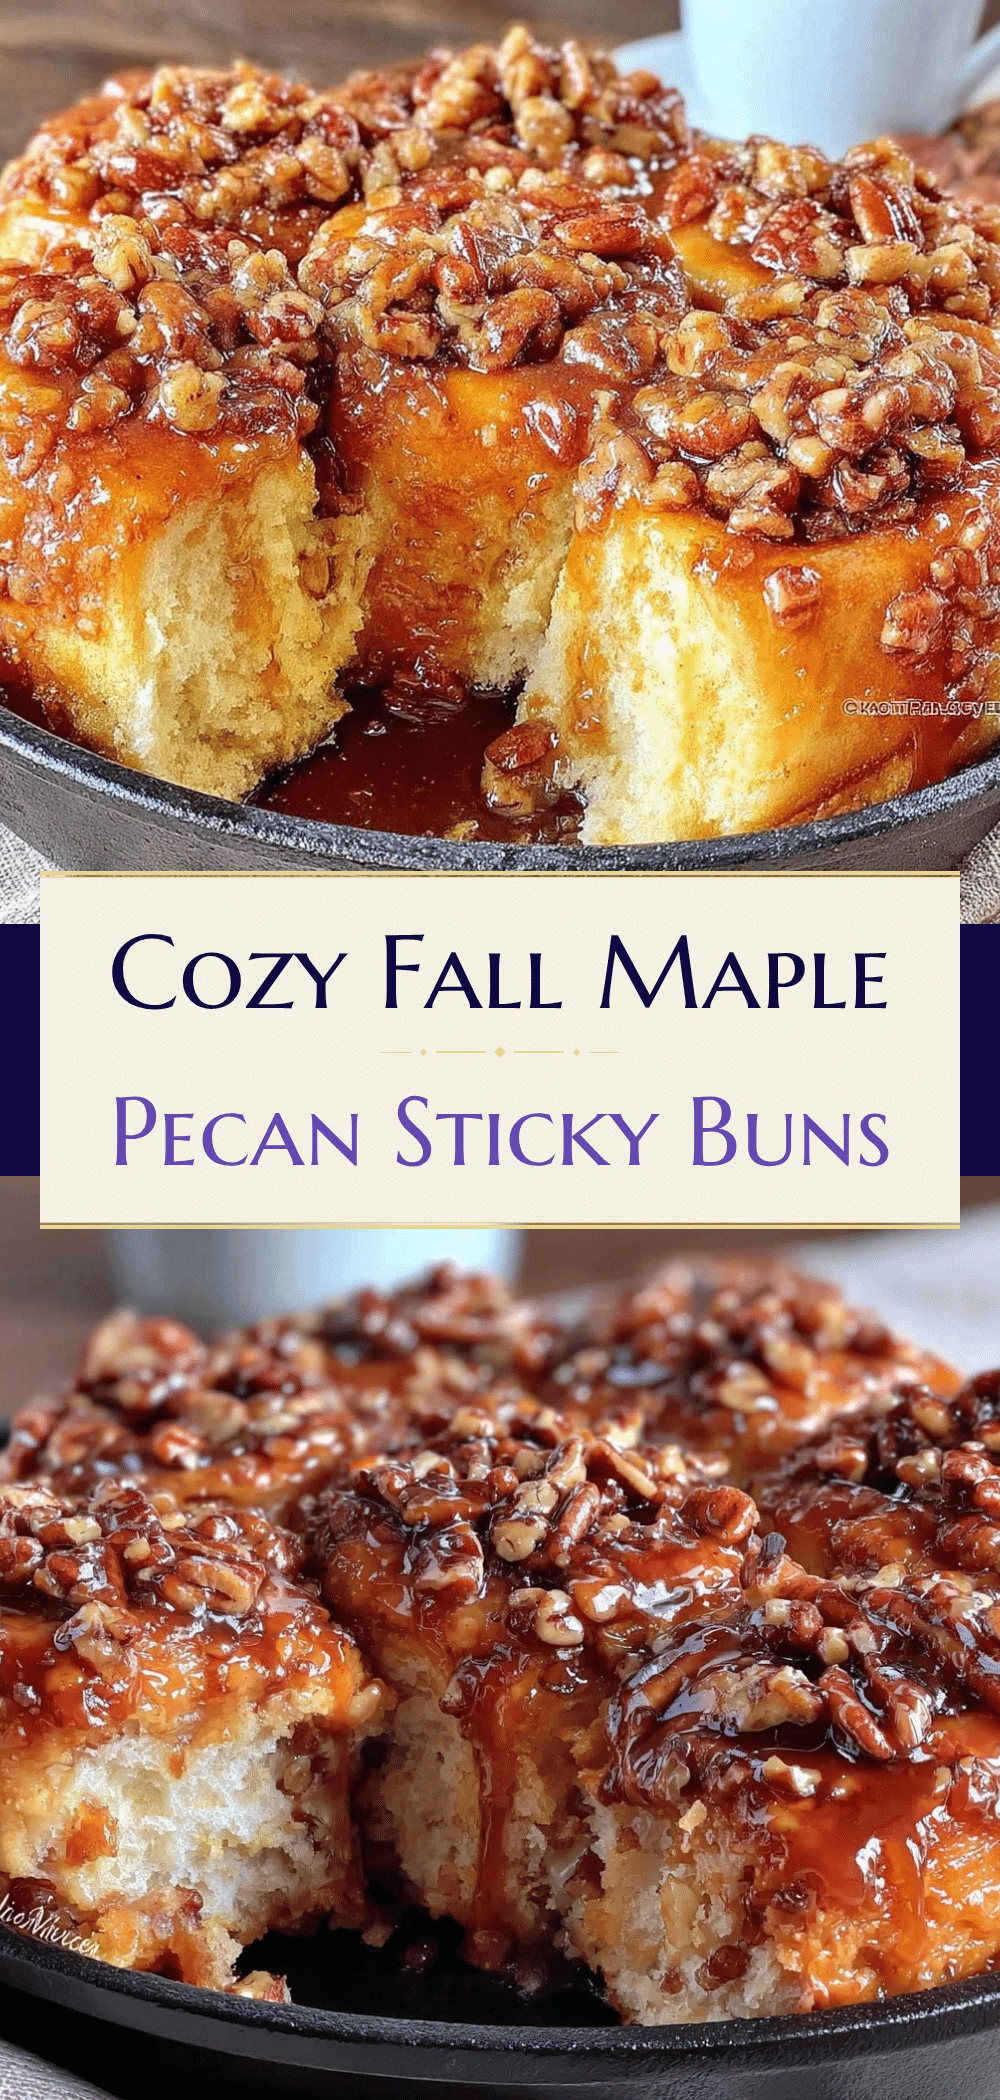
Sticky & Gooey Perfection — There’s nothing worse than a dry bun. These are soaked in a maple-pecan caramel that pools at the bottom of the pan. When you flip them out, they’re glossy, sticky, and absolutely irresistible. My kids fight over the ones with extra caramel. No shame in that game.
This is my go-to when I need dinner or breakfast to just work. No complicated techniques, no weird ingredients, just reliable, delicious food that makes everyone happy. And if you’re looking for other easy wins, check out these mini egg and cheese breakfast muffins for a savory alternative, but trust me, these sweet buns are the star.
Ingredients You’ll Need
Here’s the best part: you probably have most of this already. I’m particular about three ingredients here, and I’ll tell you exactly why. The rest is basic pantry staples.
For the Dough
All-purpose flour (3 cups / 375g) — Don’t go crazy with bread flour. You want a soft, pillowy bun, not a chewy bagel. All-purpose is perfect. Spoon it into the cup and level it off. Don’t scoop and pack, or your dough will be dense.
Granulated sugar (1/4 cup / 50g) — Just enough to feed the yeast and add a little sweetness. Don’t skip it, but don’t add more or the buns will spread too much.
Instant yeast (2 1/4 teaspoons / 1 packet) — Instant yeast is faster because you don’t need to proof it in water first. Just mix it right in. Active dry works too, but you’ll need to let it sit in warm milk for 5 minutes first. I always keep instant yeast on hand for quick wins.
Warm milk (1 cup / 240ml) — Whole milk is best for richness. Warm it until it’s luke-warm, not hot. If it’s too hot, you’ll kill the yeast. If it’s cold, the dough won’t rise. Test it with your finger—it should feel like a warm bath.
Unsalted butter (4 tablespoons / 60g, melted) — Adds softness to the crumb. Let it cool slightly before adding so you don’t cook the eggs.
Egg (1 large) — Room temperature eggs incorporate better. If you forget, just drop them in warm water for 5 minutes.
Salt (1 teaspoon) — Essential for flavor. Don’t skip it, or the buns will taste flat.
For the Filling
Unsalted butter (1/4 cup / 60g, softened) — This gets mixed with brown sugar to create the sticky layer. Softened is key so it spreads evenly.
Brown sugar (1 cup / 200g) — Light or dark doesn’t matter much, but dark has a deeper molasses flavor. I use dark for that rich, caramel taste.
Ground cinnamon (2 teaspoons) — Don’t use old cinnamon. If it’s been sitting in your cabinet for two years, toss it and buy fresh. The smell should be strong and spicy.
Chopped pecans (1 cup / 120g) — Toast them first if you have time (5 minutes in a dry pan), but raw works too. I chop them roughly—some big pieces, some small. Texture is everything.
For the Brown Butter Glaze
Unsalted butter (1/4 cup / 60g) — This is where you brown the butter. Watch it closely. It goes from perfect to burnt in seconds.
Powdered sugar (1 1/2 cups / 180g) — Sifted if you can. Clumps in powdered sugar are the worst. A fine glaze looks professional.
Maple syrup (2 tablespoons / 30ml) — Real maple syrup, not pancake syrup. The kind with “pure” on the label. It adds that distinct fall flavor.
Vanilla extract (1 teaspoon) — Enhances the sweetness. Pure vanilla only, please.
Pinch of salt — Balances the sweetness. Don’t skip it.
Equipment Needed
You don’t need fancy equipment for this. Here’s what I actually use:
Large mixing bowl — I use a 6-quart bowl. It needs to fit all the flour and dough without spilling when you mix. My ancient stainless steel bowl from college still works fine.
9×13 inch baking pan — Glass or metal works. I prefer glass because it browns the bottom nicely. Grease it well—this stuff sticks.
Whisk — For mixing the dough. A wooden spoon works too, but a whisk is faster for incorporating the flour.
Small saucepan — For browning the butter. Non-stick is easiest because you can see the color change clearly.
Pastry brush — Optional, but helpful for brushing melted butter on the dough before sprinkling the filling. Or just use your fingers.
Sharp knife or bench scraper — For cutting the buns. A sharp knife gives cleaner cuts than a dull one.
Measuring cups and spoons — Pretty standard stuff. Dollar store versions work fine, but be accurate with flour.
Cooling rack — For letting the buns cool slightly before glazing. If they’re too hot, the glaze melts into the buns. If they’re too cold, the glaze doesn’t stick. Aim for warm.
How to Make It: Step-by-Step
Alright, let’s make this! I’m walking you through exactly how I do it, including the little tricks I’ve picked up.
Step 1: Mix the Dough (5 minutes)
In your large bowl, whisk together the flour, sugar, instant yeast, and salt. Make a well in the center. Pour in the warm milk, melted butter, and egg. Mix with a wooden spoon or stand mixer on low until a shaggy dough forms. Knead it for 5-7 minutes until smooth and elastic. It should feel soft but not sticky. If it’s too sticky, add a tablespoon of flour. If it’s too dry, add a tablespoon of milk.
Step 2: First Rise (30 minutes)
Place the dough in a lightly greased bowl, cover with plastic wrap or a damp towel, and let it rise in a warm spot for 30 minutes. It doesn’t need to double in size—just puff up a bit. This is the “quick rise” version, so don’t wait an hour. We’re keeping it simple.
Step 3: Prep the Pan and Filling (10 minutes)
While the dough rises, melt the 1/4 cup butter for the filling. Mix it with the brown sugar, cinnamon, and chopped pecans in a small bowl. Grease your 9×13 pan generously with butter or non-stick spray. This is crucial—sticky buns will stick if you don’t prep the pan well.
Step 4: Shape the Buns (10 minutes)
Punch down the risen dough and roll it out on a floured surface into a 12×16 inch rectangle. Spread the butter-brown sugar mixture evenly over the dough, leaving a small border at the edges. Roll the dough tightly from the long end, like a jelly roll. Pinch the seam to seal. Cut into 12 equal slices. Place them cut-side up in the prepared pan, spacing them about 1 inch apart.
Step 5: Second Rise (20 minutes)
Cover the pan again and let the buns rise for 20 minutes. They should look puffy and touch each other. Preheat your oven to 350°F (175°C) during the last 10 minutes of rising.
Step 6: Bake (25 minutes)
Bake for 25-30 minutes until golden brown. If the tops are browning too fast, cover loosely with foil after 15 minutes. The buns are done when they’re firm to the touch and the center reaches 190°F if you have a thermometer.
Step 7: Make the Glaze and Finish
While the buns bake, brown your butter for the glaze. Melt the butter in a small saucepan over medium heat. Swirl occasionally until it turns amber and smells nutty. Watch closely—it burns fast. Remove from heat and let cool for 2 minutes. Whisk in the powdered sugar, maple syrup, vanilla, and salt until smooth.
Let the buns cool in the pan for 5 minutes. Then, run a knife around the edges and invert onto a serving platter. Drizzle the warm brown butter glaze over the top. Serve warm.
Total Time: About 1 hour 30 minutes (mostly hands-off)
Expert Tips & Tricks
Here’s everything I’ve learned from making this dozens of times. These tips will save you from my mistakes.
Brown Butter Carefully
This is the #1 tip. Brown butter smells amazing but turns to smoke if you look away. Use a light-colored pan so you can see the color change. Look for brown bits at the bottom—that’s where the flavor is. Remove from heat immediately when you see it.
Don’t Over-Knead
If you’re using a stand mixer, stop as soon as the dough is smooth. Over-kneading develops too much gluten, making the buns tough. You want tender, not chewy.
Room Temperature Ingredients
Ensure your milk and butter are room temperature. Cold ingredients can shock the yeast and slow down the rise. It’s a small thing, but it makes a big difference in texture.
Grease the Pan Well
I cannot stress this enough. Grease the pan, then add a little extra butter or sugar to the bottom for extra caramelization. These buns are sticky by design, but you don’t want them stuck to the pan.
Glaze While Warm
Apply the glaze when the buns are warm, not hot. If they’re too hot, the glaze melts into the dough. If they’re cold, the glaze won’t stick. Warm is the sweet spot.
Variations & Substitutions
Once you’ve nailed the basic version, here’s how you can mix it up. I’ve tried all of these.
Maple Pecan Variation
Add a pinch of nutmeg to the filling for extra warmth. It pairs beautifully with the maple glaze.
Walnut Swap
Not a fan of pecans? Walnuts work just as well. Toast them first for extra flavor.
Gluten-Free
Use a 1:1 gluten-free flour blend. The texture will be slightly denser, but still delicious. Add an extra teaspoon of xanthan gum if your blend doesn’t have it.
Dairy-Free
Use plant-based milk and dairy-free butter. The glaze can be made with coconut cream instead of butter, but it won’t have the nutty brown butter flavor.
Mini Buns
Divide the dough into smaller rolls and bake in a muffin tin. They’ll bake faster (15-18 minutes). Great for portion control.
Serving & Storage
How to Serve:
I usually serve these straight from the pan at the breakfast table—they look rustic and stay warm. But here are other ways I’ve enjoyed them:
Side Dishes:
Crisp bacon or sausage links
A simple fruit salad with berries
Coffee or hot chocolate (obviously)
Storage Instructions:
Refrigerator:
Store leftovers in an airtight container for up to 3 days. The glaze will harden slightly in the fridge. Reheat in the microwave for 20 seconds to soften.
Freezing:
These freeze well! Bake them, let them cool completely, then wrap tightly in plastic wrap and foil. Freeze for up to 2 months. Thaw at room temperature and reheat in the oven at 350°F for 10 minutes.
Pro Tip:
If you have leftover glaze, store it in the fridge. It hardens up, but you can microwave it for 10 seconds to soften it again. Don’t waste that good brown butter flavor!
Nutrition Information
I’m not a nutritionist, but here’s the breakdown if you’re tracking.
Per Serving (based on 12 buns):
- Calories: 380
- Protein: 6g
- Carbs: 52g
- Fiber: 2g
- Sugar: 28g
- Fat: 16g
- Saturated Fat: 8g
- Cholesterol: 35mg
- Sodium: 220mg
What’s Good:
Decent protein from the eggs and flour. Pecans add healthy fats and fiber.
What to Know:
Higher in sugar from the glaze and filling. This is a treat, not a health food. Enjoy in moderation!
Final Thoughts
So that’s my go-to fall maple pecan sticky buns with brown butter glaze! I’ve probably talked your ear off at this point, but when you make a recipe this often, you have a lot to say about it.
This has saved weeknight dinners more times than I can count. It’s my answer to “what’s for dinner” when I’m tired, don’t want takeout, and still want something that tastes really good. My kids are happy, my husband’s happy, and I’m happy because I’m not stressed about cooking.
Make it yours! Try different nuts, swap the maple syrup for honey, or add a splash of bourbon to the glaze. The best recipes are the ones you adapt to your family’s tastes.
If you make this, drop a comment and let me know what you think! I love hearing how recipes turn out in your kitchen. And if something doesn’t work, tell me that too—I’m here to help troubleshoot.
Happy cooking! And I hope your kitchen smells half as good as mine does right now.
Frequently Asked Questions
Can I use active dry yeast instead of instant yeast?
Yes! You’ll need to dissolve it in the warm milk with a teaspoon of sugar and let it sit for 5-10 minutes until foamy. Then proceed with the recipe. It just adds one extra step.
Why did my buns turn out dense?
Usually, this means the yeast was dead (milk was too hot) or the dough was over-kneaded. Make sure your milk is luke-warm, not hot. Also, don’t knead for more than 7 minutes.
Can I make these ahead for a dinner party?
Absolutely. Let the dough rise, shape the buns, and then refrigerate them overnight. In the morning, let them come to room temperature and rise for 1-2 hours before baking. This is my favorite way to prep for guests.
Can I freeze the glaze?
It’s better to make the glaze fresh. Brown butter glaze can separate if frozen and thawed. But you can freeze the baked buns and add fresh glaze when you reheat them.
What if I don’t have a 9×13 pan?
You can use two 8-inch round pans or a 9×9 square pan. Adjust baking time accordingly—they’ll bake faster in smaller pans. Keep an eye on them after 20 minutes.
Can I use raw pecans?
Yes, but toasting them first brings out their flavor. I toast them in a dry pan for 5 minutes until fragrant. It’s worth the extra minute.
How do I store leftovers?
Store in an airtight container at room temperature for up to 2 days. In the fridge for up to 4 days. Reheat in the microwave for 20 seconds to soften the glaze.
Pin This Recipe!
Fall Maple Pecan Sticky Buns: Easy 1-Bowl Dinner
- Total Time: 1 hour 30 minutes
- Yield: 12 servings 1x
Description
These fall maple pecan sticky buns with brown butter glaze are a forgiving, one-bowl recipe that yields gooey, rich buns perfect for breakfast, dessert, or a weeknight treat. They are pantry-friendly, make-ahead capable, and require minimal equipment.
Ingredients
- 3 cups (375g) all-purpose flour
- 1/4 cup (50g) granulated sugar
- 2 1/4 teaspoons (1 packet) instant yeast
- 1 cup (240ml) warm whole milk
- 4 tablespoons (60g) unsalted butter, melted
- 1 large egg, room temperature
- 1 teaspoon salt
- 1/4 cup (60g) unsalted butter, softened (for filling)
- 1 cup (200g) brown sugar
- 2 teaspoons ground cinnamon
- 1 cup (120g) chopped pecans
- 1/4 cup (60g) unsalted butter (for glaze)
- 1 1/2 cups (180g) powdered sugar, sifted
- 2 tablespoons (30ml) pure maple syrup
- 1 teaspoon vanilla extract
- Pinch of salt
Instructions
- In a large bowl, whisk together flour, sugar, instant yeast, and salt. Make a well in the center.
- Pour in warm milk, melted butter, and egg. Mix with a wooden spoon or stand mixer on low until a shaggy dough forms.
- Knead the dough for 5-7 minutes until smooth and elastic. If too sticky, add flour; if too dry, add milk.
- Place dough in a lightly greased bowl, cover, and let rise in a warm spot for 30 minutes until puffy.
- While dough rises, mix softened butter, brown sugar, cinnamon, and chopped pecans in a small bowl.
- Grease a 9×13 inch baking pan generously.
- Punch down risen dough and roll out on a floured surface into a 12×16 inch rectangle.
- Spread the butter-brown sugar mixture evenly over the dough, leaving a border at the edges.
- Roll dough tightly from the long end like a jelly roll. Pinch seam to seal.
- Cut into 12 equal slices and place cut-side up in the prepared pan, spacing 1 inch apart.
- Cover pan and let buns rise for 20 minutes until puffy and touching.
- Preheat oven to 350°F (175°C) during the last 10 minutes of rising.
- Bake for 25-30 minutes until golden brown. Cover loosely with foil if tops brown too quickly.
- While buns bake, brown 1/4 cup butter in a small saucepan over medium heat until amber and nutty. Remove from heat and cool for 2 minutes.
- Whisk browned butter, powdered sugar, maple syrup, vanilla, and pinch of salt until smooth.
- Let buns cool in pan for 5 minutes, then invert onto a serving platter.
- Drizzle warm brown butter glaze over the top and serve warm.
Notes
Brown butter carefully as it burns quickly. Use light-colored pans to monitor color change. Ensure milk is lukewarm, not hot, to avoid killing yeast. Grease the pan well to prevent sticking. Glaze buns while warm, not hot, for best adhesion. Can be made ahead and refrigerated overnight before baking.
- Prep Time: 45 minutes
- Cook Time: 25 minutes
- Category: Breakfast
- Cuisine: American
Nutrition
- Serving Size: 1 bun
- Calories: 380
- Sugar: 28
- Sodium: 220
- Fat: 16
- Saturated Fat: 8
- Carbohydrates: 52
- Fiber: 2
- Protein: 6
Keywords: sticky buns, maple pecan buns, brown butter glaze, one bowl recipe, fall baking, easy breakfast, weeknight dinner, make ahead buns