I was standing in my kitchen at 5:03 PM, staring into the open refrigerator like it held the secrets to the universe. It didn’t. It held a half-empty carton of milk, some sad spinach, and a package of chicken thighs that had been in there since Tuesday. I was exhausted. I didn’t want to order takeout because I knew the pizza would arrive lukewarm and cost me twenty bucks. I didn’t want to chop vegetables because my brain was mush. I just wanted hot, crispy, delicious chicken. Something that tasted like I’d spent an hour in the kitchen, but actually took twenty minutes.
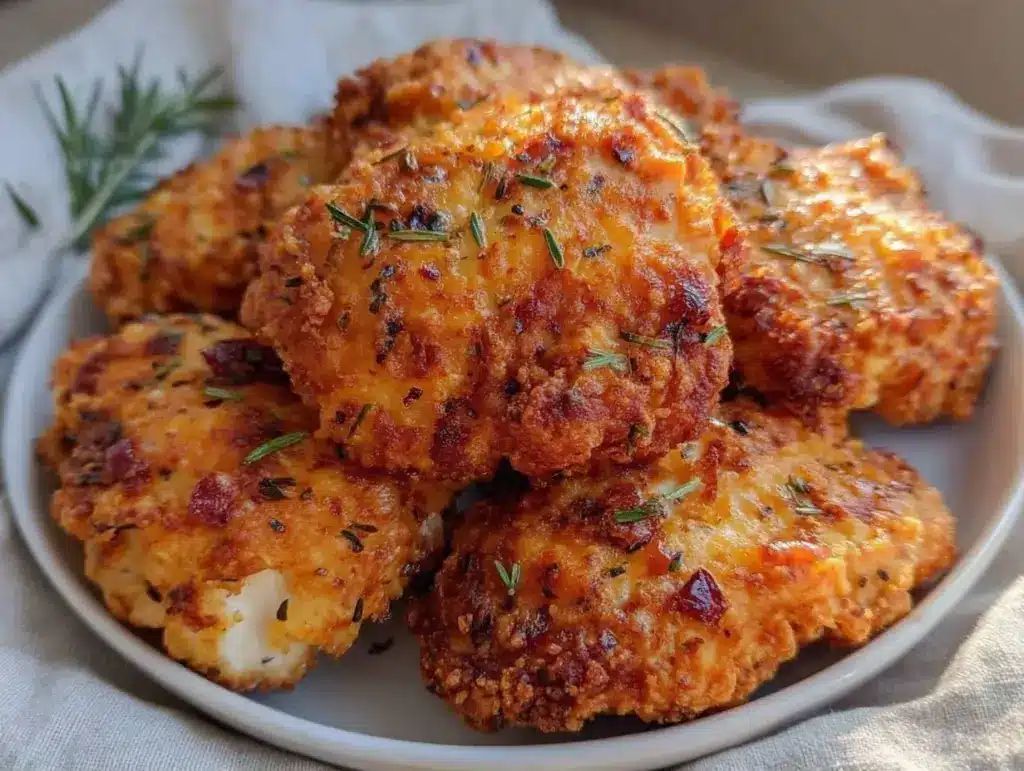
That’s when I decided to make this extra-crispy oven-fried chicken with buttermilk marinade. And honestly? It’s become my absolute savior. I’ve made it at least three times this week alone. It’s the answer to “5pm and nothing planned” when you’re too tired to think but too hungry to compromise. You get that crackling, golden crust you usually only find in a deep fryer, but without the grease, the mess, or the thirty minutes of standing over a splattering pot of oil. It’s in the oven. It’s hands-off. And the buttermilk? That’s the secret weapon that makes the meat tender and the coating stick like glue.
If you’ve ever felt trapped by the dinner-time clock, you need this recipe in your rotation. It’s simple, it’s forgiving, and it tastes incredible. Let me walk you through exactly how I do it, so you can stop stressing and start eating.
Why You’ll Love This Recipe
I know what you’re thinking. “Oven-fried chicken? Isn’t that just dry baked chicken?” No. Not this. This is different. This is the good stuff. Here’s why this recipe has completely changed our weeknight dinners:
Stupid Simple Prep — Seriously, if you can dump ingredients in a bowl, you can make this. I marinate the chicken for ten minutes (while I’m on the phone or folding laundry), then toss it in crumbs. That’s it. No fancy techniques, no culinary school required.
Actual Crispiness — Most oven chicken recipes leave you with soggy breading. Not this one. By using a specific ratio of panko breadcrumbs and a little baking powder, the coating gets shatteringly crisp. I’ve had guests ask if I ordered from a restaurant. (I didn’t. It’s from my oven.)
One Pan, Zero Stress — You line a baking sheet with foil and parchment. You bake. You peel off the foil and toss it in the trash. That is the entire cleanup process. I love that. It’s one of those recipes where the cleanup is easier than the cooking.
Buttermilk Magic — I used to skip the marinade because it felt like extra work. Big mistake. The acid in the buttermilk breaks down the chicken fibers, making it juicy and tender, while also helping the breading adhere. It’s non-negotiable now. I keep a carton in the fridge specifically for this.
Family-Approved — My kids, who usually pick at dinner, devour this. It reminds them of nuggets but feels like “real” chicken. It’s a win-win. Plus, it pairs perfectly with sides like my loaded bacon ranch potato salad for a full meal that feels indulgent but comes together in no time.
Ingredients You’ll Need
Here’s the best part: you probably have most of this already. It’s pantry-friendly, with just a couple of key items you might need to grab. I’m particular about a few things here, and I’ll tell you exactly why.
For the Marinade
Buttermilk (2 cups / 480ml) — This is the star. Don’t substitute milk with lemon juice if you can help it; real buttermilk has the right tang and thickness. I buy the cheap carton. It doesn’t matter. Just make sure it’s cold.
Hot Sauce (2 tablespoons) — I use Frank’s RedHot or any cayenne-based sauce. You don’t want it to taste spicy, just a little kick. It adds depth to the marinade. If you’re sensitive to heat, use 1 tablespoon, but don’t skip it entirely.
Egg (1 large) — Helps bind the marinade. Whisk it into the buttermilk before adding the chicken.
Garlic Powder (1 teaspoon) — I use powder here, not fresh. Fresh garlic burns in the oven. Powder distributes evenly.
Onion Powder (1 teaspoon) — Adds that savory backbone without the texture.
Salt and Black Pepper (1 teaspoon each) — Season the marinade well. The chicken needs flavor from the inside out.
For the Coating
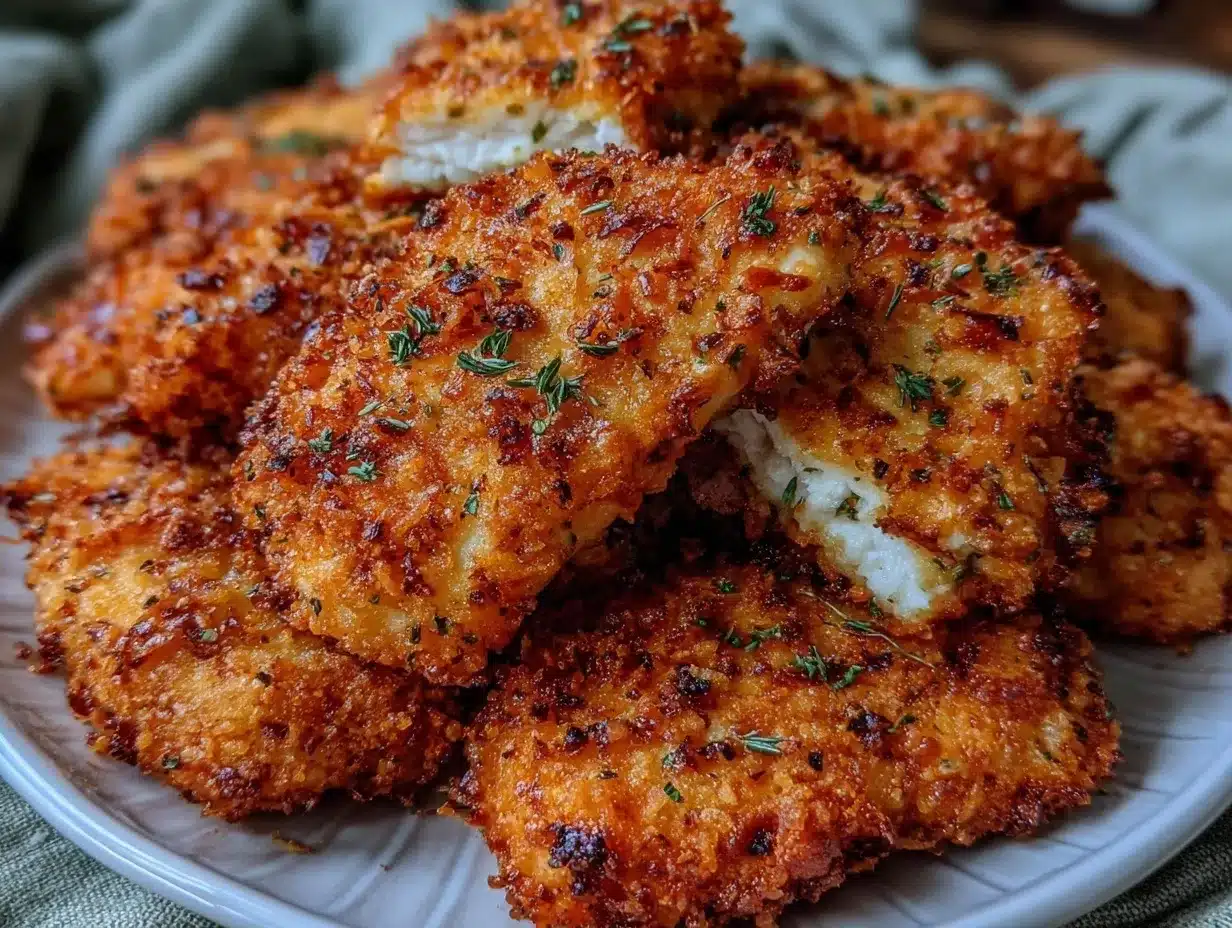
Panko Breadcrumbs (2 cups / 160g) — This is crucial. Regular breadcrumbs are too fine and dense. Panko creates those big, airy, crispy flakes. I always buy the Japanese-style panko. It’s worth the extra dollar.
All-Purpose Flour (½ cup / 60g) — This acts as a glue between the chicken and the crumbs. Don’t skip it.
Baking Powder (1 teaspoon) — The secret ingredient. It helps the coating puff up slightly and stay crisp. It’s a game-changer for oven frying.
Spices (2 teaspoons total) — I use a mix of paprika, garlic powder, onion powder, and dried thyme. Or just use 2 teaspoons of your favorite seasoned salt. Keep it simple.
Cooking Spray or Melted Butter — You need to coat the tops of the chicken to help them brown. I use non-stick cooking spray for ease, but melted butter tastes richer. Your call.
Equipment Needed
You don’t need fancy equipment for this. Here’s what I actually use.
Baking Sheet — A standard half-sheet pan. I use one that’s big enough to hold all the chicken pieces in a single layer. Crowding the pan steams the chicken instead of frying it. Don’t crowd it.
Aluminum Foil & Parchment Paper — Line the pan with foil first, then parchment. The foil catches the drips, and the parchment prevents sticking. Cleanup is literally peeling and tossing.
Three Shallow Bowls — One for the buttermilk marinade, one for the flour, and one for the panko mixture. You can use pie plates or shallow dishes to make dipping easier.
Tongs — For flipping the chicken. Forks can puncture the breading, so tongs are better.
Wire Rack (Optional but Nice) — If you have a wire rack that fits in your baking sheet, use it. It allows air to circulate underneath, making the bottom crispier too. If you don’t have one, just bake directly on the parchment.
How to Make It: Step-by-Step
Alright, let’s make this! I’m walking you through exactly how I do it, including the little tricks I’ve picked up over time.
Step 1: Marinate the Chicken (10 minutes)
Whisk together the buttermilk, egg, hot sauce, garlic powder, onion powder, salt, and pepper in a large bowl. Toss in your chicken pieces (I use bone-in, skin-on thighs for maximum flavor, but breasts work too). Make sure they’re fully submerged. If you have time, let them sit for 30 minutes to overnight. But if you’re rushing? Ten minutes is fine. The acid works fast. I usually do this while I’m chopping veggies for after-school hummus and veggie dippers or just waiting for the oven to preheat.
Step 2: Prep the Coating (5 minutes)
Preheat your oven to 400°F (200°C). Line your baking sheet with foil and parchment. In a shallow bowl, mix the flour, baking powder, paprika, garlic powder, onion powder, thyme, salt, and pepper. In another bowl, pour in the panko breadcrumbs. Keep them separate for now.
Step 3: The Dredge (10 minutes)
Take a piece of chicken out of the buttermilk, letting the excess drip off. Dredge it in the flour mixture, shaking off any excess. This first layer is crucial for adhesion. Then, press it firmly into the panko breadcrumbs. Press! You want the crumbs to stick. Don’t just roll it; press them on. Place the coated chicken on the prepared baking sheet, leaving space between each piece.
Step 4: The Crisp Coat (2 minutes)
Lightly spray the tops of the chicken with cooking spray, or brush with melted butter. This helps them brown in the oven. I find that spraying evenly is key. If some parts look dry, spray those spots again.
Step 5: Bake (35-40 minutes)
Place the chicken in the oven. Bake for 35-40 minutes, flipping halfway through. You want the internal temperature to reach 165°F (74°C). The coating should be golden brown and crispy. If it’s browning too fast, cover loosely with foil. If it’s not crispy enough, broil for the last 1-2 minutes, but watch it like a hawk. It goes from golden to burnt in seconds.
Step 6: Rest and Serve (5 minutes)
Let the chicken rest for 5 minutes before serving. This keeps the juices inside. If you cut into it immediately, all that goodness runs out. Serve hot with your favorite sides.
Expert Tips & Tricks
Here’s everything I’ve learned from making this dozens of times. These tips will save you from my mistakes.
Don’t Skip the Resting Time — I know it’s tempting to dig in, but resting allows the juices to redistribute. The chicken stays juicier. Trust me.
Use Bone-In, Skin-On Thighs — They’re more forgiving. Breast meat dries out easily in the oven. Thighs have more fat, so they stay moist even if you overcook them by a few minutes. If you use breasts, pound them to an even thickness so they cook uniformly.
Flatten the Chicken — If you’re using breasts, pound them flat. Uneven chicken cooks unevenly. You’ll end up with some dry pieces and some raw spots. Flatten them to about ½-inch thickness.
Double the Panko — If you want extra crunch, press the chicken into the panko twice. Dip in buttermilk, then panko, then buttermilk again, then panko. It creates a thicker, crispier shell. It’s a bit more work, but worth it for company.
Keep the Oven Door Closed — Every time you open the oven, you lose heat. The chicken needs consistent heat to crisp up. Try to wait until the halfway point to flip.
Cleanup Hack — Line your baking sheet with foil, then parchment. After baking, let it cool slightly, peel off the parchment, crumple it up, and toss it. The foil catches the grease. Wipe the pan with a paper towel. Done. No scrubbing.
Variations & Substitutions
Once you’ve nailed the basic version, here’s how you can mix it up. I’ve tried all of these.
Spicy Buffalo — Add 4 tablespoons of hot sauce to the marinade and mix 2 tablespoons into the panko. Serve with blue cheese dressing. This is a crowd-pleaser for game nights.
Herb Lemon — Swap the paprika for lemon zest and fresh parsley in the panko. Bright and fresh. Great for spring.
Gluten-Free — Use gluten-free panko and gluten-free flour. Many brands make great GF panko now. It crisps up just as well.
Dairy-Free — Use coconut milk instead of buttermilk. It won’t be as tangy, but it works. Or use a dairy-free buttermilk substitute. The coating stays crispy.
Korean Style — Mix gochujang paste into the buttermilk marinade. Sweet, spicy, and savory. Serve with sesame seeds on top.
Serving & Storage
I usually serve this straight from the oven at the dinner table—it looks rustic and stays warm. But here are other ways I’ve enjoyed it:
Side Dishes — It pairs perfectly with back-to-school blueberry banana smoothies for a light breakfast the next day, or for dinner, try frozen yogurt berry bites as a dessert. For sides, roasted broccoli, mashed potatoes, or a simple green salad with balsamic vinaigrette works great.
Toppings Bar — When I have guests, I put out: extra hot sauce, ranch dressing, lemon wedges, and fresh parsley. Everyone customizes their bowl.
Refrigerator — Store in an airtight container for up to 3 days. The coating will soften slightly, but it’s still good.
Reheating — Best method: Oven or air fryer at 375°F for 10 minutes. This restores the crispiness. Microwave method: It will get soggy. Only do this in a pinch. If you microwave, put a paper towel under the chicken to absorb moisture.
Freezing — You can freeze the cooked chicken, but the texture changes. It’s best eaten fresh. If you must freeze, freeze the uncooked coated chicken on a baking sheet, then transfer to a bag. Bake from frozen, adding 10 minutes to the cook time.
Nutrition Information
I’m not a nutritionist, but here’s the breakdown if you’re tracking. Per serving (based on 4 servings, using thighs):
- Calories: 450
- Protein: 35g
- Carbs: 30g
- Fiber: 2g
- Fat: 18g
- Saturated Fat: 5g
- Sodium: 600mg
It’s higher in sodium due to the seasoning and buttermilk, but the protein content is great. If you want to lighten it up, use breast meat and less oil spray. But honestly? It’s comfort food. Enjoy it.
Final Thoughts
So that’s my go-to extra-crispy oven-fried chicken! I’ve probably talked your ear off at this point, but when you make a recipe this often, you have a lot to say about it. This has saved weeknight dinners more times than I can count. It’s my answer to “what’s for dinner” when I’m tired, don’t want takeout, and still want something that tastes really good. My kids are happy, my husband’s happy, and I’m happy because I’m not stressed about cooking.
Make it yours! Try different spices, swap in your favorite vegetables, adjust the heat. The best recipes are the ones you adapt to your family’s tastes. If you make this, drop a comment and let me know what you think! I love hearing how recipes turn out in your kitchen. And if something doesn’t work, tell me that too—I’m here to help troubleshoot.
Happy cooking! And I hope your kitchen smells half as good as mine does right now.
Frequently Asked Questions
Can I use chicken breasts instead of thighs?
Yes, but be careful. Breast meat dries out faster. Pound them to an even thickness so they cook uniformly. Check the temperature early—you want 165°F, not higher. Thighs are more forgiving because of the higher fat content.
Why is my coating soggy?
Usually, this means the oven wasn’t hot enough, or the chicken was crowded on the pan. Make sure your oven is fully preheated to 400°F. Also, don’t stack the chicken. Air needs to circulate around each piece to crisp the coating.
Can I make this ahead of time?
You can marinate the chicken overnight, which actually improves the flavor. But coat the chicken right before baking. If you coat it ahead and let it sit, the breadcrumbs will get soggy from the moisture.
What if I don’t have panko?
You can use regular breadcrumbs, but the texture won’t be as crispy. To compensate, mix in some crushed cornflakes or rice cereal for extra crunch. It’s not the same, but it works.
How do I know when the chicken is done?
Use a meat thermometer. Insert it into the thickest part of the meat, avoiding the bone. It should read 165°F (74°C). If you don’t have a thermometer, cut into the thickest piece. The juices should run clear, not pink.
Can I air fry this?
Yes! Air fry at 375°F for 15-20 minutes, flipping halfway. It cooks faster and gets even crispier. Keep an eye on it so the crumbs don’t burn.
Is buttermilk essential?
For the best texture and flavor, yes. The acid tenderizes the meat and helps the breading stick. If you’re out, you can make a substitute: add 1 tablespoon of lemon juice or vinegar to 1 cup of milk. Let it sit for 5 minutes until it curdles slightly. It won’t be as tangy, but it works in a pinch.
Pin This Recipe!

Extra-Crispy Oven-Fried Chicken: Easy 5pm Weeknight Dinner
- Total Time: 65 minutes
- Yield: 4 servings 1x
Description
This extra-crispy oven-fried chicken features a buttermilk marinade and panko coating for a crackling, golden crust without the grease of deep frying. It is a simple, hands-off weeknight dinner that delivers restaurant-quality results in under 30 minutes.
Ingredients
- 2 cups buttermilk
- 2 tablespoons hot sauce (e.g., Frank’s RedHot)
- 1 large egg
- 1 teaspoon garlic powder
- 1 teaspoon onion powder
- 1 teaspoon salt
- 1 teaspoon black pepper
- 2 cups panko breadcrumbs
- 1/2 cup all-purpose flour
- 1 teaspoon baking powder
- 2 teaspoons mixed spices (paprika, garlic powder, onion powder, dried thyme) or seasoned salt
- Cooking spray or melted butter
Instructions
- Whisk together buttermilk, egg, hot sauce, garlic powder, onion powder, salt, and pepper in a large bowl.
- Toss chicken pieces into the marinade, ensuring they are fully submerged. Let sit for at least 10 minutes (or up to overnight).
- Preheat oven to 400°F (200°C). Line a baking sheet with aluminum foil and parchment paper.
- In a shallow bowl, mix flour, baking powder, paprika, garlic powder, onion powder, thyme, salt, and pepper.
- In a separate shallow bowl, pour in panko breadcrumbs.
- Remove a chicken piece from the marinade, letting excess drip off. Dredge in the flour mixture, shaking off excess.
- Press the chicken firmly into the panko breadcrumbs to ensure coating adheres.
- Place coated chicken on the prepared baking sheet, leaving space between pieces.
- Lightly spray tops with cooking spray or brush with melted butter.
- Bake for 35-40 minutes, flipping halfway through, until internal temperature reaches 165°F (74°C).
- Let chicken rest for 5 minutes before serving.
Notes
For extra crispiness, double-dip the chicken in buttermilk and panko. Use bone-in, skin-on thighs for juiciness, or pound breasts to even thickness. Do not crowd the pan. Resting the chicken is crucial for juicy results.
- Prep Time: 25 minutes
- Cook Time: 40 minutes
- Category: Main Course
- Cuisine: American
Nutrition
- Serving Size: 1 piece of chicken
- Calories: 450
- Sodium: 600
- Fat: 18
- Saturated Fat: 5
- Carbohydrates: 30
- Fiber: 2
- Protein: 35
Keywords: oven fried chicken, crispy chicken, weeknight dinner, buttermilk chicken, panko chicken, easy chicken recipe, healthy fried chicken