It was 5:15 PM on a Tuesday, and I was staring into the abyss of my refrigerator. You know that look. The door light flickers on, revealing a sad container of leftover takeout, three wilting carrots, and a package of chicken thighs that have been sitting in there since Sunday. My stomach growled, my husband was already asking “what’s for dinner?” in that tone that suggests he’s giving me a five-minute warning, and I had zero energy to start chopping, peeling, or preheating a massive oven.
Usually, this is the moment I cave. I’d pull out the phone, order pizza, and eat standing over the sink while washing dishes. But last week, I refused. I grabbed those chicken thighs and my air fryer. I didn’t have time to marinate. I didn’t have time to worry about oil splatter or a greasy stove. I just needed crispy, flavorful chicken that would make my family think I’d planned ahead, even though I hadn’t.
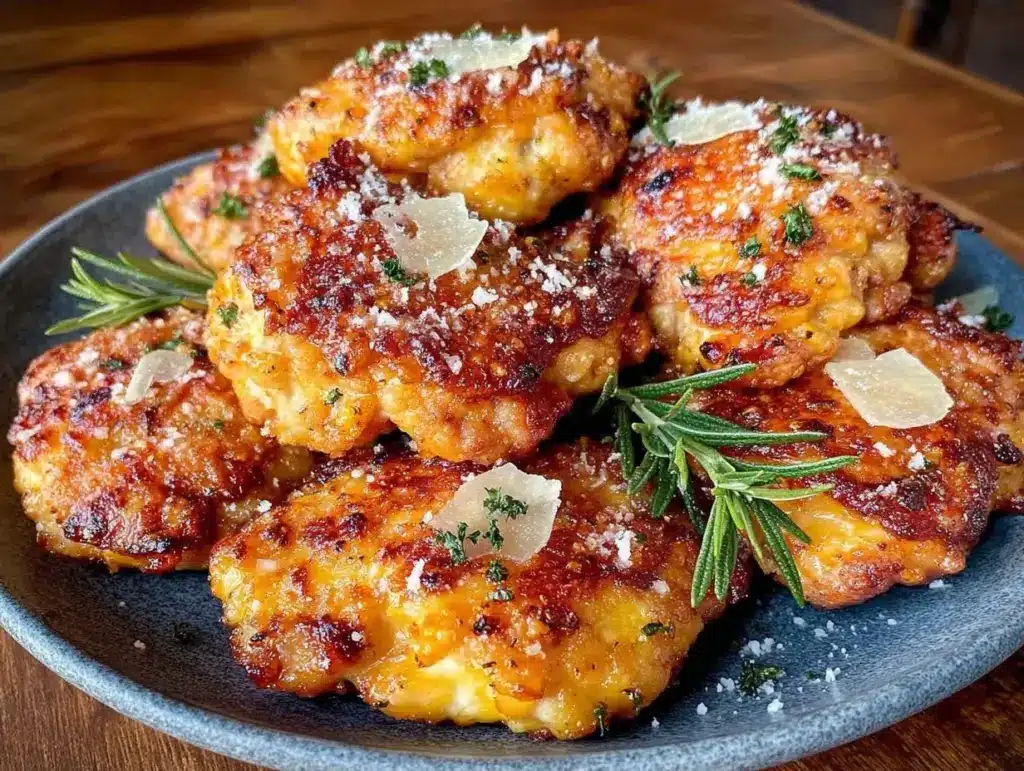
That’s when I threw together these Crispy Garlic Parmesan Air Fryer Chicken Thighs. I tossed the thighs in a simple mix of garlic powder, dried herbs, and a generous amount of grated Parmesan, cranked the air fryer to 400°F, and walked away. Ten minutes later, the kitchen smelled like an Italian restaurant. Twenty minutes later, the plate was clean.
Since that night, I’ve made this air fryer chicken thighs recipe at least six times. It’s become my go-to answer for “5pm and nothing planned.” It’s faster than delivery, healthier than takeout, and honestly? It tastes better than most fried chicken I’ve had at restaurants. If you’re tired of dry, bland chicken breasts or spending an hour over a hot stove, this is the weeknight win you’ve been looking for.
Why You’ll Love This Recipe
I’m not exaggerating when I say this has completely changed my Tuesday nights. There are a few reasons why this Crispy Garlic Parmesan Air Fryer Chicken Thighs has earned a permanent spot in my weekly rotation.
- Zero Active Prep Time — Seriously. I’m talking 5 minutes of tossing chicken in a bowl. That’s it. I don’t even marinate it. The dry rub sticks to the chicken, and the air fryer does the heavy lifting. If you can shake a bottle of spices, you can make this.
- Actually Crispy (Not Soggy) — I’ve tried coating chicken in flour, breadcrumbs, and panko. They all work, but they require oil spraying and constant flipping. The Parmesan crust in this recipe gets incredibly crispy in the air fryer without needing a ton of oil. It’s golden, crunchy, and stays that way.
- Thighs Are Forgiving — Breast meat dries out if you look at it wrong. Thighs? They’re juicy. Even if you leave them in the air fryer for an extra two minutes, they stay moist. This is huge for busy parents who might get distracted by a crying toddler or a work email.
- One-Bowl Cleanup — This is the best part. I mix the chicken and spices in one bowl, dump it in the air fryer basket, and that’s my mess. No dirty pots, no frying pans with splattered oil, no baking sheets to scrub. Just one bowl and the basket. My husband does the dishes, and he’s happy because there’s barely anything to wash.
- Flavor Bomb — Garlic powder, onion powder, dried Italian herbs, and sharp Parmesan cheese. It’s savory, salty, and garlicky in the best way possible. You don’t need a side dish to make it taste complete, though it’s great with almost anything.
This recipe is my secret weapon. It makes me look like a culinary genius when I’m actually just being lazy in the best way possible. It’s reliable, fast, and delicious. Every time.
Ingredients You’ll Need
Here’s the best part: you probably have most of this already in your pantry. I’m not asking you to go to the store for anything obscure. This is true pantry-friendly cooking.
For the Chicken
Chicken thighs (2 pounds / 900g) — Boneless, skinless thighs are my preference because they cook evenly and don’t have bones to work around. You can use bone-in if you want more flavor, but you’ll need to increase the cooking time by about 5-7 minutes. Avoid chicken breasts if you want that juicy texture; thighs are just superior here.
Garlic powder (1 tablespoon) — Yes, powder. Fresh garlic burns in the air fryer before the chicken is cooked. Powder gives you that garlicky flavor without the char. Don’t skimp on this; it’s the main flavor driver.
Dried Italian seasoning (1 teaspoon) — Or a mix of dried basil, oregano, and thyme. This adds that classic herby note. If you don’t have Italian seasoning, just use dried oregano and basil.
Onion powder (½ teaspoon) — Adds depth and savory sweetness. Again, powder works better than fresh here for the same burning reasons.
Smoked paprika (½ teaspoon) — This is optional but highly recommended. It adds a subtle smokiness that mimics frying. If you only have regular paprika, that works too, just less depth.
Salt and black pepper (to taste) — I use about 1 teaspoon of kosher salt and ½ teaspoon of freshly cracked black pepper. Adjust based on your salt preferences.
For the Crispy Coating
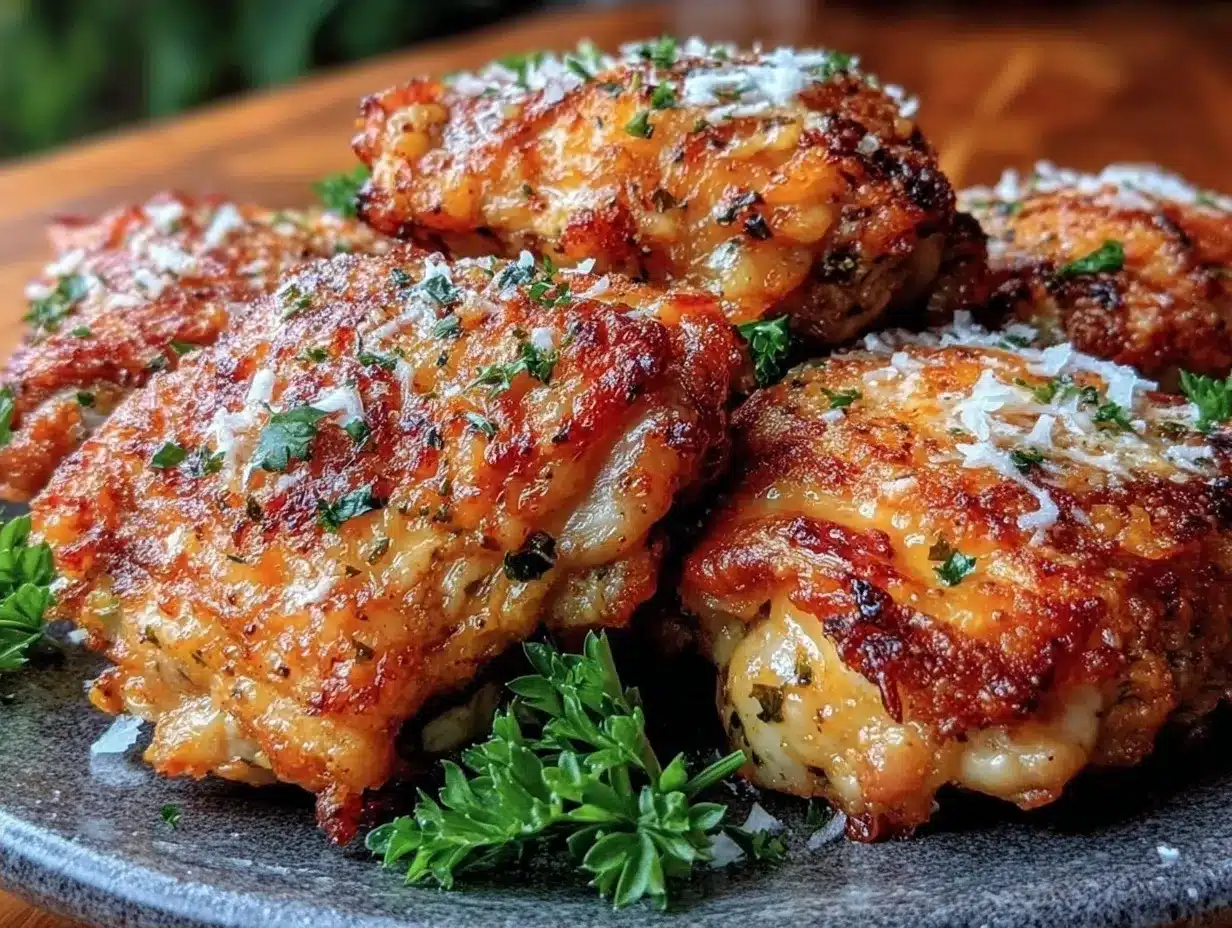
Grated Parmesan cheese (½ cup / 50g) — This is the magic ingredient. It melts slightly, then crisps up into a golden shell. Important: Grate your own cheese from a block. Pre-shredded cheese has cellulose (anti-caking agents) that prevent it from melting and crisping properly. I’ve tested it. Block cheese wins every time.
Almond flour or Panko breadcrumbs (½ cup / 50g) — I use almond flour for a lower-carb option, but Panko works great if you want extra crunch. Regular breadcrumbs work too, but they’re denser. If you’re doing keto, stick with almond flour or crushed pork rinds.
Heavy cream or milk (2 tablespoons) — This acts as the binder. It helps the cheese and flour stick to the chicken. Heavy cream makes it slightly richer, but milk works fine.
Cooking spray — Olive oil or avocado oil spray. Just a light mist on top of the chicken before cooking helps the browning.
Equipment Needed
You don’t need fancy equipment for this. Here’s what I actually use.
Air Fryer — Obviously. I use a 5.8-quart basket style. If you have a smaller one, you might need to cook in two batches to avoid overcrowding. Overcrowding = steaming = soggy chicken. Don’t skip this step.
Large Mixing Bowl — Just something big enough to toss the chicken with spices and cheese. Any bowl works.
Paper Towels — For patting the chicken dry. This is crucial. Wet chicken doesn’t get crispy. Pat it dry before adding spices.
Tongs — For flipping the chicken halfway through. Fingers work, but tongs are cleaner.
Instant-Read Thermometer — Not strictly necessary, but I love using it to ensure the chicken hits 165°F (74°C) without overcooking. It takes the guesswork out.
How to Make It: Step-by-Step
Alright, let’s make this! I’m walking you through exactly how I do it, including the little tricks I’ve picked up to ensure perfection.
Step 1: Prep the Chicken (2 minutes)
Take your chicken thighs out of the package and pat them dry with paper towels. I know it’s a boring step, but it’s the most important one for crispiness. Remove any excess fat or silver skin if you see it. Place the thighs in your large mixing bowl.
Step 2: Season the Base (1 minute)
Drizzle the chicken with the heavy cream or milk. Then, add the garlic powder, onion powder, Italian seasoning, smoked paprika, salt, and pepper. Toss everything together with your hands or tongs until every piece of chicken is evenly coated in the spiced cream. The cream helps the spices stick and adds moisture.
Step 3: Create the Crust (2 minutes)
Spread the grated Parmesan cheese and almond flour (or Panko) on a plate or shallow dish. Take each chicken thigh and press it into the cheese mixture, coating both sides. Press firmly so the cheese adheres. You don’t need a thick layer; just enough to cover the surface. Place the coated chicken back in the bowl or on a plate.
Step 4: Preheat the Air Fryer (3 minutes)
Preheat your air fryer to 400°F (200°C). Most air fryers take about 3-5 minutes to preheat. If yours doesn’t preheat, just add 2 minutes to the cooking time. I always preheat because it ensures immediate crisping.
Step 5: Cook the Chicken (15-18 minutes)
Lightly spray the air fryer basket with oil. Place the chicken thighs in the basket in a single layer. Do not overlap them! If you have a small air fryer, cook in batches. Overcrowding is the enemy of crispy chicken.
Cook at 400°F (200°C) for 15-18 minutes. Flip the chicken halfway through (around the 8-minute mark) and give the tops a quick spray of oil. This helps the cheese brown evenly. The chicken is done when the internal temperature reaches 165°F (74°C) and the coating is golden brown and crispy.
Step 6: Rest and Serve (5 minutes)
Remove the chicken from the air fryer and let it rest for 5 minutes. This allows the juices to redistribute. If you cut into it immediately, the juices run out, and the chicken dries out. Serve warm with your favorite sides.
Expert Tips & Tricks
Here’s everything I’ve learned from making this dozens of times. These tips will save you from my mistakes.
Don’t Skip the Pat Dry
I cannot stress this enough. Moisture is the enemy of crispiness. If your chicken is wet, the cheese will slide off, and you’ll end up with steamed chicken. Pat it dry, then season, then coat. It’s worth the extra 30 seconds.
Grate Your Own Cheese
Pre-shredded Parmesan is coated in potato starch to keep it from clumping. That starch prevents melting and crisping. Buy a wedge of Parmesan and grate it yourself. It takes 2 minutes and makes a massive difference in texture.
Single Layer Only
Air fryers work by circulating hot air. If chicken pieces are touching, the air can’t circulate, and they steam instead of fry. Cook in batches if needed. It’s better to cook two batches than one soggy batch.
Use a Thermometer
Thighs have more fat than breasts, so they’re forgiving, but you still don’t want rubbery chicken. Pull them at 165°F. If you don’t have a thermometer, cut into the thickest piece—it should be opaque with clear juices.
Adjust for Bone-In
If you use bone-in thighs, increase cooking time to 20-25 minutes at 380°F. Lower heat helps cook the meat through without burning the coating.
Variations & Substitutions
Once you’ve nailed the basic version, here’s how you can mix it up. I’ve tried all of these.
Spicy Kick
Add ½ teaspoon of cayenne pepper or red pepper flakes to the spice mix. If you like heat, this is a game-changer. It pairs perfectly with the salty Parmesan.
Herb Garden
Skip the Italian seasoning and use dried rosemary and thyme. This gives it a more rustic, earthy flavor. Great with roasted potatoes.
Lemon Pepper
Swap the Italian herbs for lemon pepper seasoning. Add a squeeze of fresh lemon juice after cooking. Bright, zesty, and refreshing.
Gluten-Free
Use almond flour or certified gluten-free Panko. The rest of the ingredients are naturally gluten-free, so this is easy to adapt.
Keto/Low-Carb
Use almond flour or crushed pork rinds instead of regular breadcrumbs. The Parmesan crust is already low-carb friendly.
Dairy-Free
Use nutritional yeast instead of Parmesan, and a splash of olive oil instead of heavy cream. It won’t have the same cheesy crust, but it still tastes good. My lactose-intolerant friend uses this version.
If you’re looking for other chicken dishes to rotate in, check out my Honey Chipotle Grilled Chicken Skewers for a summer vibe, or my Crockpot Creamy Tuscan Chicken when you want something slow-cooked and saucy.
Serving & Storage
How to Serve
I usually serve these straight out of the air fryer basket onto a plate. They’re crispy enough to eat with your hands, but fork-and-knife is fine too. Here are some sides I love:
- Roasted Vegetables — Broccoli, asparagus, or green beans tossed in olive oil and salt.
- Light Salad — A simple arugula salad with lemon vinaigrette cuts through the richness.
- Starchy Sides — Mashed potatoes, rice, or crusty bread to soak up any juices.
- Salad Side Idea — For a refreshing contrast, try a Grilled Peach Burrata Salad if you’re in the mood for something fruity and fresh.
Storage
Refrigerator: Store leftovers in an airtight container for up to 3 days. The coating will soften in the fridge, which is normal.
Reheating: The microwave will make the chicken soggy. Reheat in the air fryer at 375°F for 3-4 minutes to restore crispiness. Or, reheat in a skillet over medium heat.
Freezing: You can freeze the cooked chicken for up to 2 months. Thaw in the fridge and reheat in the air fryer. You can also freeze the raw coated chicken on a baking sheet, then transfer to a bag. Cook from frozen, adding 5 minutes to the time.
Meal Prep: These are great for meal prep. Cook a batch on Sunday, store in the fridge, and reheat throughout the week. They pair well with Loaded Bacon Ranch Potato Salad for a hearty lunch.
Nutrition Information
I’m not a nutritionist, but here’s the breakdown if you’re tracking. These are estimates for one thigh (approx. 6-8 oz).
| Nutrient | Amount per Serving |
|---|---|
| Calories | 320 |
| Protein | 28g |
| Carbs | 6g |
| Fat | 22g |
| Fiber | 1g |
| Sugar | 1g |
| Sodium | 450mg |
What’s Good: High protein, low carb (if using almond flour), and no added sugars. The Parmesan adds calcium and flavor without needing heavy sauces.
What to Know: Chicken thighs have more fat than breasts, so calories are slightly higher. But the fat is mostly unsaturated, which is healthier. The sodium comes from the Parmesan and added salt. If you’re watching sodium, reduce the salt and use low-sodium Parmesan.
My Take: This is a solid, balanced meal. It’s not a diet food, but it’s definitely healthier than fried chicken from a restaurant. I love that I can control the ingredients and get a crispy texture without deep frying.
Final Thoughts
So that’s my Crispy Garlic Parmesan Air Fryer Chicken Thighs! I’ve probably talked your ear off at this point, but when you make a recipe this often, you have a lot to say about it.
This has saved weeknight dinners more times than I can count. It’s my answer to “what’s for dinner” when I’m tired, don’t want takeout, and still want something that tastes really good. My kids are happy, my husband’s happy, and I’m happy because I’m not stressed about cooking. Plus, the cleanup is practically non-existent.
Make it yours! Try different herbs, add some heat, or swap the coating. The best recipes are the ones you adapt to your family’s tastes. If you make this, drop a comment and let me know what you think! I love hearing how recipes turn out in your kitchen. And if something doesn’t work, tell me that too—I’m here to help troubleshoot.
Happy cooking! And I hope your kitchen smells half as good as mine does right now.
Frequently Asked Questions
Can I use chicken breasts instead of thighs?
You can, but I don’t recommend it for this specific recipe. Chicken breasts have very little fat and will dry out quickly in the air fryer, especially with the high heat needed to crisp the Parmesan. Thighs stay juicy. If you must use breasts, reduce cooking time to 12-14 minutes and check temperature early.
Why is my chicken not crispy?
Usually, it’s one of three things: 1) The chicken wasn’t patted dry enough before seasoning. 2) The air fryer was overcrowded, causing steaming. 3) You didn’t spray the top with oil before cooking. The oil helps the cheese brown. Make sure you have a single layer and a light mist of oil.
Can I make this ahead of time?
Yes! You can coat the chicken in the spice and cheese mixture up to 24 hours ahead. Store it covered in the fridge. Take it out 10 minutes before cooking to take the chill off. This is great for meal prep.
Do I need to flip the chicken?
Yes, flipping halfway through ensures even browning. The top might get crispy, but the bottom needs air circulation too. Flip at the 8-minute mark for a 16-minute cook time.
What if I don’t have an air fryer?
You can bake these in the oven! Preheat to 400°F. Place chicken on a wire rack set over a baking sheet (this allows air circulation). Bake for 20-25 minutes, flipping halfway. The crust might be slightly less crispy than air frying, but still delicious.
How do I store leftovers?
Store in an airtight container in the fridge for up to 3 days. Reheat in the air fryer at 375°F for 3-4 minutes to restore crispiness. Microwaving will make them soggy.
Can I freeze the raw chicken?
Yes. Coat the chicken in the spice and cheese mixture, place on a parchment-lined baking sheet, and freeze until solid. Then transfer to a freezer bag. Cook from frozen, adding 5-7 minutes to the cooking time.
Pin This Recipe!
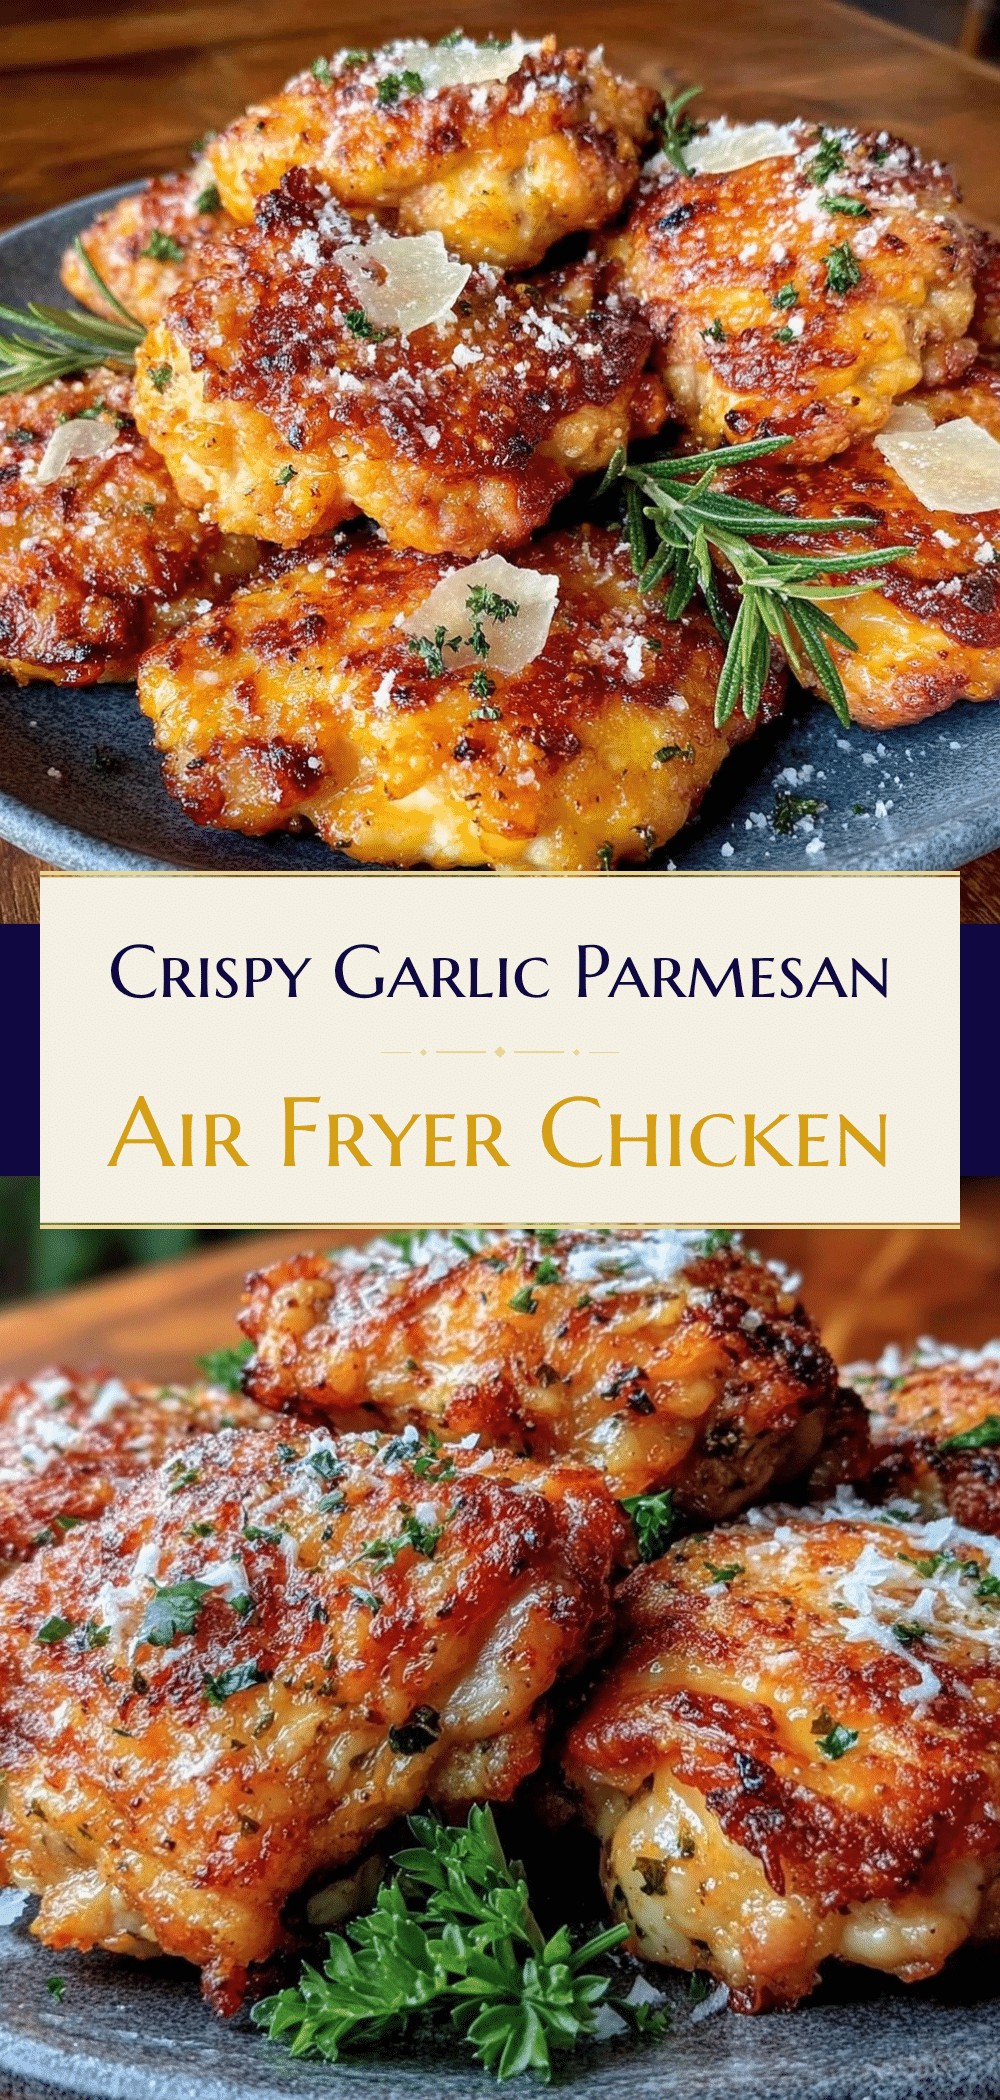

Crispy Garlic Parmesan Air Fryer Chicken Thighs
- Total Time: 23 minutes
- Yield: 4 servings 1x
Description
A quick and easy weeknight dinner featuring juicy chicken thighs coated in a crispy garlic, herb, and Parmesan crust, cooked in an air fryer for maximum flavor with minimal cleanup.
Ingredients
- 2 pounds boneless, skinless chicken thighs
- 1 tablespoon garlic powder
- 1 teaspoon dried Italian seasoning
- 1/2 teaspoon onion powder
- 1/2 teaspoon smoked paprika
- 1 teaspoon kosher salt
- 1/2 teaspoon freshly cracked black pepper
- 1/2 cup grated Parmesan cheese (from a block)
- 1/2 cup almond flour or Panko breadcrumbs
- 2 tablespoons heavy cream or milk
- Olive oil or avocado oil cooking spray
Instructions
- Pat the chicken thighs dry with paper towels to remove excess moisture.
- Place the chicken in a large mixing bowl and drizzle with heavy cream or milk.
- Add garlic powder, onion powder, Italian seasoning, smoked paprika, salt, and pepper. Toss until chicken is evenly coated.
- Spread the grated Parmesan cheese and almond flour (or Panko) on a plate.
- Press each chicken thigh into the cheese mixture, coating both sides firmly.
- Preheat the air fryer to 400°F (200°C).
- Lightly spray the air fryer basket with oil.
- Place chicken thighs in the basket in a single layer, ensuring they do not overlap.
- Cook at 400°F (200°C) for 15-18 minutes, flipping halfway through (around 8 minutes) and spraying tops with oil.
- Chicken is done when internal temperature reaches 165°F (74°C) and coating is golden brown.
- Remove from air fryer and let rest for 5 minutes before serving.
Notes
Patting the chicken dry is crucial for crispiness. Use block Parmesan cheese rather than pre-shredded to ensure proper melting and crisping. Do not overcrowd the air fryer basket; cook in batches if necessary. If using bone-in thighs, increase cooking time to 20-25 minutes at 380°F.
- Prep Time: 5 minutes
- Cook Time: 18 minutes
- Category: Main Course
- Cuisine: American
Nutrition
- Serving Size: 1 thigh (approx. 6-8
- Calories: 320
- Sugar: 1
- Sodium: 450
- Fat: 22
- Saturated Fat: 8
- Carbohydrates: 6
- Fiber: 1
- Protein: 28
Keywords: air fryer chicken, crispy chicken thighs, garlic parmesan chicken, weeknight dinner, easy chicken recipe, keto chicken, gluten-free chicken