It’s 6:45 AM on a Tuesday. The house is still quiet, but the clock is ticking. You’ve got fifteen minutes to get three kids fed, dressed, and out the door before the bus comes. You open the pantry, hoping for a miracle, and find only a half-empty box of cereal and a suspiciously dusty bag of chips. You don’t have time to make back-to-school mini egg and cheese breakfast muffins from scratch right now, and you definitely don’t have time for a sit-down breakfast.
This is the exact moment I discovered why I started making these chewy honey oat granola bars. Three years ago, I was standing in that same pantry, feeling defeated. I wanted something better than a granola bar from the store (which are basically sugar bombs with a few oats glued together), but I didn’t have time to bake. So I threw together a batch in ten minutes flat. They were sticky, sweet, and oddly perfect.
Fast forward to today, and these bars are my Sunday survival strategy. I make a huge batch every other Sunday while the kids are watching cartoons. By Monday morning, the freezer is full. I just grab two bars, throw them in a bag, and we’re out the door. No stress. No cooking. Just good, honest food.
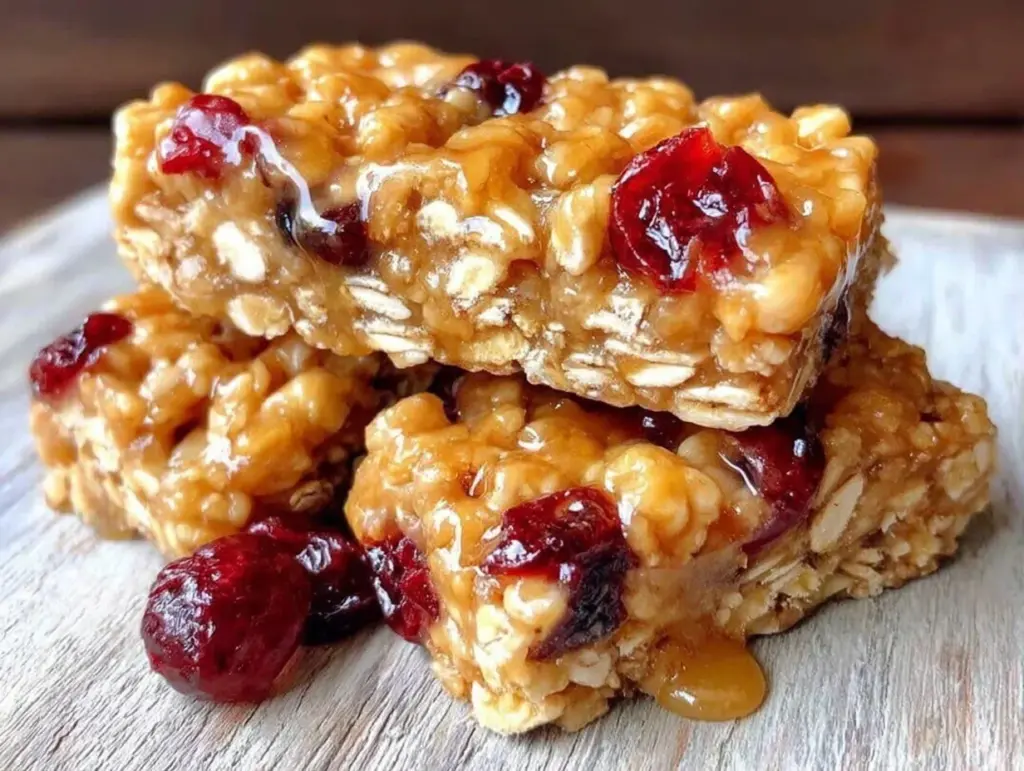
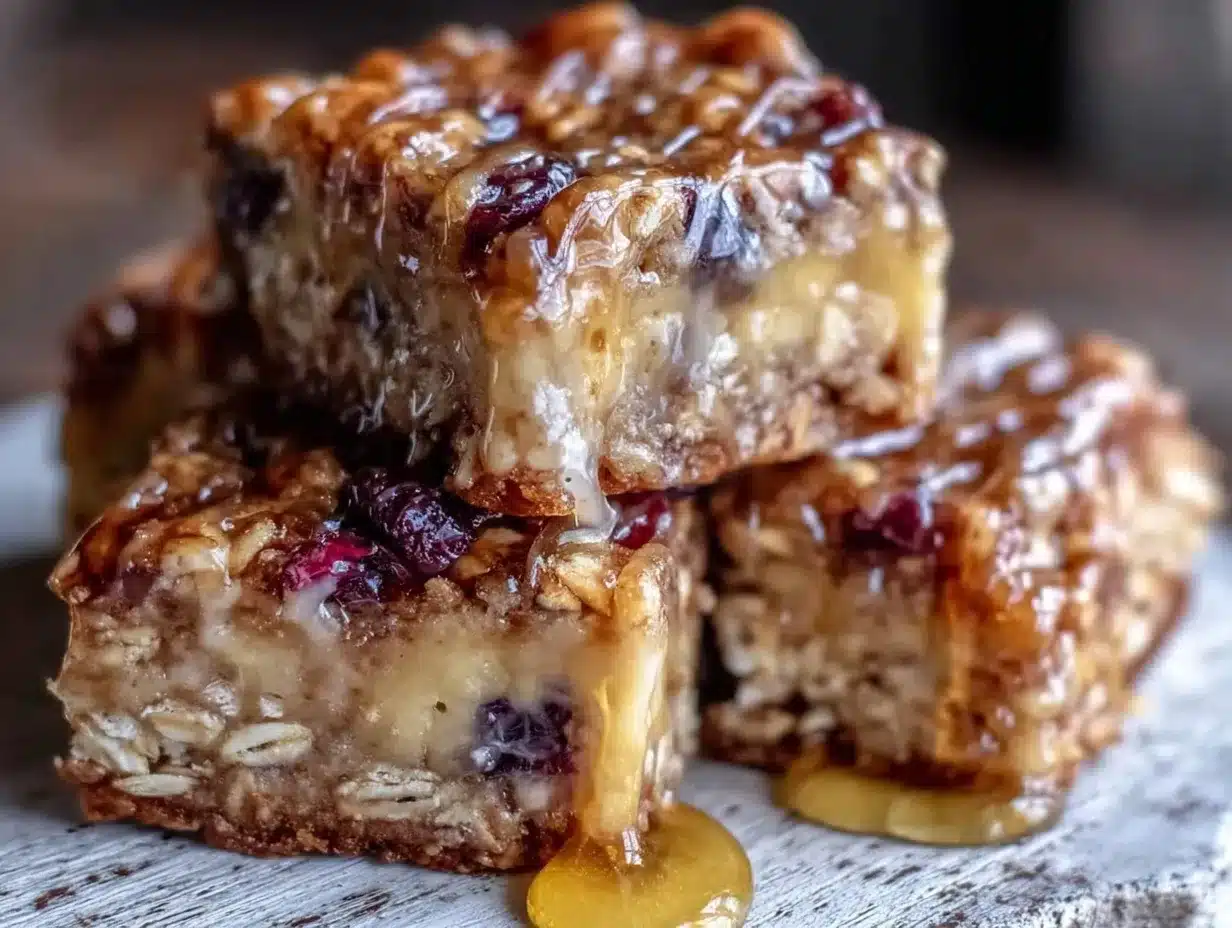
These aren’t the dry, crumbly, overly sweet bars you buy at the gas station. These are chewy, golden, and packed with real honey and oats. They hold together (mostly, if you’re patient enough to let them cool). They’re sweet but not cloying. And best of all? You can make them with ingredients you already have. If you’ve ever struggled with after-school hunger pangs, you might also enjoy checking out my after school cinnamon apple nachos for a quick treat, but for morning fuel? These granola bars are the undisputed champion.
Why You’ll Love This Recipe
Look, I’m not going to lie to you. Making food from scratch sounds nice in theory, but in practice, it’s a lot of dishes. This recipe is different. It’s designed for people who are tired, busy, and just want their kids to eat something that doesn’t come in a wrapper with a cartoon character on it.
Here’s why these chewy honey oat granola bars have taken over my kitchen (and probably will take over yours, too):
- One Bowl, One Pan — Seriously. You mix everything in one large bowl. You press it into a pan. You bake it. That’s it. No standing over a stove stirring, no complex techniques, no fancy equipment. If you can mix and press, you can make this.
- Stupid Fast Prep — The actual hands-on time is about 10 minutes. The rest is baking and cooling. I can get this done in the time it takes my coffee to brew. On Sundays, I make this while listening to a podcast. It’s the perfect background task.
- Freezer Friendly — This is the game-changer. I make three batches at once. I wrap them up and freeze them. When I’m running late on Wednesday, I pull two out of the freezer. They thaw in the car ride to school. No thawing overnight needed. It’s like having homemade breakfast bars on demand.
- No Weird Ingredients — You don’t need to order anything online. No chia seeds you’ll never use, no exotic nuts, no expensive superfoods. Just oats, honey, peanut butter, and brown sugar. Simple. Real food.
- Kid-Approved (But Not Too Sweet) — My kids are picky. They usually reject anything that looks “healthy.” But these? They think they’re getting a treat. The honey and brown sugar make them sweet enough to satisfy a candy craving, but the oats keep them substantial. It’s a win-win.
Real talk: these bars have saved me more times than I can count. They’re the answer to “what’s for breakfast/snack/lunchbox filler?” when I’m scrambling. They’re reliable, delicious, and incredibly easy. Once you try homemade, you’ll never go back to the store-bought stuff again.
Ingredients You’ll Need
Here’s the best part: you probably have 90% of this already. I’m not asking you to run to the store for anything exotic. This is pantry-friendly cooking at its finest.
The Base
Rolled oats (3 cups / 270g) — Use old-fashioned rolled oats. Do not use instant oats or steel-cut oats. Instant oats turn to mush; steel-cut oats are too hard. You want that chewy texture, and only rolled oats deliver it. I buy the big canisters because we go through them fast.
Honey (½ cup / 120ml) — This is the main sweetener and binder. Use real honey. Corn syrup or maple syrup can work, but honey gives that distinct, warm flavor and the perfect chew. If you’re out, maple syrup is a decent substitute, but it’ll be less chewy and more soft.
Peanut butter (½ cup / 125g) — Creamy or crunchy? I use creamy because it mixes easier and binds better. But if your family loves crunch, go for it. Just make sure it’s natural peanut butter without added oils, or the texture might get weird. If you have nut allergies, sunflower seed butter works perfectly fine as a swap.
Butter (¼ cup / 55g) — Unsalted butter adds richness and helps everything stick together. Melt it in the microwave or on the stove. Don’t skip this—fat helps create that tender crumb.
The Sweeteners & Flavor
Brown sugar (½ cup / 100g, packed) — This adds moisture and a caramel-like depth. White sugar works, but brown sugar makes them chewier. I keep a bag of light brown sugar specifically for baking bars like this.
Vanilla extract (1 teaspoon) — Just a splash. It rounds out the honey flavor. I use pure vanilla, not imitation, because you can taste the difference in simple recipes like this.
Salt (½ teaspoon) — Crucial. It balances the sweetness. Don’t skip it. I’ve made this without salt before, and it tastes flat and cloying. A little salt makes the honey pop.
The Mix-Ins (Optional but Recommended)
Chocolate chips (½ cup / 85g) — Semi-sweet or milk chocolate. I add these in because my kids think they’re getting cookies. It’s a secret weapon for getting them to eat oats.
Dried cranberries or raisins (½ cup / 60g) — For a fruity twist. Cranberries add a nice tartness that cuts the sweetness. I love mixing cranberries with the chocolate chips.
Chopped nuts (½ cup / 60g) — Walnuts or pecans work well. Adds texture. If you’re skipping nuts, just add more oats or seeds.
Chia seeds or flaxseed (2 tablespoons) — I add these for a tiny nutrition boost. They don’t change the taste much, but they add fiber. It’s a sneaky way to be healthy without anyone noticing.
Equipment Needed
You don’t need fancy gear for this. Here’s what I actually use:
Large mixing bowl — I use a 4-quart stainless steel bowl. It needs to be big enough to hold all the oats without spilling when you stir. If your bowl is too small, you’ll end up with oats on your counter.
8×8 inch baking pan — This is the standard size for these bars. It gives you the perfect thickness. You can use a 9×9 pan, but the bars will be thinner and crispier. I prefer the chewier 8×8 result.
Parchment paper — Line your pan. This is non-negotiable for easy cleanup and easy removal. If you don’t line it, you’ll be scraping burnt oats out of your pan for days. I keep a roll of parchment on the counter at all times.
Spatula — A silicone spatula is best for mixing and pressing. It scrapes the bowl clean and handles the sticky mixture well.
Measuring cups and spoons — Standard stuff. If you don’t have them, estimate, but be careful. Too much honey and the bars will be soup. Too little, and they’ll fall apart.
Wire cooling rack — Optional, but helpful. It lets air circulate so the bars cool evenly. If you don’t have one, just let them cool in the pan on the stovetop (where it’s cool).
How to Make It: Step-by-Step
Alright, let’s make this! I’m walking you through exactly how I do it, including the little tricks I’ve picked up over the years.
Step 1: Prep Your Pan (2 minutes)
Preheat your oven to 350°F (175°C). Line your 8×8 inch baking pan with parchment paper. Leave a little overhang on the sides—this is your handle for lifting the bars out later. Lightly spray the parchment with non-stick spray. This helps the mixture stick to the pan so it doesn’t shift while you’re pressing it.
Step 2: Mix the Wet Ingredients (3 minutes)
In a large microwave-safe bowl (or a small saucepan), combine the honey, melted butter, peanut butter, brown sugar, and vanilla. Microwave for 30-45 seconds, stirring halfway through, until everything is smooth and combined. If you’re using a saucepan, melt this over low heat. The key is to get it all melted and smooth before adding the dry ingredients. If there are lumps of peanut butter, they won’t distribute evenly.
Step 3: Combine with Dry Ingredients (2 minutes)
Add the rolled oats to the wet mixture. Stir vigorously with your spatula. You want every single oat coated. This takes a little muscle. If you’re adding mix-ins like chocolate chips, nuts, or dried fruit, add them now. Stir until everything is evenly distributed. The mixture will look thick and sticky. This is normal.
Step 4: Press into Pan (2 minutes)
Transfer the mixture to your prepared pan. Use the back of a wet spoon or your greased hands to press it down firmly. This is the most important step for chewy bars. If you don’t press hard enough, the bars will be crumbly. Press until it’s an even layer. Don’t worry if it’s not perfectly smooth on top; it’ll flatten out in the oven.
Step 5: Bake (15-18 minutes)
Bake for 15-18 minutes. You’re looking for golden edges and a slightly firm top. The center might still look a bit soft, but that’s okay—it will firm up as it cools. Do not overbake! If you bake them until they’re hard, they’ll be crunchy granola bars, not chewy ones. I usually take mine out at 15 minutes and check.
Step 6: Cool Completely (30-45 minutes)
Let the bars cool in the pan on a wire rack. This takes patience, but it’s necessary. If you cut them while they’re hot, they’ll fall apart. I know, I know. But trust me. Once they’re cool, lift them out using the parchment overhang, place on a cutting board, and slice into bars. I usually cut them into 12 or 16 bars, depending on how hungry my kids are.
Expert Tips & Tricks
Here’s everything I’ve learned from making this dozens of times. These tips will save you from my mistakes.
Press Firmly — I can’t stress this enough. The mixture needs to be compacted. Use the bottom of a measuring cup to press it down evenly. This ensures the bars hold together when you eat them.
Don’t Skip the Cool Down — I’ve been guilty of trying to cut these hot. Big mistake. They’re sticky, messy, and crumbly. Let them cool for at least 30 minutes. If you’re in a rush, you can refrigerate them for 15 minutes to speed up the process.
Use Natural Peanut Butter — If you use natural peanut butter with oil separation, stir the oil back in thoroughly before measuring. Otherwise, your bars might be oily or uneven.
Freeze in Layers — If you’re freezing these, stack them between sheets of parchment paper in an airtight container. This prevents them from sticking together. They’ll last up to 3 months in the freezer.
Chop Mix-Ins Small — If you’re adding nuts or chocolate, chop them small. Large chunks make the bars uneven and hard to cut.
Variations & Substitutions
Once you’ve nailed the basic version, here’s how you can mix it up. I’ve tried all of these.
Trail Mix Bars — Add ½ cup each of dried cranberries, chopped almonds, and dark chocolate chips. This is my favorite version for lunchboxes.
Coconut Lover’s — Swap half the oats for shredded coconut. Add ½ cup of toasted coconut flakes on top before baking. It’s tropical and delicious.
Seeded Bars — Add 2 tablespoons each of sunflower seeds, pumpkin seeds, and flaxseed. Great for a nut-free school environment.
Gluten-Free — Use certified gluten-free oats. Everything else is naturally gluten-free. I’ve used Bob’s Red Mill GF oats, and they work perfectly.
Vegan — Use maple syrup instead of honey, and coconut oil instead of butter. Use vegan chocolate chips. It’s surprisingly good.
Serving & Storage
How to serve these bars? They’re versatile. I eat them for breakfast with a glass of milk. My kids eat them as a snack after school. I pack them in lunchboxes. They’re also great for hiking or road trips.
Storage: Keep them in an airtight container at room temperature for up to 1 week. If it’s hot or humid, store them in the fridge to prevent melting. For longer storage, freeze them for up to 3 months.
Reheating: You don’t need to reheat them. But if you like warm bars, microwave one for 10-15 seconds. It softens the honey and makes it extra chewy.
Nutrition Information
I’m not a nutritionist, but here’s the breakdown if you’re tracking. These are estimates based on 12 bars.
Per Bar:
- Calories: 220
- Protein: 6g
- Carbs: 32g
- Fiber: 2g
- Sugar: 18g
- Fat: 9g
What’s good? They’re relatively low in protein, but the oats provide sustained energy. The sugar comes from honey and brown sugar, which is natural. You can reduce the sugar by using less honey and more oats if you want.
My take? These are treat bars, not health food. But they’re way better than a candy bar. I make them because I know what’s in them. No preservatives, no weird chemicals. Just real food.
Final Thoughts
So that’s my go-to chewy honey oat granola bars! I’ve probably talked your ear off at this point, but when you make a recipe this often, you have a lot to say about it.
This has saved my mornings more times than I can count. It’s my answer to “what’s for breakfast/snack?” when I’m tired, don’t want takeout, and still want something that tastes really good. My kids are happy, I’m happy, and I’m happy because I’m not stressed about cooking.
Make it yours! Try different mix-ins, swap in your favorite nut butter, adjust the sweetness. The best recipes are the ones you adapt to your family’s tastes.
If you make this, drop a comment and let me know what you think! I love hearing how recipes turn out in your kitchen. And if something doesn’t work, tell me that too—I’m here to help troubleshoot.
Happy cooking! And I hope your kitchen smells half as good as mine does right now.
Frequently Asked Questions
Can I use quick oats instead of rolled oats?
You can, but the texture will be different. Quick oats are thinner and will make the bars softer, almost cake-like. Rolled oats give that classic chewy granola bar texture. If you only have quick oats, use them, but expect a softer result. I don’t recommend steel-cut oats—they’re too hard and won’t cook properly.
Why are my bars crumbly?
This usually happens for two reasons: you didn’t press the mixture firmly enough into the pan, or you cut them while they were still warm. Make sure you press down hard with a wet spoon or greased hands. Also, let them cool completely before cutting. If you’re still having issues, you might need a bit more binder—try adding an extra tablespoon of peanut butter or honey next time.
Can I freeze these granola bars?
Yes! This is actually the best way to store them. Wrap them individually in plastic wrap or parchment paper, then put them in a freezer-safe bag. They’ll last up to 3 months. Thaw them at room temperature for 10-15 minutes before eating. They taste just as good frozen as they do fresh.
Can I make these nut-free?
Absolutely. Swap the peanut butter for sunflower seed butter or soy nut butter. Make sure your oats are certified gluten-free if you’re also avoiding gluten. The rest of the ingredients are naturally nut-free. These are perfect for school lunches that have nut restrictions.
How do I keep the bars from sticking to the pan?
Line your pan with parchment paper. Leave a little overhang on the sides so you can lift the whole block out after baking. This is the easiest way. If you don’t have parchment, grease the pan very well with butter or non-stick spray, but parchment is much more reliable.
Can I add protein powder?
You can, but be careful. Protein powder absorbs moisture, so your bars might become dry. If you want to add protein, start with 2 tablespoons of vanilla or chocolate protein powder and reduce the honey by 1 tablespoon. Mix it well and see how the batter feels before pressing it into the pan. It’s an experiment, so start small.
Pin This Recipe!
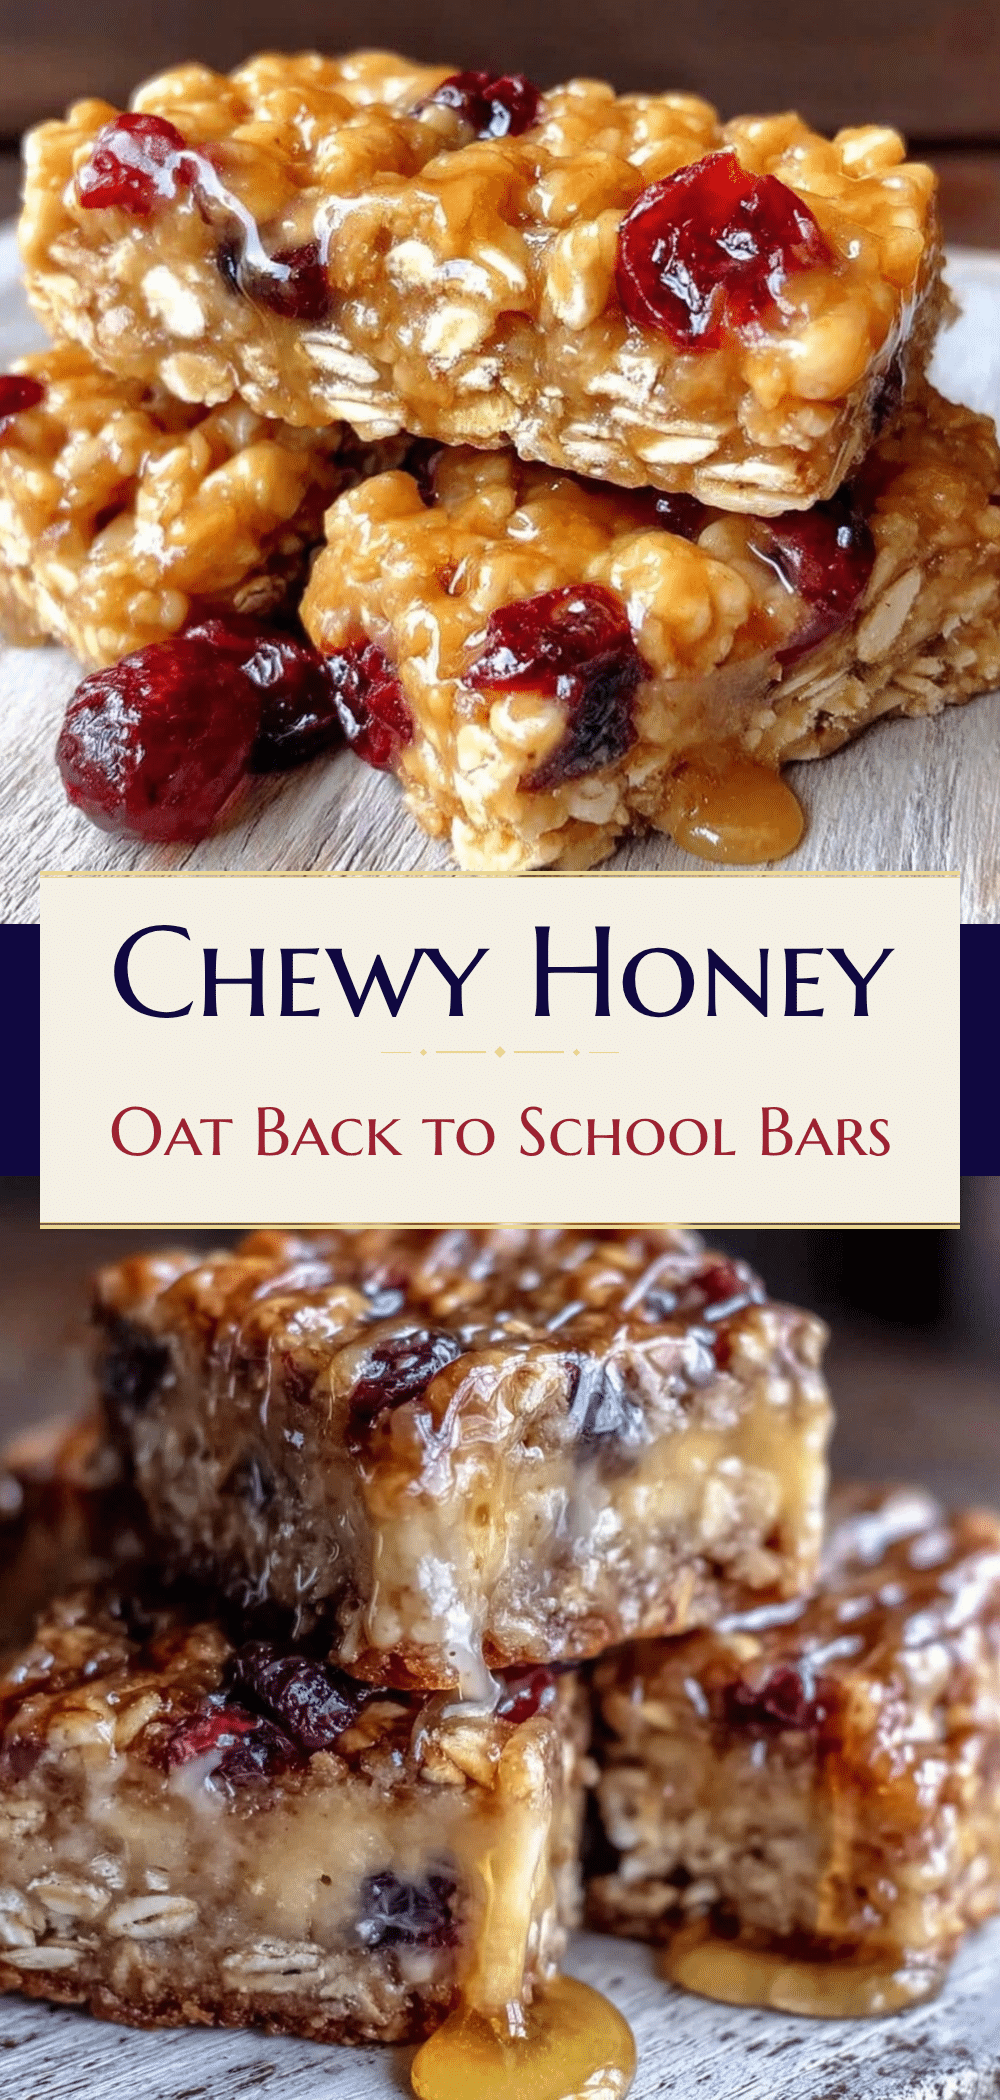
Chewy Honey Oat Granola Bars: 5 Easy Homemade Bars
- Total Time: 45 minutes
- Yield: 12-16 bars 1x
Description
These chewy honey oat granola bars are a quick, one-bowl breakfast or snack solution perfect for busy mornings. Made with simple pantry ingredients like oats, honey, and peanut butter, they are freezer-friendly and kid-approved.
Ingredients
- 3 cups rolled oats
- 1/2 cup honey
- 1/2 cup peanut butter (creamy or crunchy)
- 1/4 cup unsalted butter
- 1/2 cup brown sugar, packed
- 1 teaspoon vanilla extract
- 1/2 teaspoon salt
- Optional: 1/2 cup chocolate chips, 1/2 cup dried cranberries or raisins, 1/2 cup chopped nuts, 2 tablespoons chia seeds or flaxseed
Instructions
- Preheat oven to 350°F (175°C). Line an 8×8 inch baking pan with parchment paper, leaving an overhang on the sides, and lightly spray with non-stick spray.
- In a microwave-safe bowl or small saucepan, combine honey, melted butter, peanut butter, brown sugar, and vanilla. Microwave for 30-45 seconds or melt over low heat, stirring until smooth and combined.
- Add the rolled oats to the wet mixture and stir vigorously until every oat is coated. Stir in any optional mix-ins.
- Transfer the mixture to the prepared pan. Use a wet spoon or greased hands to press the mixture down firmly and evenly into the pan.
- Bake for 15-18 minutes, or until edges are golden and the top is slightly firm.
- Let the bars cool completely in the pan on a wire rack for at least 30-45 minutes to set.
- Lift the bars out using the parchment paper overhang and slice into 12 or 16 bars.
Notes
Press the mixture firmly into the pan to ensure chewy bars that hold together. Do not cut while hot, as they will be crumbly. For nut allergies, swap peanut butter for sunflower seed butter. For vegan options, use maple syrup and coconut oil. Store in an airtight container at room temperature for up to 1 week or freeze for up to 3 months.
- Prep Time: 10 minutes
- Cook Time: 15-18 minutes
- Category: Breakfast
- Cuisine: American
Nutrition
- Serving Size: 1 bar
- Calories: 220
- Sugar: 18
- Sodium: 120
- Fat: 9
- Saturated Fat: 3
- Carbohydrates: 32
- Fiber: 2
- Protein: 6
Keywords: granola bars, honey oat bars, breakfast bars, kid-friendly snacks, freezer meals, healthy snacks, homemade granola